5 likes
31 uses
The Course Storyboard Template is a collaborative planning tool designed to support instructional designers, curriculum developers, and Subject Matter Experts (SMEs) as they map out new courses. Acting as a high-level guiding document, the storyboard captures all the essential elements of course design — from topics and lessons to activities, discussions, assessments, and resource planning.
This template ensures that every course begins with a solid design foundation before moving into development. By focusing on structure, alignment, and active learning strategies early on, it helps teams stay organized, meet project benchmarks, and create multimodal learning experiences that engage learners effectively.
Instructional Designers looking for a structured way to organize course content.
Subject Matter Experts (SMEs) who bring expertise but need guidance in translating knowledge into learning modules.
Faculty and Trainers who want to design lessons and activities with active learning in mind.
Learning and Development Teams in organizations that need to collaborate across departments on training programs.
Project Managers who oversee timelines, benchmarks, and stakeholder collaboration in course development.
Whether you’re working in higher education, corporate training, or online learning platforms, this template provides the scaffolding to design courses that are cohesive, engaging, and aligned with best practices.
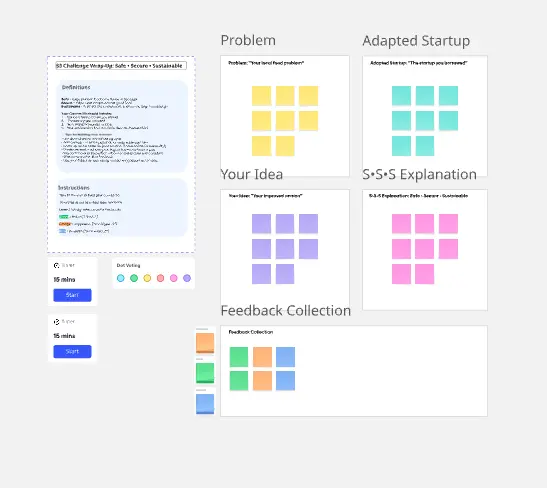
The Course Storyboard Template is designed to be flexible and collaborative. Here’s a suggested workflow for making the most of it:
Begin by identifying the main topics or modules of your course. Use the template space to brainstorm and capture every possible area of content. Cluster related ideas, sequence them logically, and align them with course learning objectives.
Within each topic, map out the lessons or sub-units. This helps you move from big-picture planning to manageable sections of instruction. Lessons can be reordered easily on the storyboard, making it simple to test different sequences.
Use the dedicated sections for activities and learner engagement to plan exercises, projects, case studies, or simulations. Consider different learning modes (individual, group, synchronous, asynchronous) and use icons or colors to categorize them.
Identify points where discussions or reflections will enhance learning. This could include forum prompts, in-class debates, or peer-review opportunities. Mapping these moments ensures learners are not just receiving information, but actively engaging with it.
Map assessments to the corresponding lessons and objectives. This ensures every assessment has a clear purpose and that learners are evaluated on what they are expected to achieve.
Finally, add notes about readings, media, and support materials. This section also highlights where new content needs to be developed or curated, helping teams allocate responsibilities effectively.
Create a clear roadmap for content creation before development begins.
Align lessons, activities, and assessments with learning objectives.
Incorporate active learning strategies and multimodal considerations.
Collaborate effectively with SMEs and stakeholders to avoid misalignment.
Keep the project on track by meeting benchmarks and quality standards.
Ensure all instructional materials are accounted for in the planning stage.
Start broad, then refine: Use the storyboard first as a brainstorming space, then refine content into structured lessons.
Use color coding: Assign colors to distinguish between topics, activities, discussions, and assessments.
Keep the learner in mind: Always connect lessons and activities back to learning outcomes and engagement strategies.
Iterate often: Treat the storyboard as a living document that evolves as the project progresses.
Leverage collaboration tools: Use Miro’s commenting, voting, and tagging features to get quick feedback from SMEs and stakeholders.
Image designed by freepik.

Colleen Kelsey
Instructional Designer
I create user friendly learning material templates to inspire creative and innovative work.
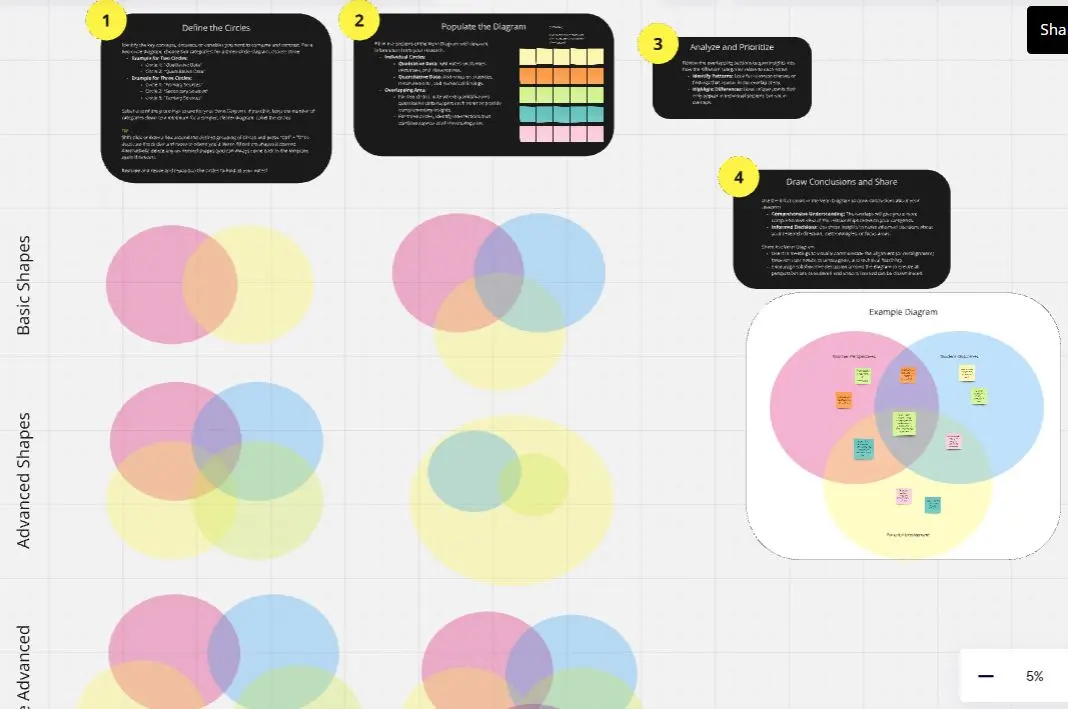
Venn Diagram for Research
The Venn Diagram for Research template is a powerful tool for analyzing relationships and intersections in research data. Use it to compare different variables, identify overlaps, and draw insights from complex datasets. This template is ideal for researchers, analysts, and academics looking to visualize their findings and communicate results effectively. It's perfect for scientific studies, market research, and any field that requires detailed data comparison.