Table of contents
Table of contents
How to create a mockup
Summary
In this guide, you will learn:
- How to start creating a mockup by defining your goal, audience, and prioritizing features using tools like the MoSCoW Matrix in Miro
- The importance of beginning with low-fidelity sketches
- How to create wireframes as structural blueprints using Miro’s wireframing library
- Techniques for refining mockups with visual design elements and interactive user flows
- The process of transitioning from wireframe to detailed mockup
- Tips for iterating and refining your mockup using Miro’s collaborative features
So, you want to create a mockup? Here’s your step-by-step guide to visualizing ideas like a pro
Got that million-dollar app idea buzzing in your head, or a game-changing website feature, but finding it tricky to get everyone on the same page? You’re not alone. Translating those brilliant, abstract thoughts into something tangible that your team, clients, or stakeholders can actually see is often the first big hurdle. That's where mockups swoop in, and you're about to learn exactly how to create a mockup that turns heads and sparks action. We'll walk through it together, step-by-step, and see how Miro isn't just any screen mockup tool – it's your partner in bringing ideas to life.
Collaborative AI Workflows
Join thousands of teams using Miro to build the right thing, faster.
First off, why even bother with mockups? Let’s talk big wins
Ever tried explaining a complex visual concept using only words? It can feel like trying to describe a sunset to someone who’s never seen one. Mockups are your secret weapon for cutting through confusion and unlocking some serious benefits, especially when you need to manage stakeholder expectations effectively.
- Crystal-clear communication: Mockups act as a visual blueprint, showing what your digital product will actually look like. This gets everyone – from developers to marketers to that crucial investor – speaking the same visual language.
- Feedback early and often: Imagine catching a major design flaw before a single line of code gets written. That's the power of mockups. They invite early feedback, making iteration quick and relatively painless, especially when your team can drop comments right onto the design in Miro, bringing designers and non-designers together effortlessly.
- Sharpening that User Experience (UX) focus: When you start arranging buttons, text, and images, you’re forced to think critically about the user’s journey. How will they navigate? Is it intuitive? Mockups bring these UX considerations to the forefront.
- Saving precious time and money: Seriously, iterating on a mockup is exponentially faster and cheaper than making changes once development is underway. Think of it as a smart investment.
- Getting that all-important buy-in: A compelling visual is far more persuasive than a lengthy document. A well-crafted mockup can get stakeholders excited and aligned with your vision, smoothing the path for approval.
Hold up – mockups, wireframes, prototypes… what’s the actual difference?
It’s easy to get these terms jumbled, but knowing the distinction helps you pick the right tool for the job and set clear expectations. Think of it like building a house:
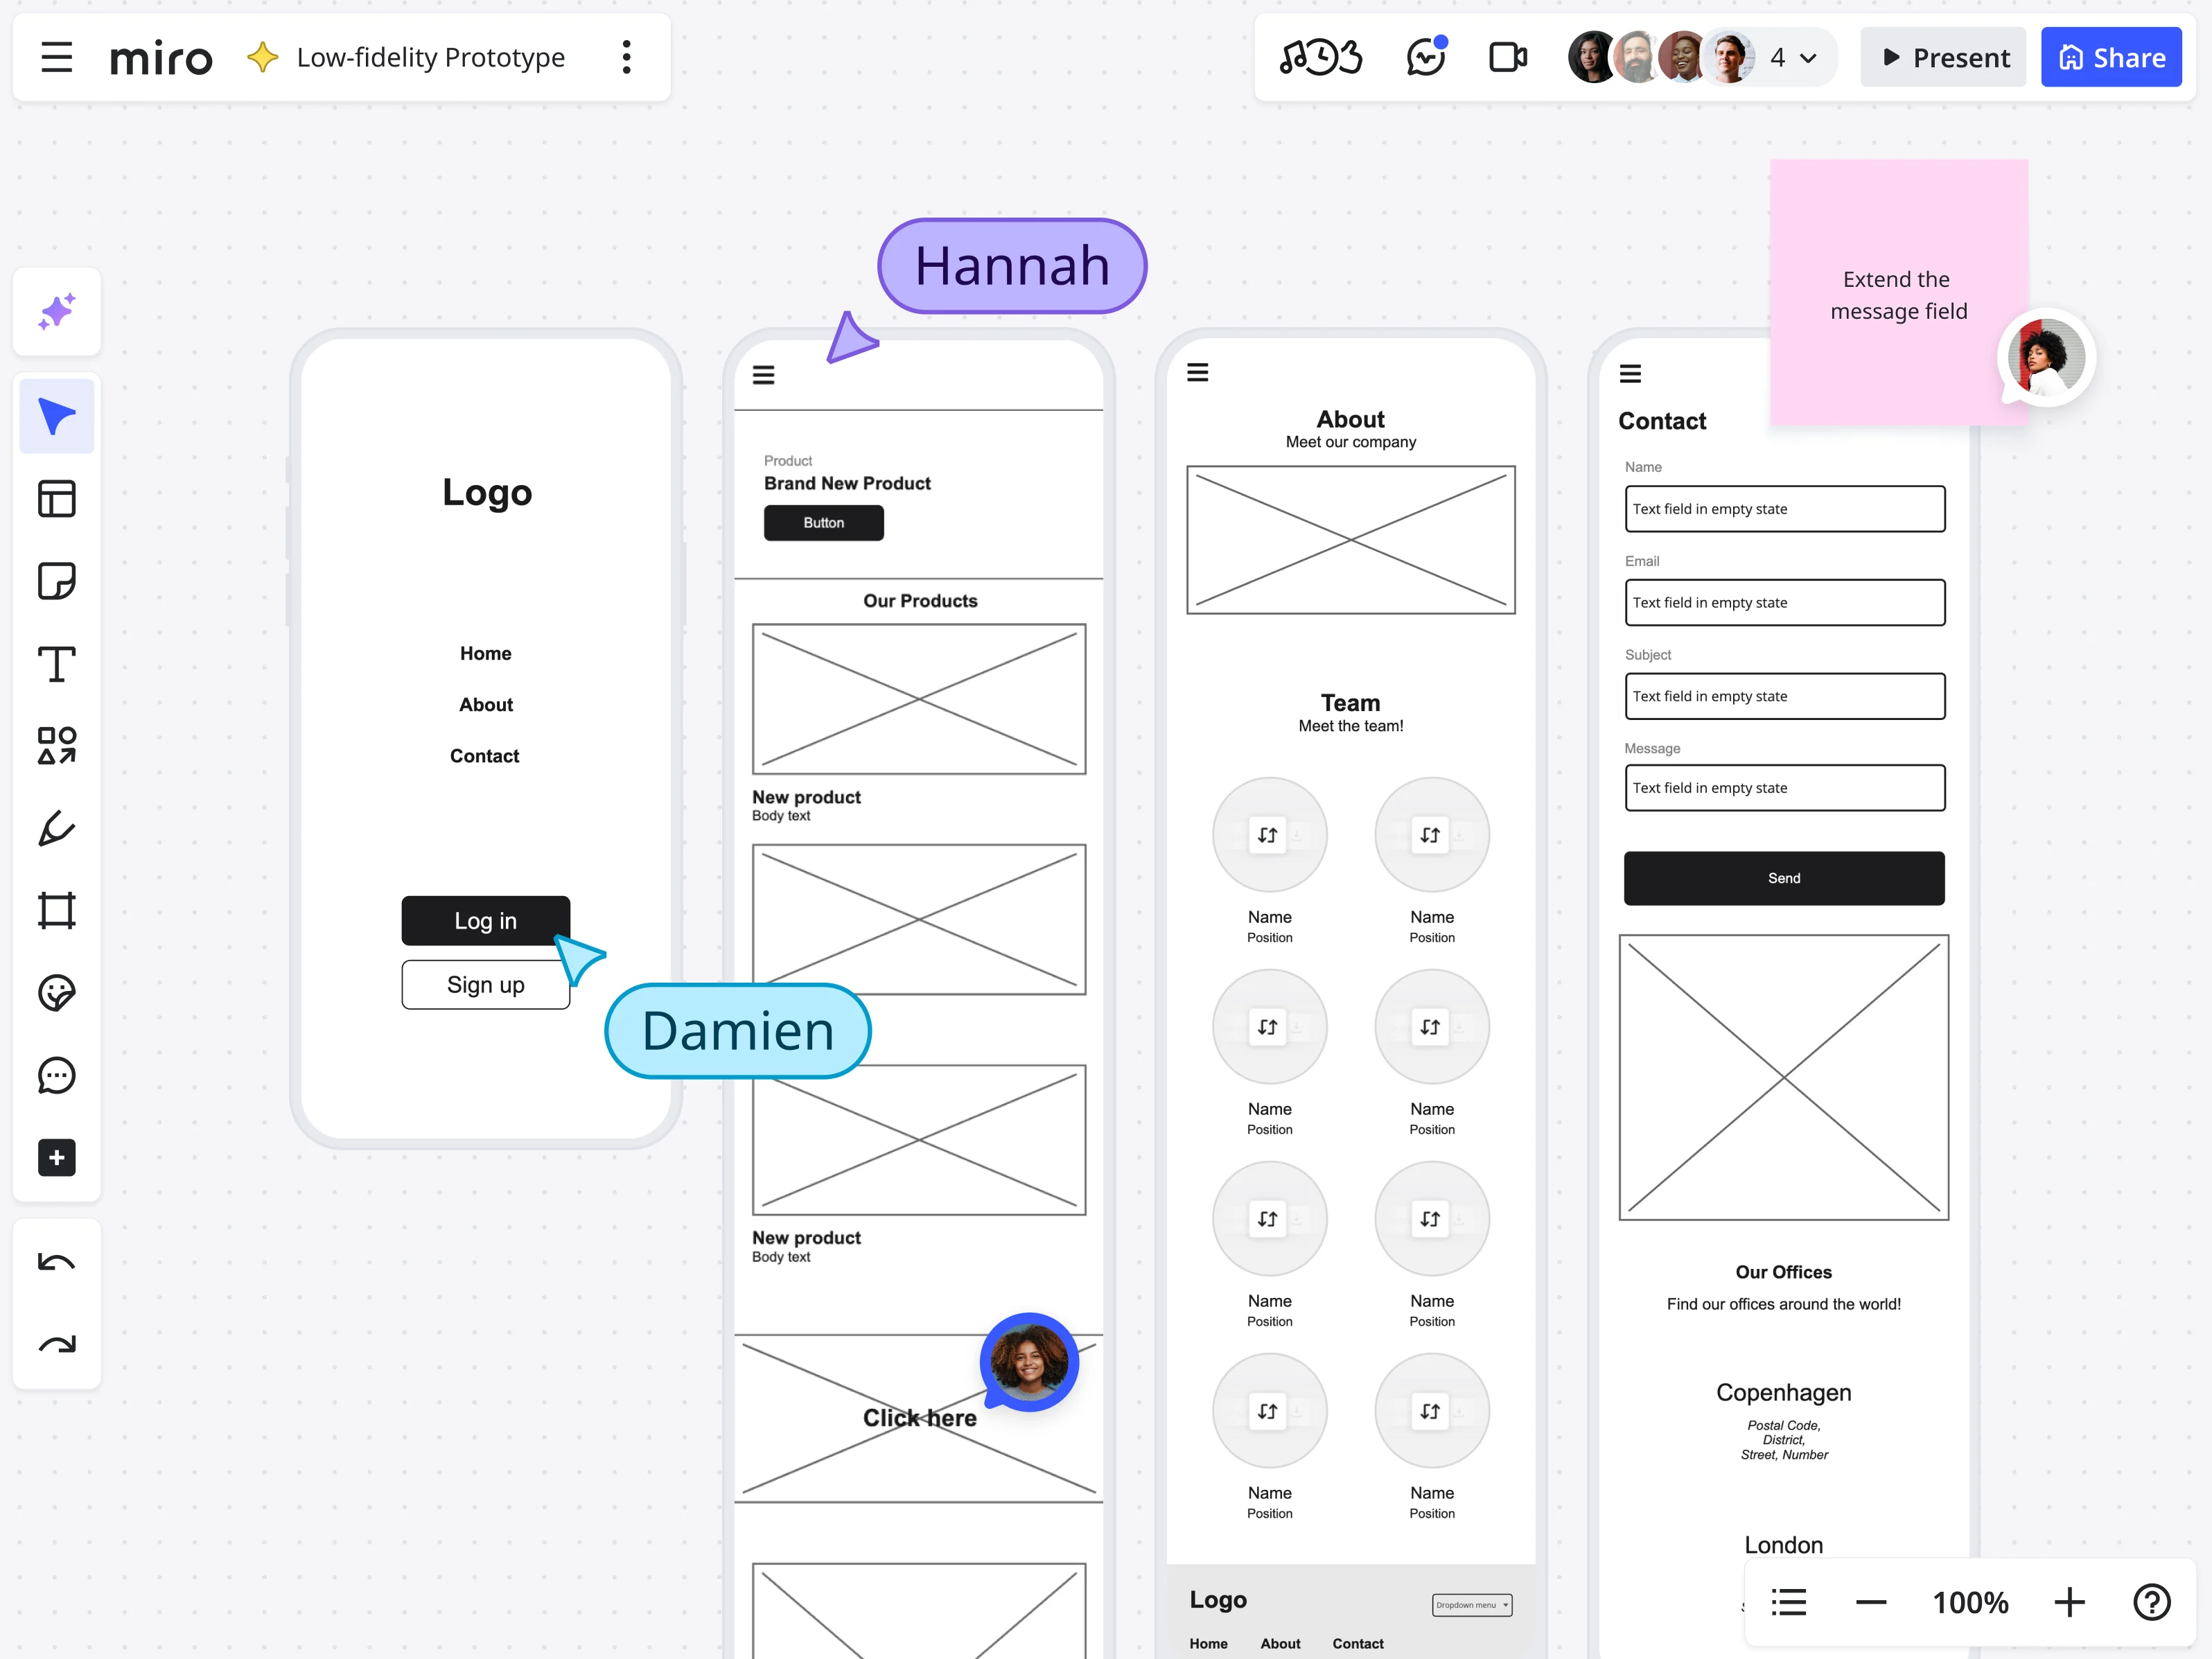
- Wireframe: This is your basic architectural blueprint. It's low-fidelity, focusing on structure, layout, and the bare bones of content. Think simple boxes and lines. Many folks kick this off with Miro's Wireframe Templates to get a head start.
- Mockup: Now we're adding the interior design. Mockups are static, visual representations that showcase the look and feel – colors, typography, imagery, and branding. This is our main focus today, showing what the product will look like.
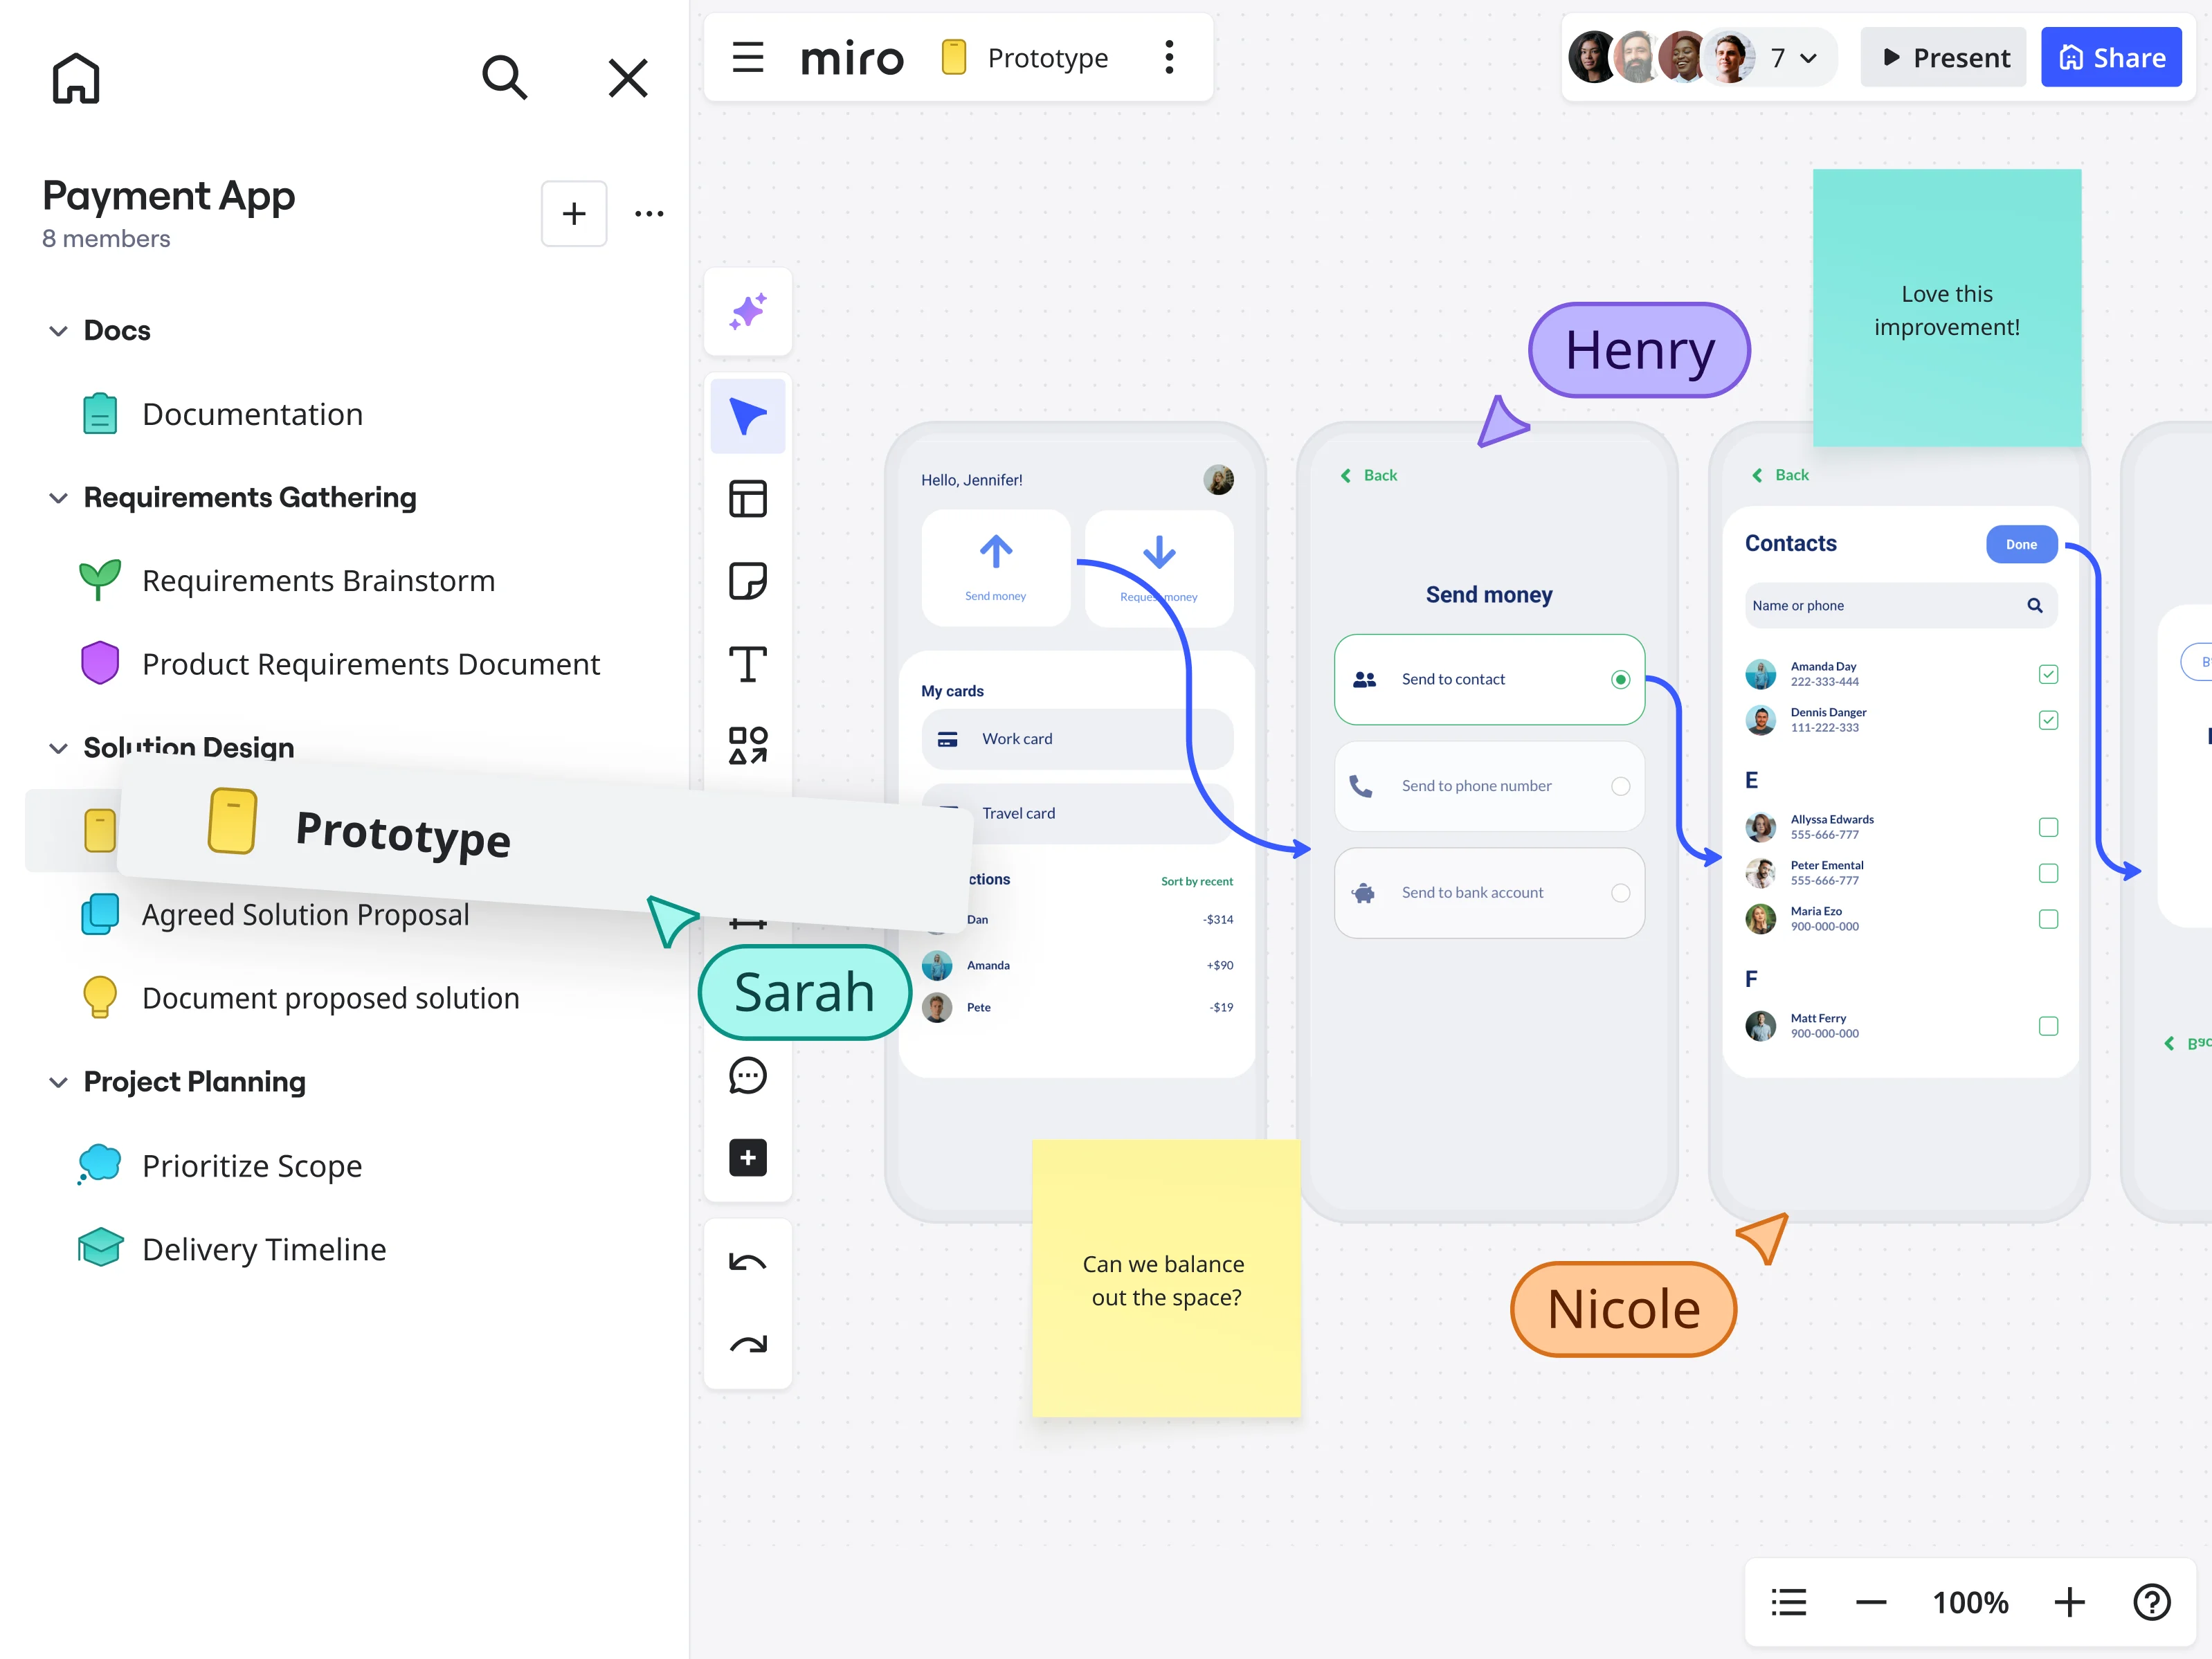
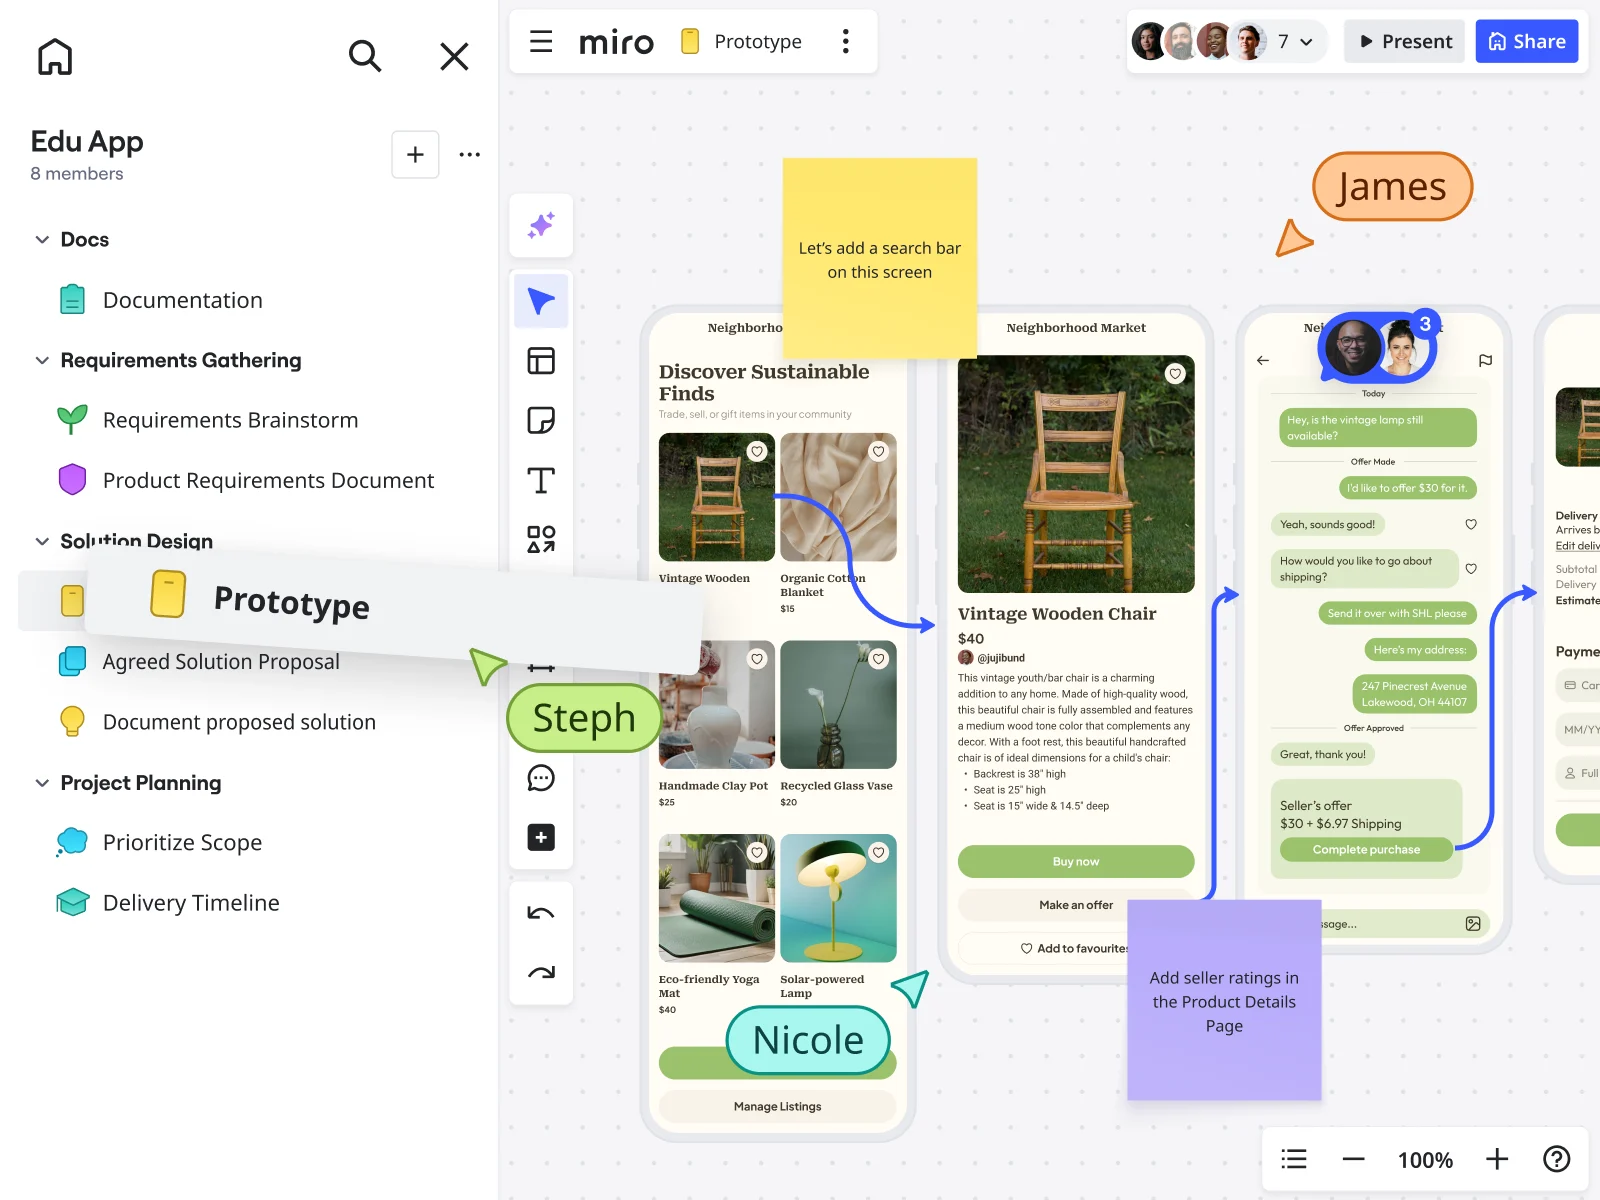
- Prototype: This is like a model home you can walk through. Prototypes are interactive simulations that users can click through, demonstrating functionality and user flow. While mockups are static, Miro makes it surprisingly simple to breathe life into your mockups, turning them into clickable prototypes to better convey interactions. We’re talking about linking screens, adding interactive hotspots, and simulating basic navigation – a smooth transition, not a whole new tool headache.
Understanding this lineup helps you explain to your team what you’re delivering and why it’s valuable at that particular stage.
Alright, let's get to it: How to make a mockup in 7 clear steps
Ready to transform your idea into a visual masterpiece? This process is more straightforward than you might think, especially when you’ve got Miro, your versatile screen mockup tool and collaborative hub, by your side.
Step 1: Nail down your goal, audience, and what’s really important
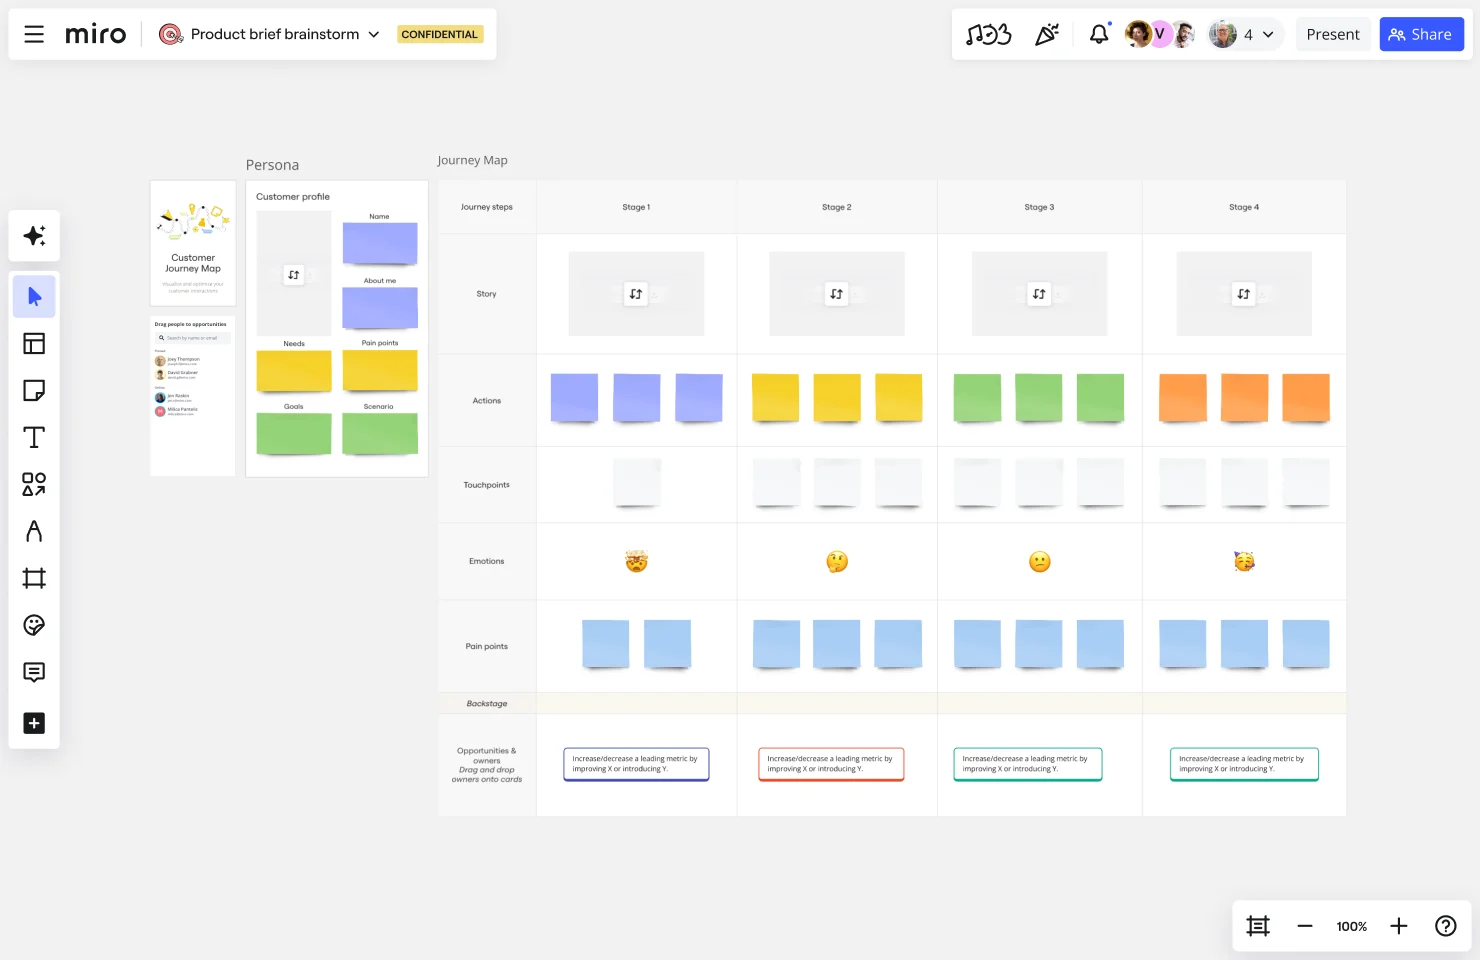
Before you draw a single line, get clear on a few things. What problem is this screen or product solving? Who are you making this mockup for? The answers will shape the detail level. To truly understand user needs, you might even start with a Customer Journey Map to identify key touchpoints. Then, critically, what must be in this mockup versus what would be nice? For this, the MoSCoW Matrix template in Miro is your best friend. It helps you and your team decide what features are Must-haves, Should-haves, Could-haves, and Won't-haves for this iteration, keeping your mockup focused and effective.
Step 2: Unleash your inner sketch artist (low-fidelity is your friend)
Resist the urge to jump straight into pixel perfection. Grab a pen and paper, open up Miro’s intelligent canvas, and just get those initial ideas out. Sketch out different layouts, where key elements might go. Focus on the flow and the big picture. Don’t worry about perfection; this is about exploration.
Step 3: Choose your creative command center – your screen mockup tool (Hint: Miro’s got you covered)
This is a big one. You want a tool that’s easy for everyone, not just designers, and powerful enough to be your central design hub. Look for:
- Ease of Use & AI Assistance: You shouldn't need a complex manual. With Miro, you get an intuitive interface, and with upcoming Miro AI features, you'll find getting from idea to mockup, and even to a basic prototype, smoother than ever.
- Rock-Solid Collaboration: Can your whole team – designers, PMs, marketers, developers – jump in, leave comments, and iterate together in real-time or async? Miro excels at this, breaking down silos.
- Rich Libraries & Templates: Why reinvent the wheel? Access to common UI elements and screen templates (like our Wireframe Templates) speeds things up massively.
- Integration Power: Miro isn’t an island; it seamlessly integrates with the tools you already love and use, making it a true hub for your workflows and processes.
Miro is built for this visual collaboration, solving tool complexity and collaboration friction by bringing everyone into one shared space.
Step 4: Build the bones – laying out the structure
If you have those initial sketches or wireframes (perhaps made with our awesome templates!), now’s the time to digitize them or use them as your guide. Start placing the main UI elements: navigation, buttons, image placeholders, text blocks. Focus on visual hierarchy and giving elements room to breathe.
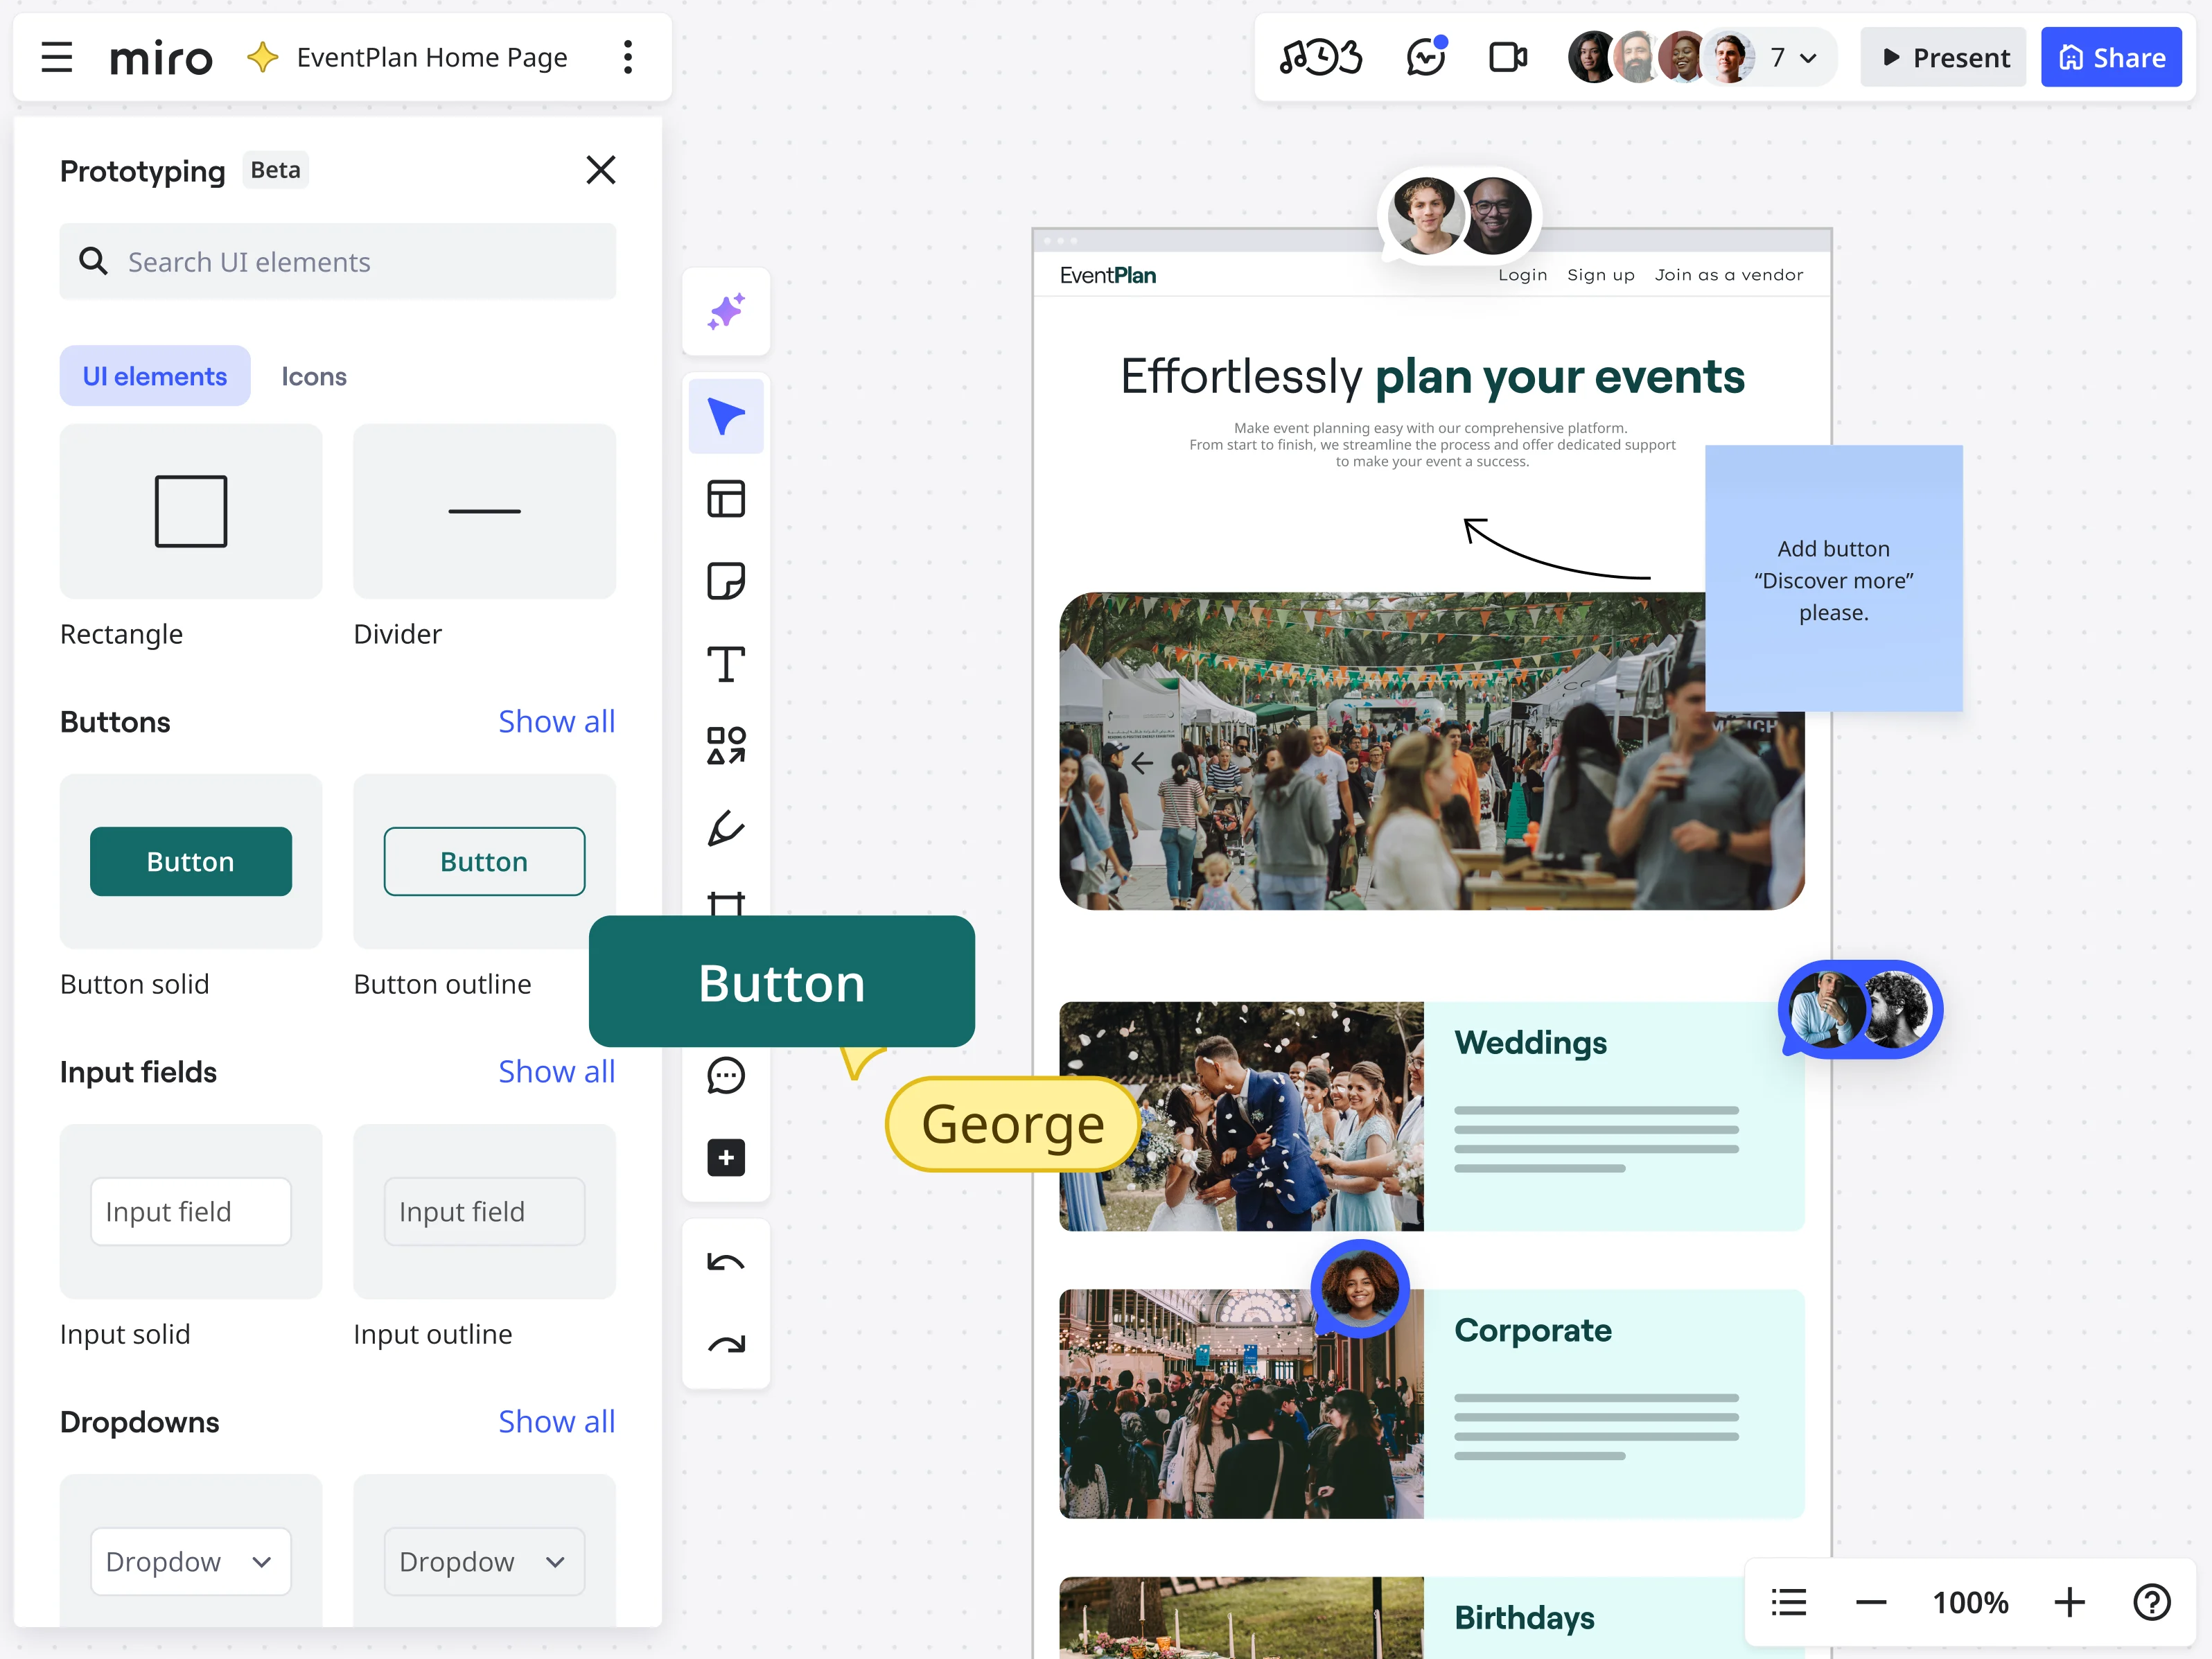
- Miro Tip: Use Miro’s shapes, smart connectors, and alignment guides. They’re super handy for quickly getting your structure organized and looking neat. Our wireframing library has all the common elements you'll need.
Step 5: Splash on some personality – adding the visual details
This is where your mockup really starts to feel like the real deal. It’s time to think about:
- Color Palette: Apply your brand colors or a specific scheme that fits the mood.
- Typography: Choose fonts that are legible and reflect the brand’s voice for headings and body copy.
- Imagery & Icons: Use high-quality placeholder images (or the real deal if you have them!) and clear icons to support your content.
- Visual Hierarchy: Make sure the most important elements grab attention first.
- Miro Tip: You can easily manage color palettes in Miro, upload your images directly, or even pull from integrated icon libraries to bring your design to life.
Step 6: Give it a voice – bringing in content (real or realistic)
"Lorem ipsum" has its place, but using realistic text and data as much as possible makes your mockup far more convincing. It helps you see how content actually fits and if your layout can handle it. If you don't have final copy, write something close to it.
Step 7: Share, listen, and polish – the feedback and iteration loop
Your mockup is looking good, but it's not done until you get some fresh eyes on it. This is a crucial part of learning how to create a mockup that truly works. Share it with your team, stakeholders, or even a few friendly potential users.
- Miro Power-Up: This is where Miro’s collaborative DNA truly shines. Share a link to your board, and your team can drop comments, sticky notes, or even emojis directly onto the mockup. Discuss feedback in real-time during a call, or let people add their thoughts async. This makes gathering and addressing feedback incredibly efficient, keeping everyone aligned. And as you gather this feedback, you might even start thinking about making it interactive – which, in Miro, is just a few clicks away to start basic prototyping.
Pro tips for mockups that make an impact
Want to take your mockups from good to great? Keep these pointers in mind:
- Keep it laser-focused (thanks, MoSCoW!): Don't try to show everything on one screen. Each mockup should have a clear purpose.
- Consistency is your best friend: Use consistent colors, fonts, and spacing across all your mockups for a professional and cohesive feel.
- Always think "user first": Every design decision should ultimately make things easier and more intuitive for the end-user.
- It’s a mockup, not a masterpiece (yet): Especially in early versions, the goal is clear communication and quick iteration, not pixel-perfect finality.
- A little annotation goes a long way: If some interaction or element isn't immediately obvious, add a quick note or annotation. Miro’s commenting features are perfect for this.
Ready to stop dreaming and start designing? Miro is your innovation workspace, from first idea to interactive prototype.
Creating mockups doesn’t have to be a complex, siloed slog. With a bit of know-how and Miro as your go-to screen mockup tool, you can effectively translate your vision into compelling visuals. Miro isn’t just about putting shapes on a canvas; it’s your central innovation workspace, designed to be your design hub. It brings together workflows, processes, and seamlessly integrates with the tools you already use. From initial brainstorming with a Customer Journey Map, prioritizing with a MoSCoW matrix, building with our Wireframe Templates, to detailed mockups and then easily adding interactions for basic prototypes, Miro keeps your entire design process connected and collaborative for designers and non-designers alike.
Ready to see why Miro is the go-to for creating mockups (and so much more)? Sign up for Miro for free and start bringing your ideas to life. Need a jumpstart? Explore Miro's rich library of templates to get going even faster.
Author: Miro Team Last update: August 14, 2025