Table of contents
Table of contents
Skip the design tools: How to build a clickable prototype in Miro
Summary
In this article, you'll learn:
- Why traditional prototyping workflows slow teams down and delay critical decisions
- How to turn any screenshot into a fully editable, clickable prototype using Miro AI
- A step-by-step walkthrough of the collaborative prototyping workflow, as demonstrated by Mathias Davidsen and Shipra Kayan from Miro
- How to use the UX Researcher Sidekick to catch usability and accessibility issues before stakeholder reviews
- How Lufthansa Group's Miles & More program aligned on the right product direction in less than one day using Miro Prototypes
- Where Miro Prototypes fits in your product development process and how it compares to tools like Figma
Collaborative AI Workflows
Join thousands of teams using Miro to build the right thing, faster.
You have a product idea. Maybe you’ve got a screenshot of a competitor’s app or a rough flow sketched on sticky notes. But you don’t have six hours to spend in Figma before your next stakeholder meeting.
That’s the reality for most product teams, and especially for startups, where speed to validation is everything. The traditional prototyping workflow asks too much: export your wireframes, rebuild them in a design tool, manually connect every screen, share a file no one else can edit, then start over when feedback comes in.
There’s a faster way. And it starts with a screenshot.
The old way of building clickable prototypes is slowing you down
Here’s what most teams actually do when they need a clickable prototype.
A designer opens Figma or Adobe XD, rebuilds every screen from scratch, manually links up interactions, exports a shareable link, and waits for async feedback that arrives across five Slack threads, two email chains, and a comment left on the wrong version.
Meanwhile, the PM is explaining the flow using screenshots pasted into a slide deck. The engineer is asking whether any of this is technically feasible. And the stakeholder just asked to see the mobile version too.
By the time the prototype is “done,” the brief has changed.
The core problem isn’t the tool. It’s the workflow. Prototyping has been treated as a design-only activity that happens late in the process, disconnected from where the real thinking lives: the brainstorm, the PRD, the user research on the board. The result is that by the time there’s something clickable to react to, the team has already made decisions based on assumptions no one tested.
For startup teams, this is especially costly. You’re moving fast, but you can’t afford to build the wrong thing. A slow prototyping process doesn’t just delay decisions. It delays learning.
What if your screenshot was already the starting point?
Imagine grabbing a screenshot of any UI, your own product, a competitor’s app, a rough sketch on paper, and having it automatically converted into a fully editable mockup in seconds. Every button, layout block, and text element becomes something you can move, change, and connect to other screens.
That’s not a future workflow. That’s what Miro Prototypes does today.
Instead of rebuilding from scratch, you iterate. You take what already exists, whether that’s a screenshot, a set of sticky notes, a PRD, or a diagram already on your board, and use AI to turn it into something clickable. The whole team can jump in, leave comments, and propose changes in real time or async. No design file access required. No back-and-forth handoffs.
This is what modern clickable prototypes look like: collaborative, fast, and built where the thinking already happens.
How to build a clickable prototype in Miro: From messy canvas to shareable flow
Shipra Kayan, Principal Product Evangelist at Miro, frames the core problem well: on almost every product project, everyone thinks they agree on the solution until they see a visual prototype. That’s when the technical constraints, unmet requirements, and customer confusion bubble up. The goal of Miro Prototypes is to move that moment earlier, before weeks have been spent debating documents.
Here’s the workflow Mathias Davidsen, Solutions GM for Prototypes at Miro, walks through: from unstructured discovery materials to a clickable, shareable prototype.
Step 1: Gather your canvas inputs — don’t start from scratch
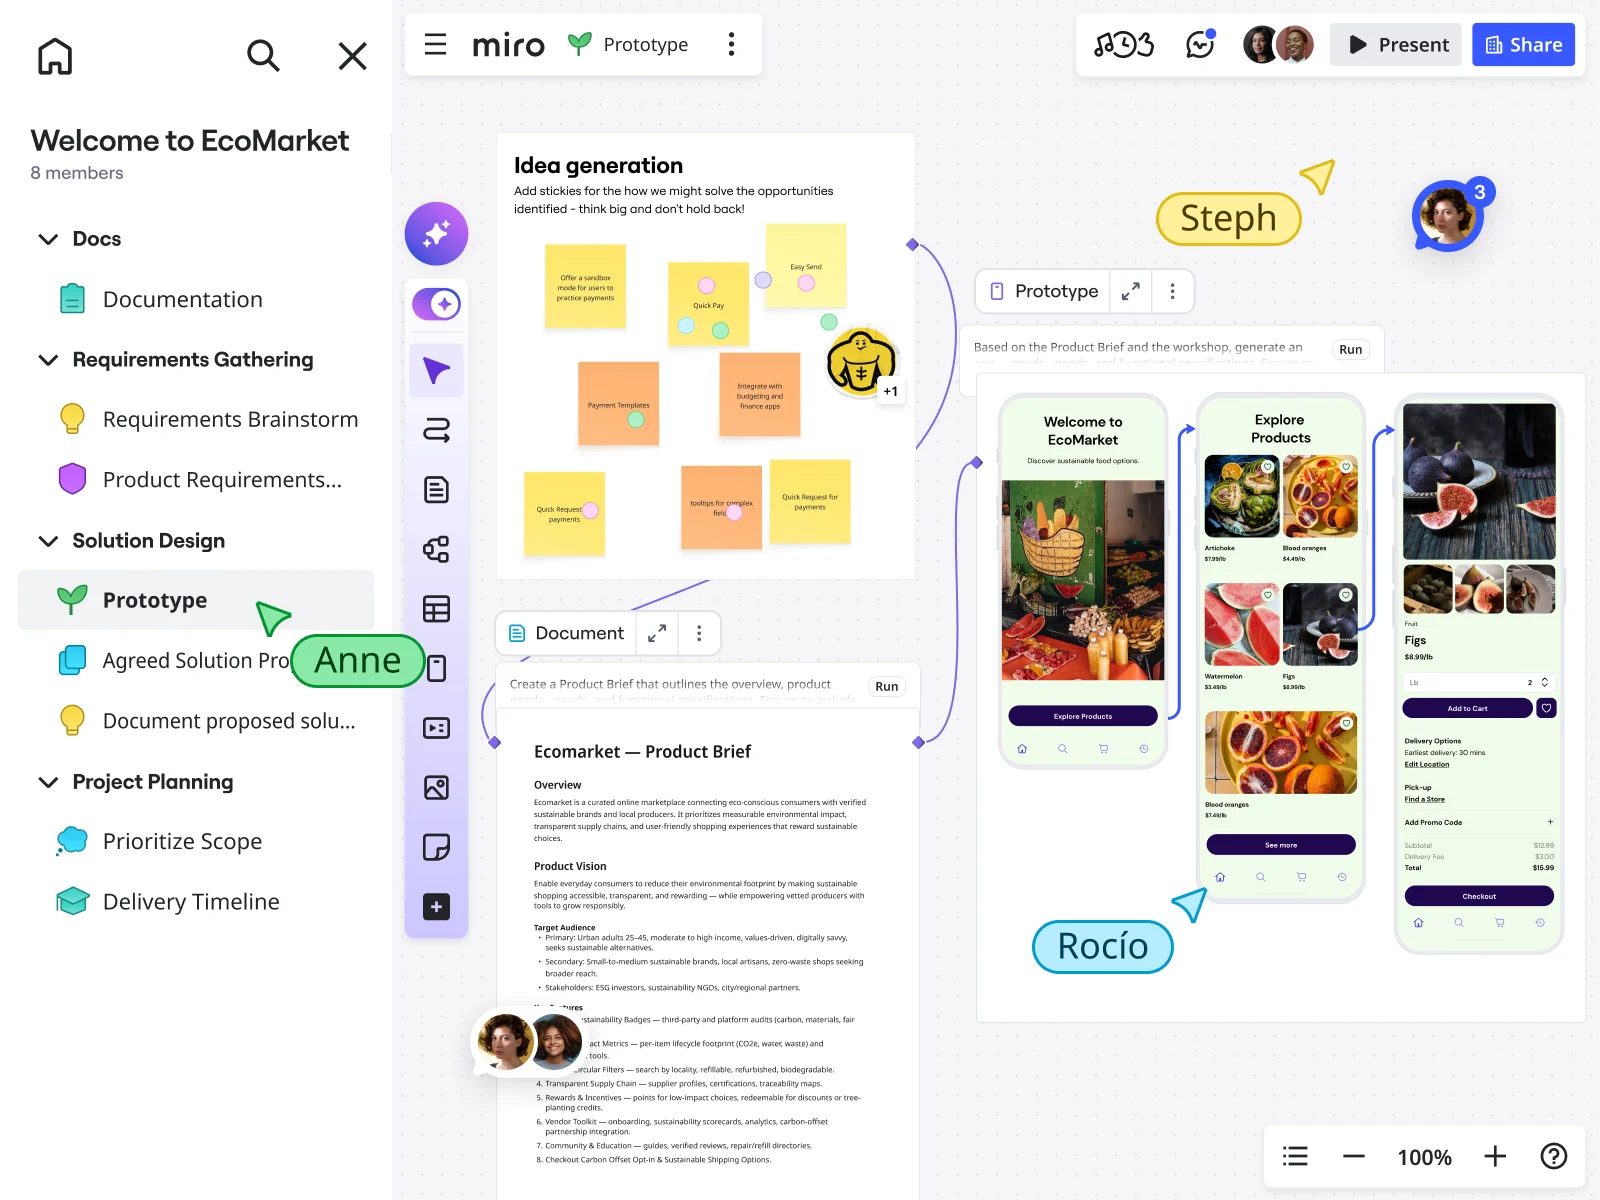
The first thing Mathias is clear about: you never start from a blank board. In almost every real prototyping scenario, your team already has context sitting on the canvas: brainstorm sticky notes, opportunity maps, user research outputs, a PRD, sketches, existing screenshots. That’s your starting point.
In the walkthrough, the team is working on a payments app and wants to drive user retention and reduce payment abandonment. On the canvas they already have:
- Brainstorm sticky notes on user pain points and desired outcomes
- A PRD outlining purpose, problem, opportunity, and success criteria
- An opportunity map showing which features matter most to both the team and users
- Feature ideas across different directions
- An existing app screenshot to establish the visual style they want to build on
You don’t need all of these. But the more context you put on the canvas, the more relevant the prototype output will be. As Mathias explains, the canvas becomes the prompt. You’re not describing your product to the AI in a chat window. You’re showing it everything already on your board.
Step 2: Select your inputs and open the prototyping panel
Once your materials are on the board, select everything you want the AI to use as context: your opportunity map, your PRD, your screenshot, your sticky notes. In the walkthrough, Matias selects 28 objects across the board.
With your inputs selected, open the Create with AI panel and choose Prototype. Here you’ll set a few key preferences:
- Device type: mobile, tablet, or web
- Single screen or multi-screen: for a full user flow, choose multi-screen
- Your prompt: describe what you want the prototype to achieve
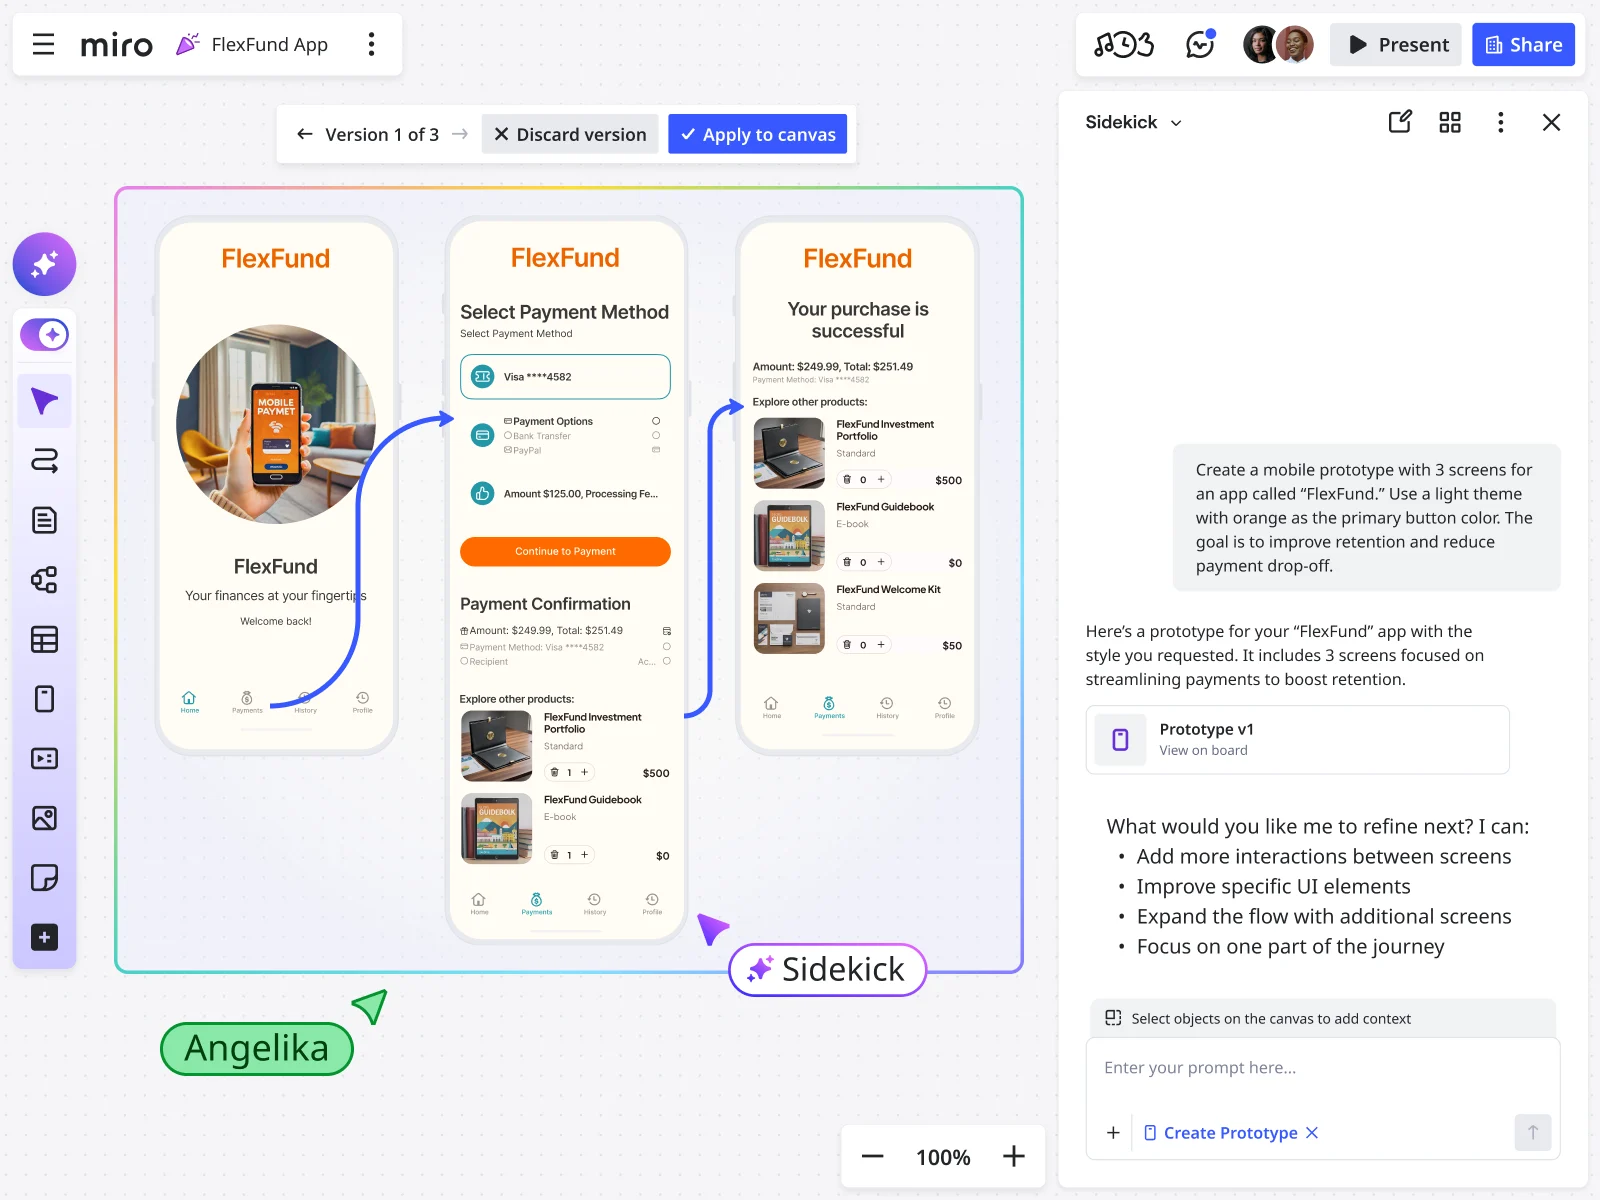
Mathias keeps the prompt straightforward. He asks the AI to come up with inspiration for how a five-screen prototype could look, based on the PRD and opportunity mapping, using the theme and styling of the existing screenshot. Clear intent, specific context, visual reference included.
Step 3: Get the look and feel right from the start
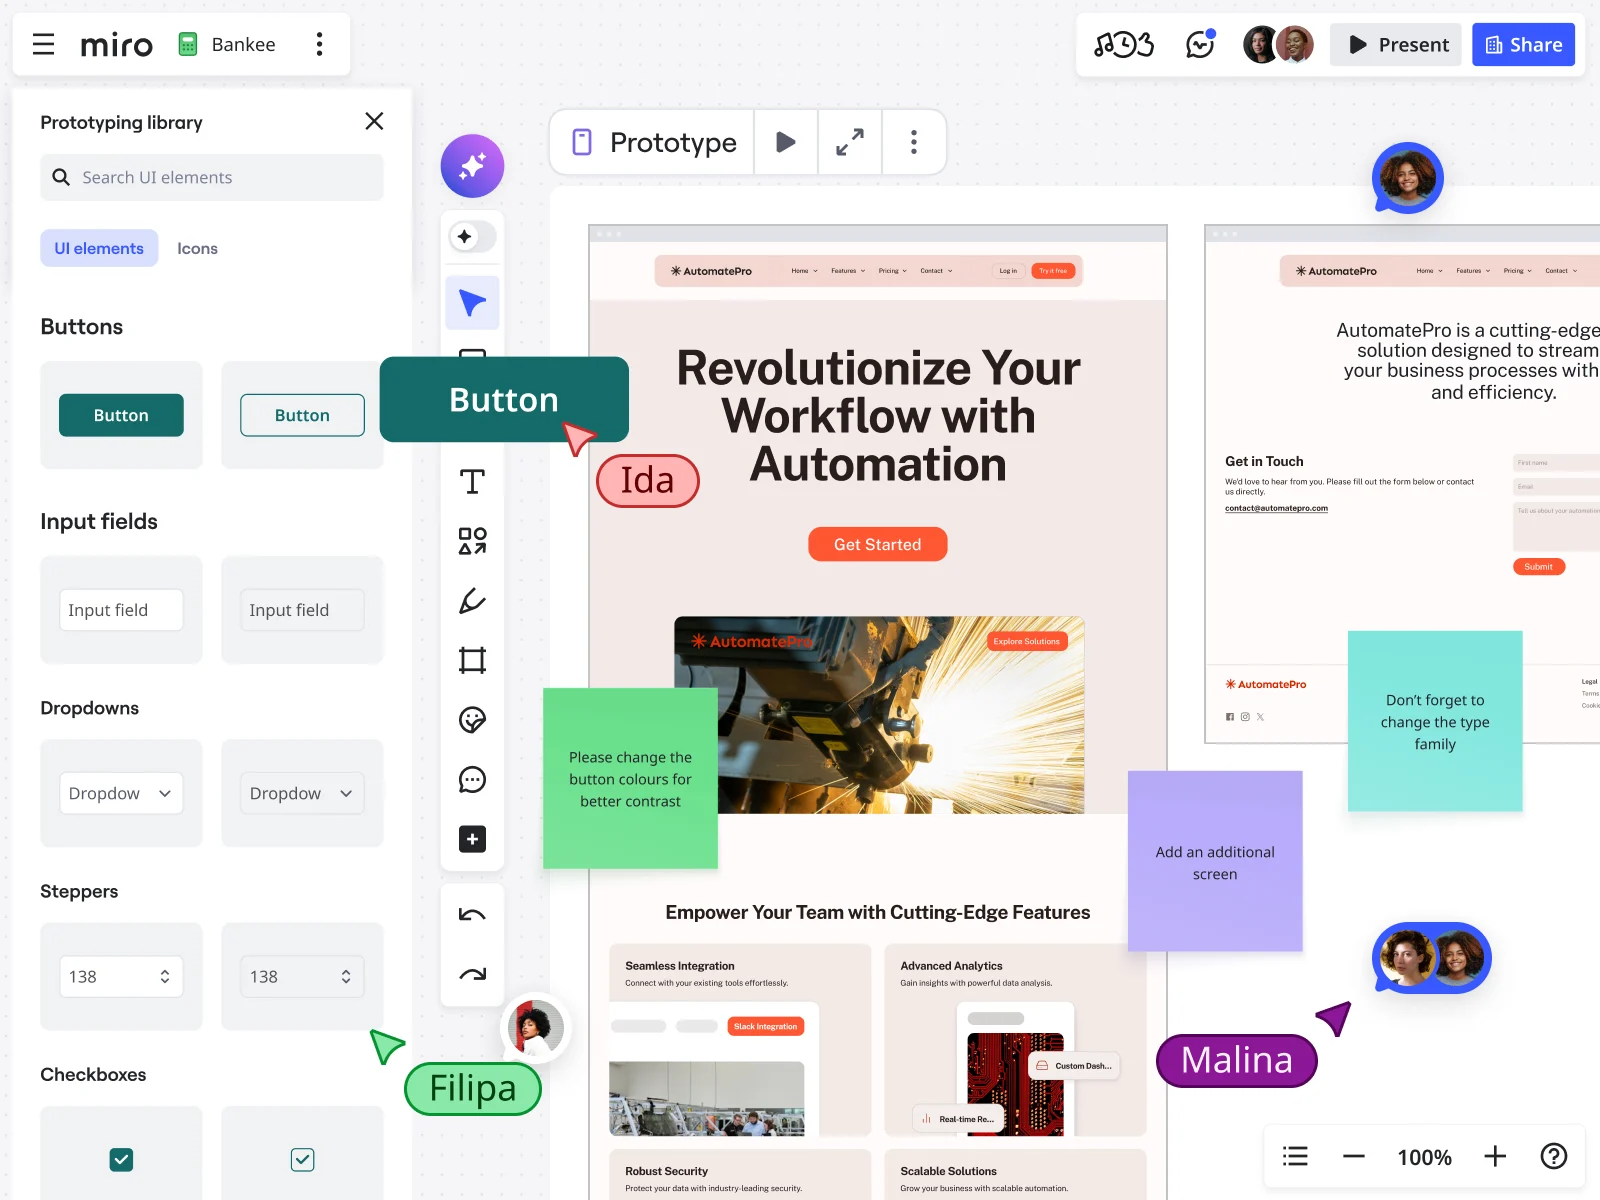
One of the most common frustrations with AI prototyping tools is getting the output to actually reflect your brand: the right colors, fonts, and component styles. Mathias highlights three ways to handle this in Miro:
- Upload a screenshot of your existing product and ask the AI to match its theme and styling. This is the fastest option and works well for iterating on existing products.
- Prompt directly with specific hex codes, font names, and layout guidelines. The more detail you include, the more precise the output.
- Use the prototyping library to upload your own custom atomic components, so outputs won’t just have the right styling, they’ll use the actual design system components your team builds with.
Getting this right upfront saves significant time in the iteration stages. A prototype that already looks like your product is much easier for stakeholders and users to react to honestly.
Step 4: Review what the AI generates and notice what it prioritized
Once generation completes, take time to actually read what the AI built before you start editing. In the walkthrough, the AI produced five screens covering a dashboard, spending insights, balance and transactions, a budget screen, alerts and notifications, and a profile view.
What’s worth noting: the AI read the opportunity map and reflected the team’s prioritization in the prototype. Features that scored high on both business and user importance, like personalized savings tips and budget forecasts, appeared prominently. The prototype wasn’t just aesthetically generated. It reflected the strategic inputs.
This is the difference between using the canvas as context versus just prompting from scratch.
Step 5: Iterate with AI and with your hands
Getting to a solid first prototype is the easy part. As Mathias points out, the real work is iterating toward the output your team has in mind, and that’s where a lot of AI tools start to slow down.
In Miro Prototypes, you have two ways to refine:
AI-assisted editing: Select a specific screen, open the edit panel, and describe the change you want. In the demo, Mathias asks the AI to add a section for unusual spending activity alerts above the spending insights section. The AI implements the visual change with no code to debug or test. You can also use this to generate multiple variations of a screen, compare them side by side, and choose the direction you prefer.
Manual drag-and-drop editing: Not everything needs a prompt. A lot of small changes, like adjusting colors, swapping text, or repositioning elements, are faster to just do directly on the canvas. Because the prototype lives in Miro, you have the full flexibility of visual editing combined with AI assistance. You’re not locked into one mode.
💡
Mathias’s tip:
Designers often want multiple options to evaluate, not just one output to react to. Use the AI to generate two or three variations of a screen or flow, then use the version selector to toggle between them and land on the direction that works. This is much faster than building each option manually.
Step 6: Use the UX Researcher Sidekick before sharing with stakeholders
Before your prototype goes in front of customers or leadership, run it through the UX Researcher Sidekick. This is one of the most practical tips from the walkthrough, and one that saves a lot of meeting time.
Select your prototype and any supporting context (like your PRD), open the Sidekick panel, choose the UX Researcher Sidekick, and ask it to identify the five most critical usability issues and provide clear recommendations for each.
The reason Mathias does this before stakeholder review is deliberate: it gets the obvious issues out of the way first. Rather than spending stakeholder time on things AI can already catch, like navigation inconsistencies, unclear labels, missing states, and accessibility gaps, you surface and fix those in advance. The feedback you get from real stakeholders and users then focuses on the things that genuinely need human judgment.
💡
Shipra’s tip:
You can do exactly the same thing for accessibility. Ask the Sidekick to identify the main accessibility issues and generate a revised version with those implemented. Not everyone on the team needs to be an accessibility expert when you can build that expertise into a Sidekick that’s available to everyone.
Step 7: Implement the Sidekick’s recommendations in one step
Once you have the usability report on your canvas, don’t work through the recommendations manually. Select the entire prototype and the entire report, then prompt the AI to create a new version of the prototype with all recommendations implemented.
In the walkthrough, the output adds screens the report flagged as missing, updates the navigation structure, improves the QR code payment flow, and refines the security alerts, all in one generation pass. The revised prototype has eight screens instead of five, and each flagged issue has been addressed.
This is the loop that makes rapid iteration actually rapid: generate, review with a Sidekick, implement recommendations, and repeat, without rebuilding from scratch at any stage.
Step 8: Connect screens and share in preview mode
With your screens on the canvas, add connector lines between screens to define the user flow. Click any component, drag the blue connector that appears, and link it to the next screen. These connections become the interactive hotspots in preview mode.
When you’re ready to share, click Preview to enter a full product experience where stakeholders can click through the prototype as if they were using the real app. Input fields, sliders, and dropdown buttons all respond. The experience is close enough to a real product that teams are already using this for actual concept validation with customers during early discovery, not just internal reviews.
💡
Mathias’s tip:
Visuals in Slack beat long messages about proposed changes every time. Once you have a clickable prototype, share the preview link rather than writing up a description of what you’re proposing. The team reacts faster, the feedback is more specific, and alignment happens in one round instead of three.
What a real team achieved with this workflow
Lufthansa Group’s Miles & More loyalty program used Miro Prototypes to create, validate, and align on the right product direction in less than one day, a process that would typically stretch across multiple rounds of design revisions and stakeholder reviews.
As Product Owner Björn Ehrlinspiel explained, the ability to show a clickable vision rather than describe it made a concrete difference in how confidently the team could move forward and present to leadership. The prototype wasn’t a deliverable. It was a decision-making tool.
That shift, from prototyping as a design artifact to prototyping as a thinking and alignment tool, is exactly what this workflow makes possible.
As Jeff Chow, Chief Product & Technology Officer at Miro, puts it: "Now you don't have to tell the designers what you want — you can show them instead." That's the real unlock here. When anyone on the team can put a clickable prototype in front of a designer, an engineer, or a stakeholder, the conversation changes entirely.
Where Miro Prototypes fits in your broader workflow
It’s worth being direct about what Miro Prototypes is designed for and where it sits relative to other tools.
Miro Prototypes is built for the earliest stages of product development: discovery, ideation, and early alignment. It’s where you figure out what to build before you invest in high-fidelity design or engineering time. Once a direction is validated and you’re moving into production-quality UI design, tools like Figma take over.
Think of it this way: Figma is where you polish. Miro is where you think.
The gap this closes is the one between “we have an idea” and “let’s look at something clickable,” which is typically where teams lose the most time and momentum. For startups especially, clickable prototypes created this early are one of the highest-leverage activities you can do: they compress feedback cycles, surface misalignment before it’s expensive to fix, and give you something concrete to test with real users before any code is written.
For cross-functional teams, engineers, PMs, designers, and marketers, the collaborative canvas makes this even more valuable. Everyone sees the same prototype, contributes to the same board, and leaves feedback in the same place. There are no file exports, no version confusion, and no sync meeting required just to see the latest iteration.
Ready to see how Miro Prototypes works?
The next time you’re staring at a screenshot wishing you could just change it, you can.
Drop any UI into Miro, convert it to an editable prototype in seconds, and start iterating with your whole team before your next meeting.
FAQs
Do I need design experience to create a clickable prototype in Miro? No. Miro Prototypes is designed for anyone on the product team, including PMs, engineers, marketers, and founders, not just designers. You generate screens from text prompts or screenshots, and the AI handles the UI construction. You focus on the flow and the decisions.
What’s the difference between a wireframe and a clickable prototype? A wireframe is a static, structural blueprint that shows layout and content but doesn’t move. A clickable prototype connects those screens into a flow you can actually navigate. In Miro, you can go from wireframe to clickable prototype on the same canvas, without switching tools.
Can I use Miro Prototypes to iterate on an existing product? Yes. The screenshot-to-editable-mockup workflow is built specifically for this. Upload a screenshot of your existing UI, convert it to an editable prototype, and use AI prompts to explore new directions, test feature changes, or adapt for different platforms, without needing access to design files.
Is Miro Prototypes a good fit for startup teams? It’s particularly well suited to startup workflows. Clickable prototypes for startups are most valuable when resources are limited and you need to validate fast. Miro Prototypes compresses the time between idea and testable prototype, so you can learn from real users before committing engineering time to something that hasn’t been validated.
What plans include Miro Prototypes? Miro Prototypes is a paid add-on available for Starter, Business, and Enterprise plans. Enterprise teams can access it through the beta program. Visit the Miro Prototypes page for current plan details and pricing.
Author: Sarah Luisa Santos, Content and Growth Last updated: April 13, 2026