About the MVP (Minimum Viable Product) Templates Collection
An MVP template is a strategic, collaborative visual workspace designed to help product managers, startup founders, and innovation teams strip an idea down to its core value proposition. The goal of an MVP is not to build a cheap, broken product, but to maximize validated learning about customer preferences with the least amount of effort. By utilizing a standardized Miro template, cross-functional teams can align on assumptions, prioritize features based on user necessity rather than stakeholders' whims, and design structured experiments to test viability before writing a single line of scalable code.
Key Components of an MVP Template
A highly actionable MVP workspace prevents feature creep by forcing teams to focus exclusively on what is necessary to solve the core user problem. Every professional Miro MVP board should include these five essential elements:
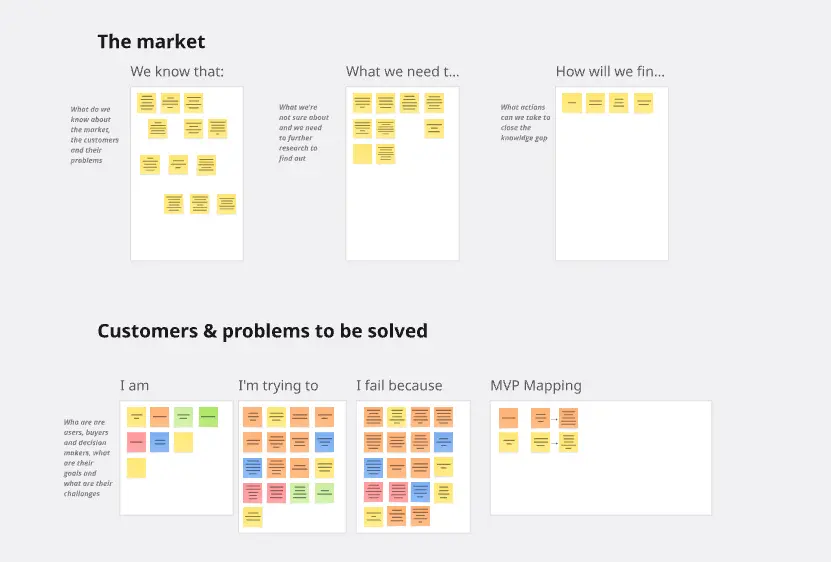
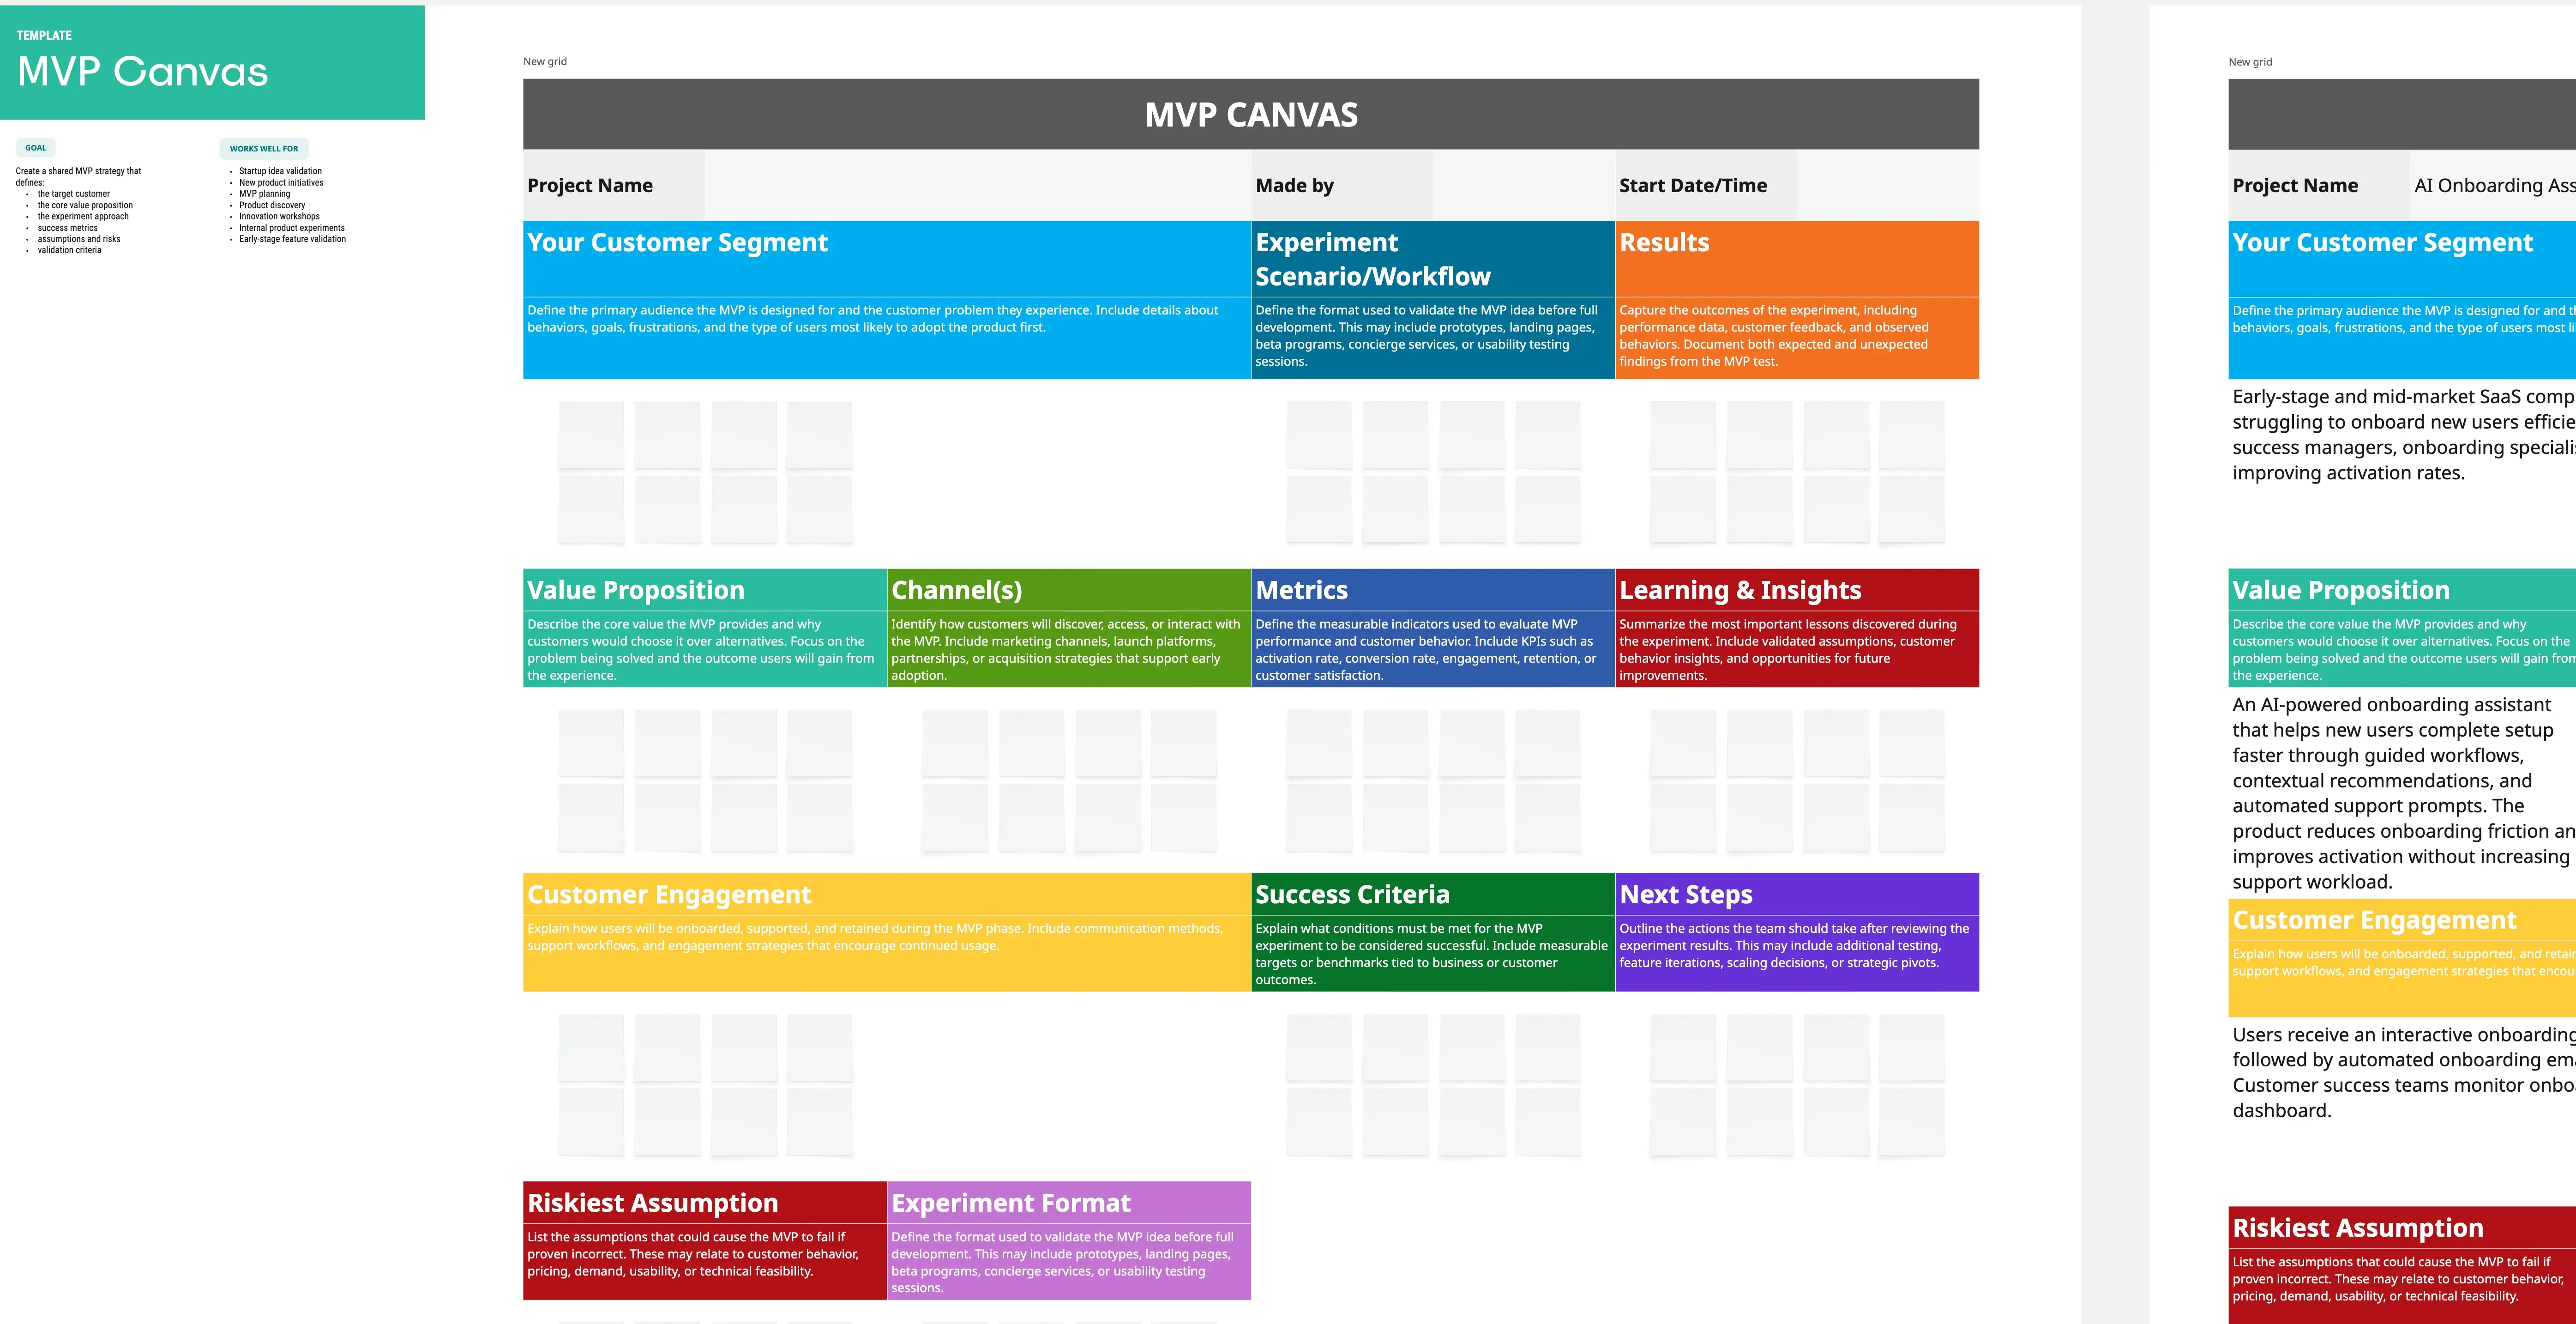
The Problem-Solution Fit Anchor: A section dedicated to defining the absolute top 1–2 pain points of the target user and the primary mechanism your product uses to solve them.
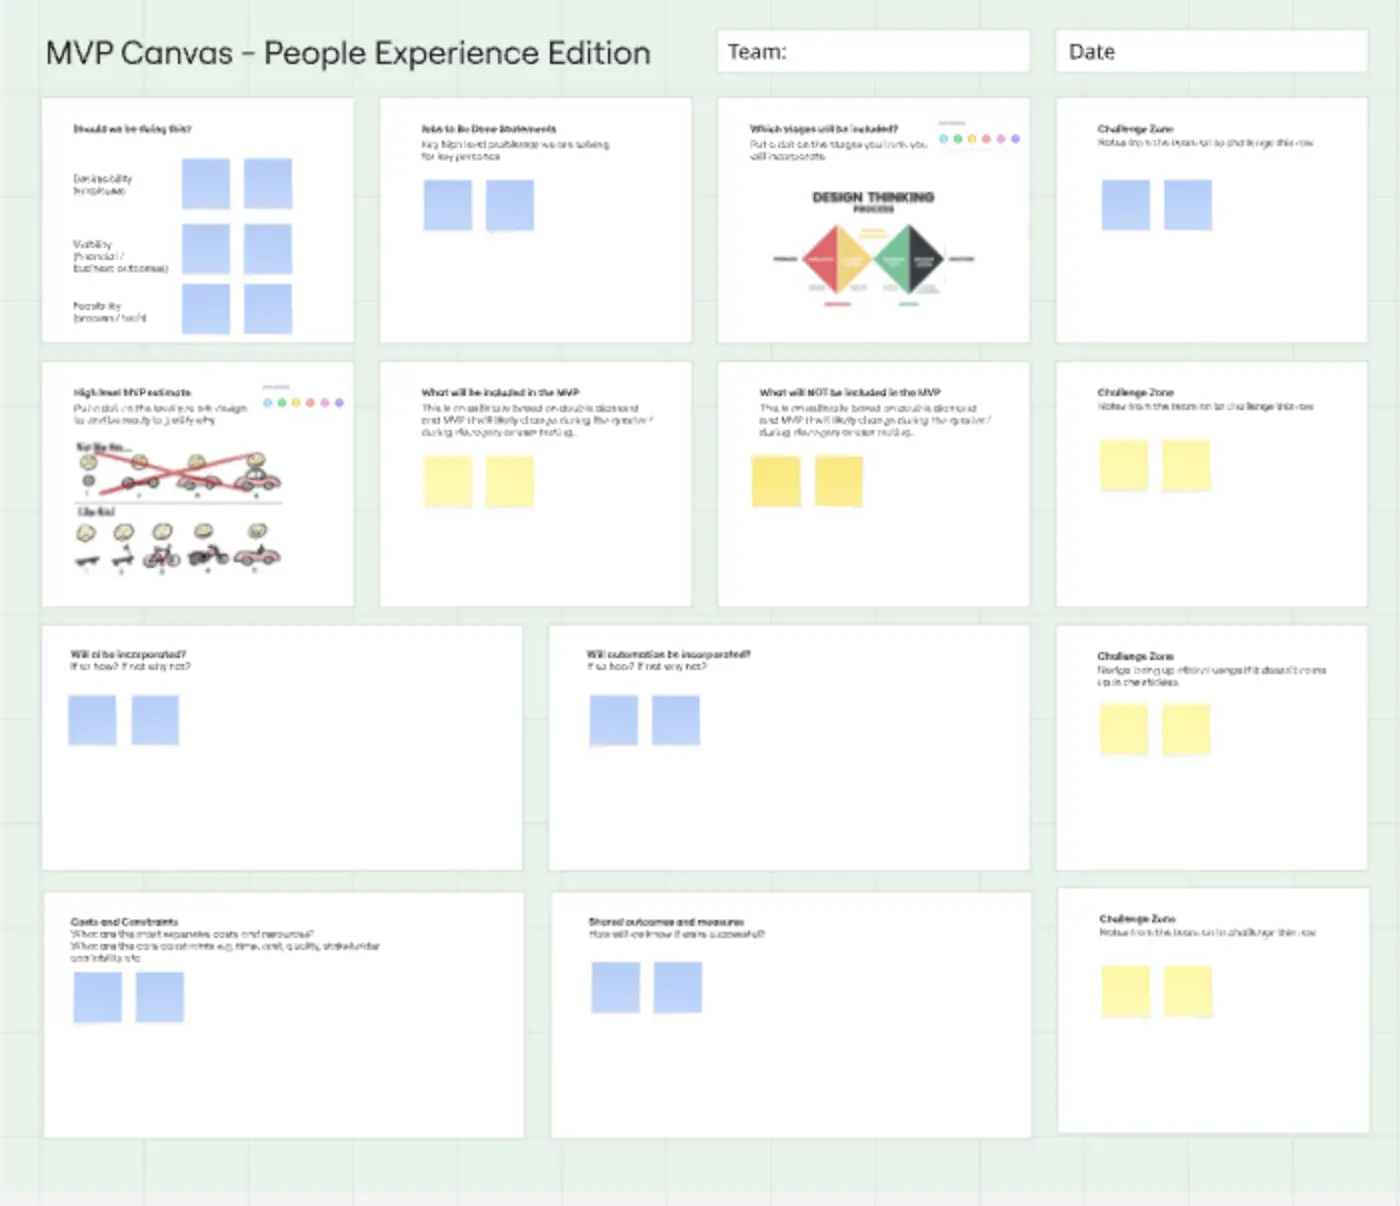
The Assumptions & Hypotheses Ledger: A workspace to call out the fundamental risks underlying the product idea—categorized by desirability (do they want it?), viability (should we do it?), and feasibility (can we build it?).
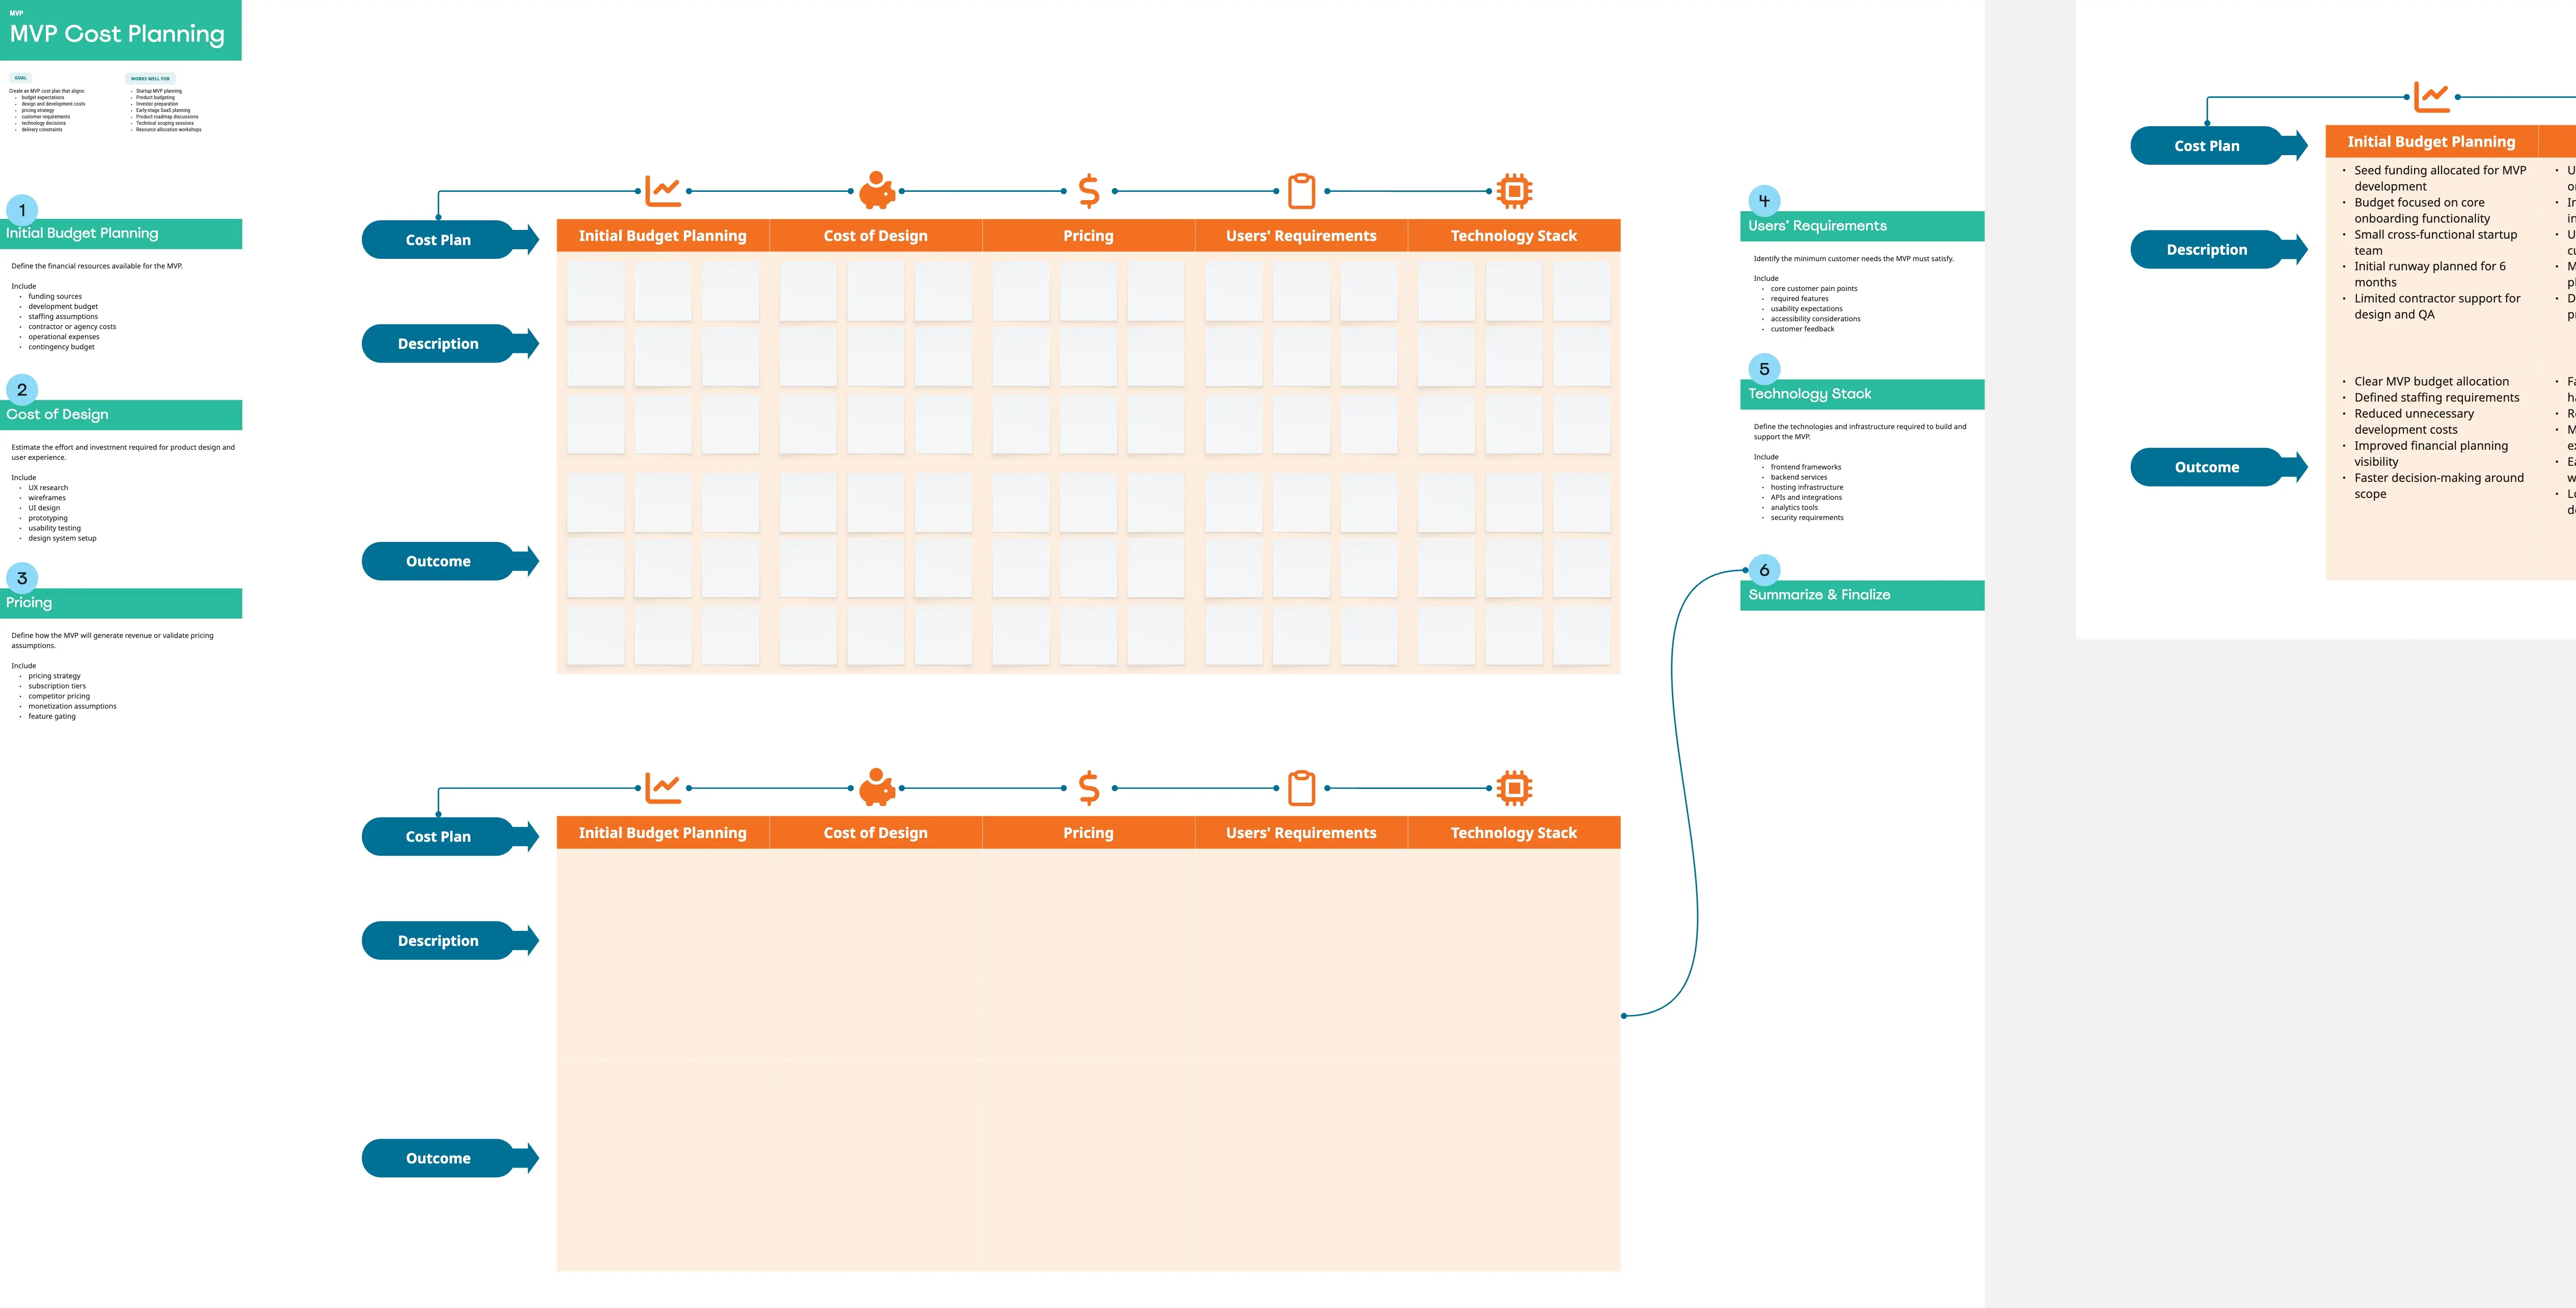
Feature Prioritization Matrix (The Slice Line): A visual grid or axis (such as Value vs. Complexity or Must-Have vs. Nice-to-Have) with a literal cut-off line separating the MVP scope from post-launch iterations.
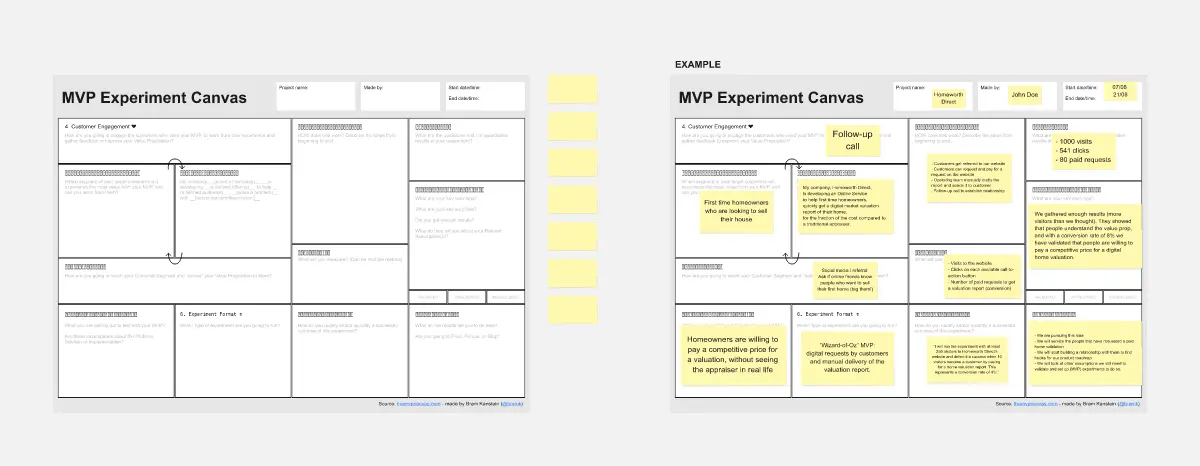
Experimentation Playbook: A dedicated block mapping out the non-code or low-code method chosen to test the market (e.g., landing page, concierge, wizard of oz, or video explainer).
Success Metric Safeguards: Clear, quantifiable thresholds (e.g., sign-up rates, waitlist deposits, or engagement levels) that determine whether the experiment is a Go or a Pivot.
How to Use MVP Templates in Miro
1. Define the Core Value Proposition
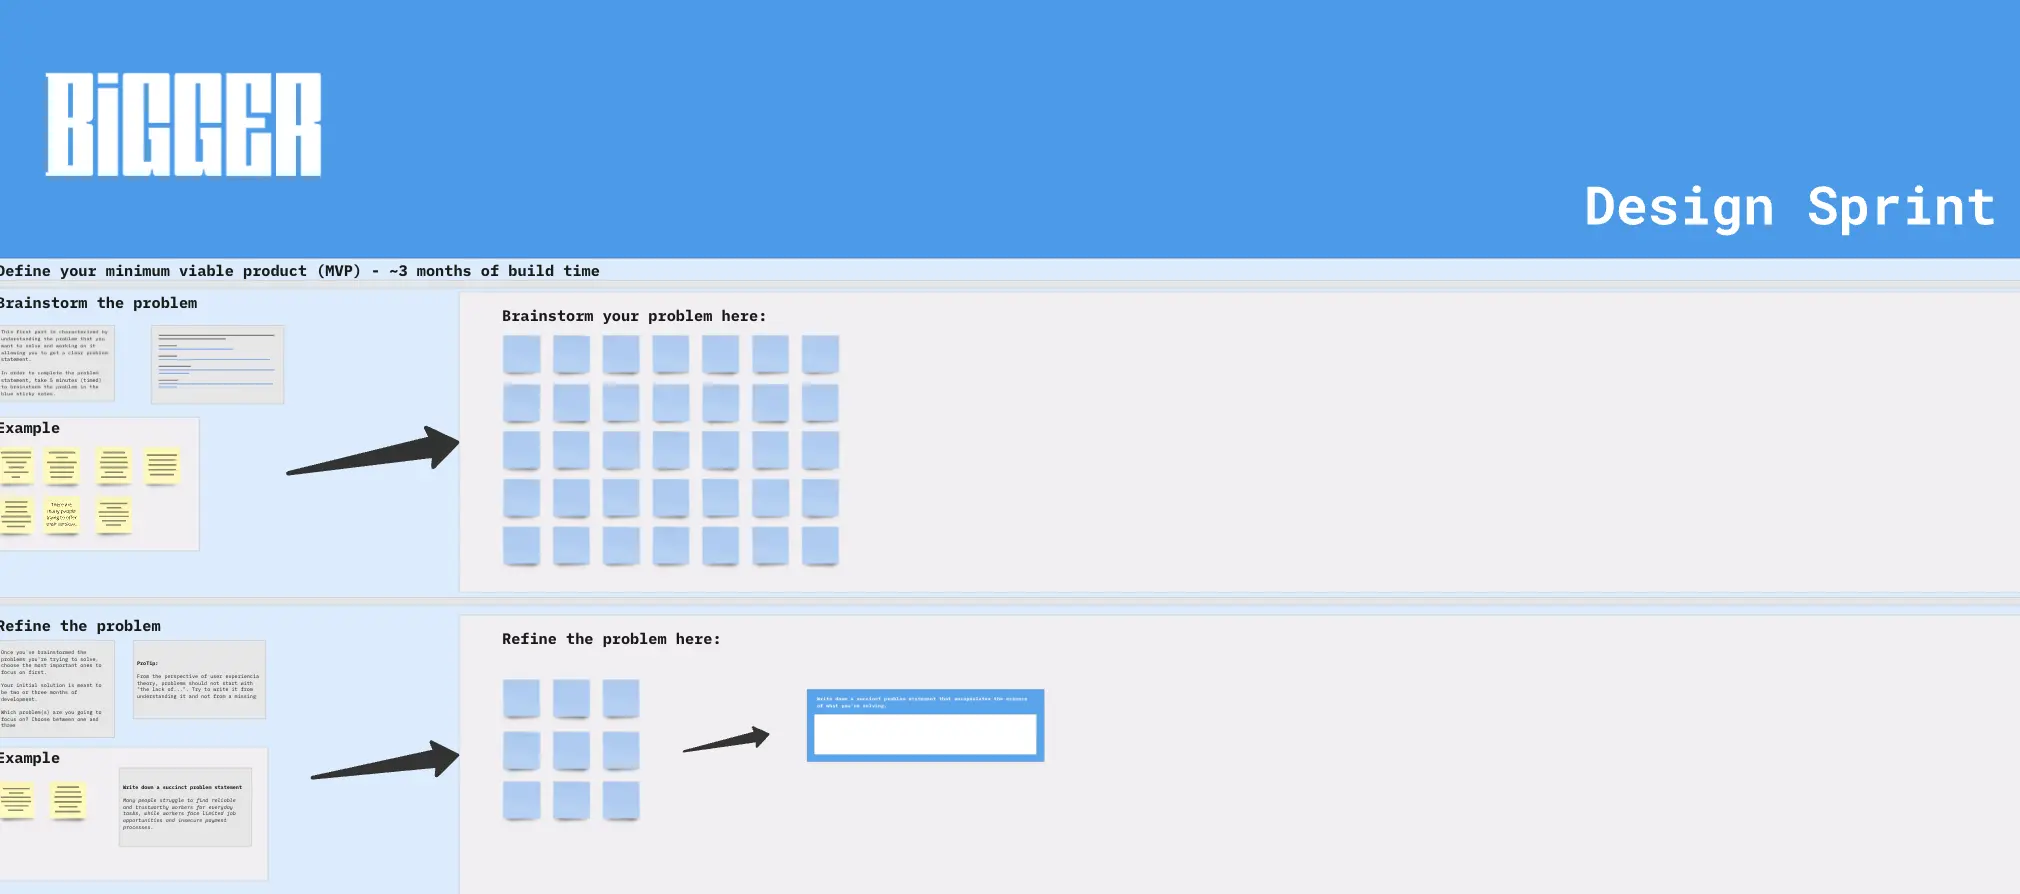
Start by filling out the top of your MVP template. Explicitly write down who your user is and what critical problem you are solving. If the team cannot agree on a single, clear problem statement, halt planning until you do.
2. Map the Riskiest Assumptions
Brainstorm all the assumptions that must be true for this product to succeed. Place them on a 2x2 grid mapped by Impact (High/Low) and Confidence (High/Low). Focus your MVP exclusively on testing the "High Impact, Low Confidence" quadrant—these are the assumptions that could kill your business if you're wrong.
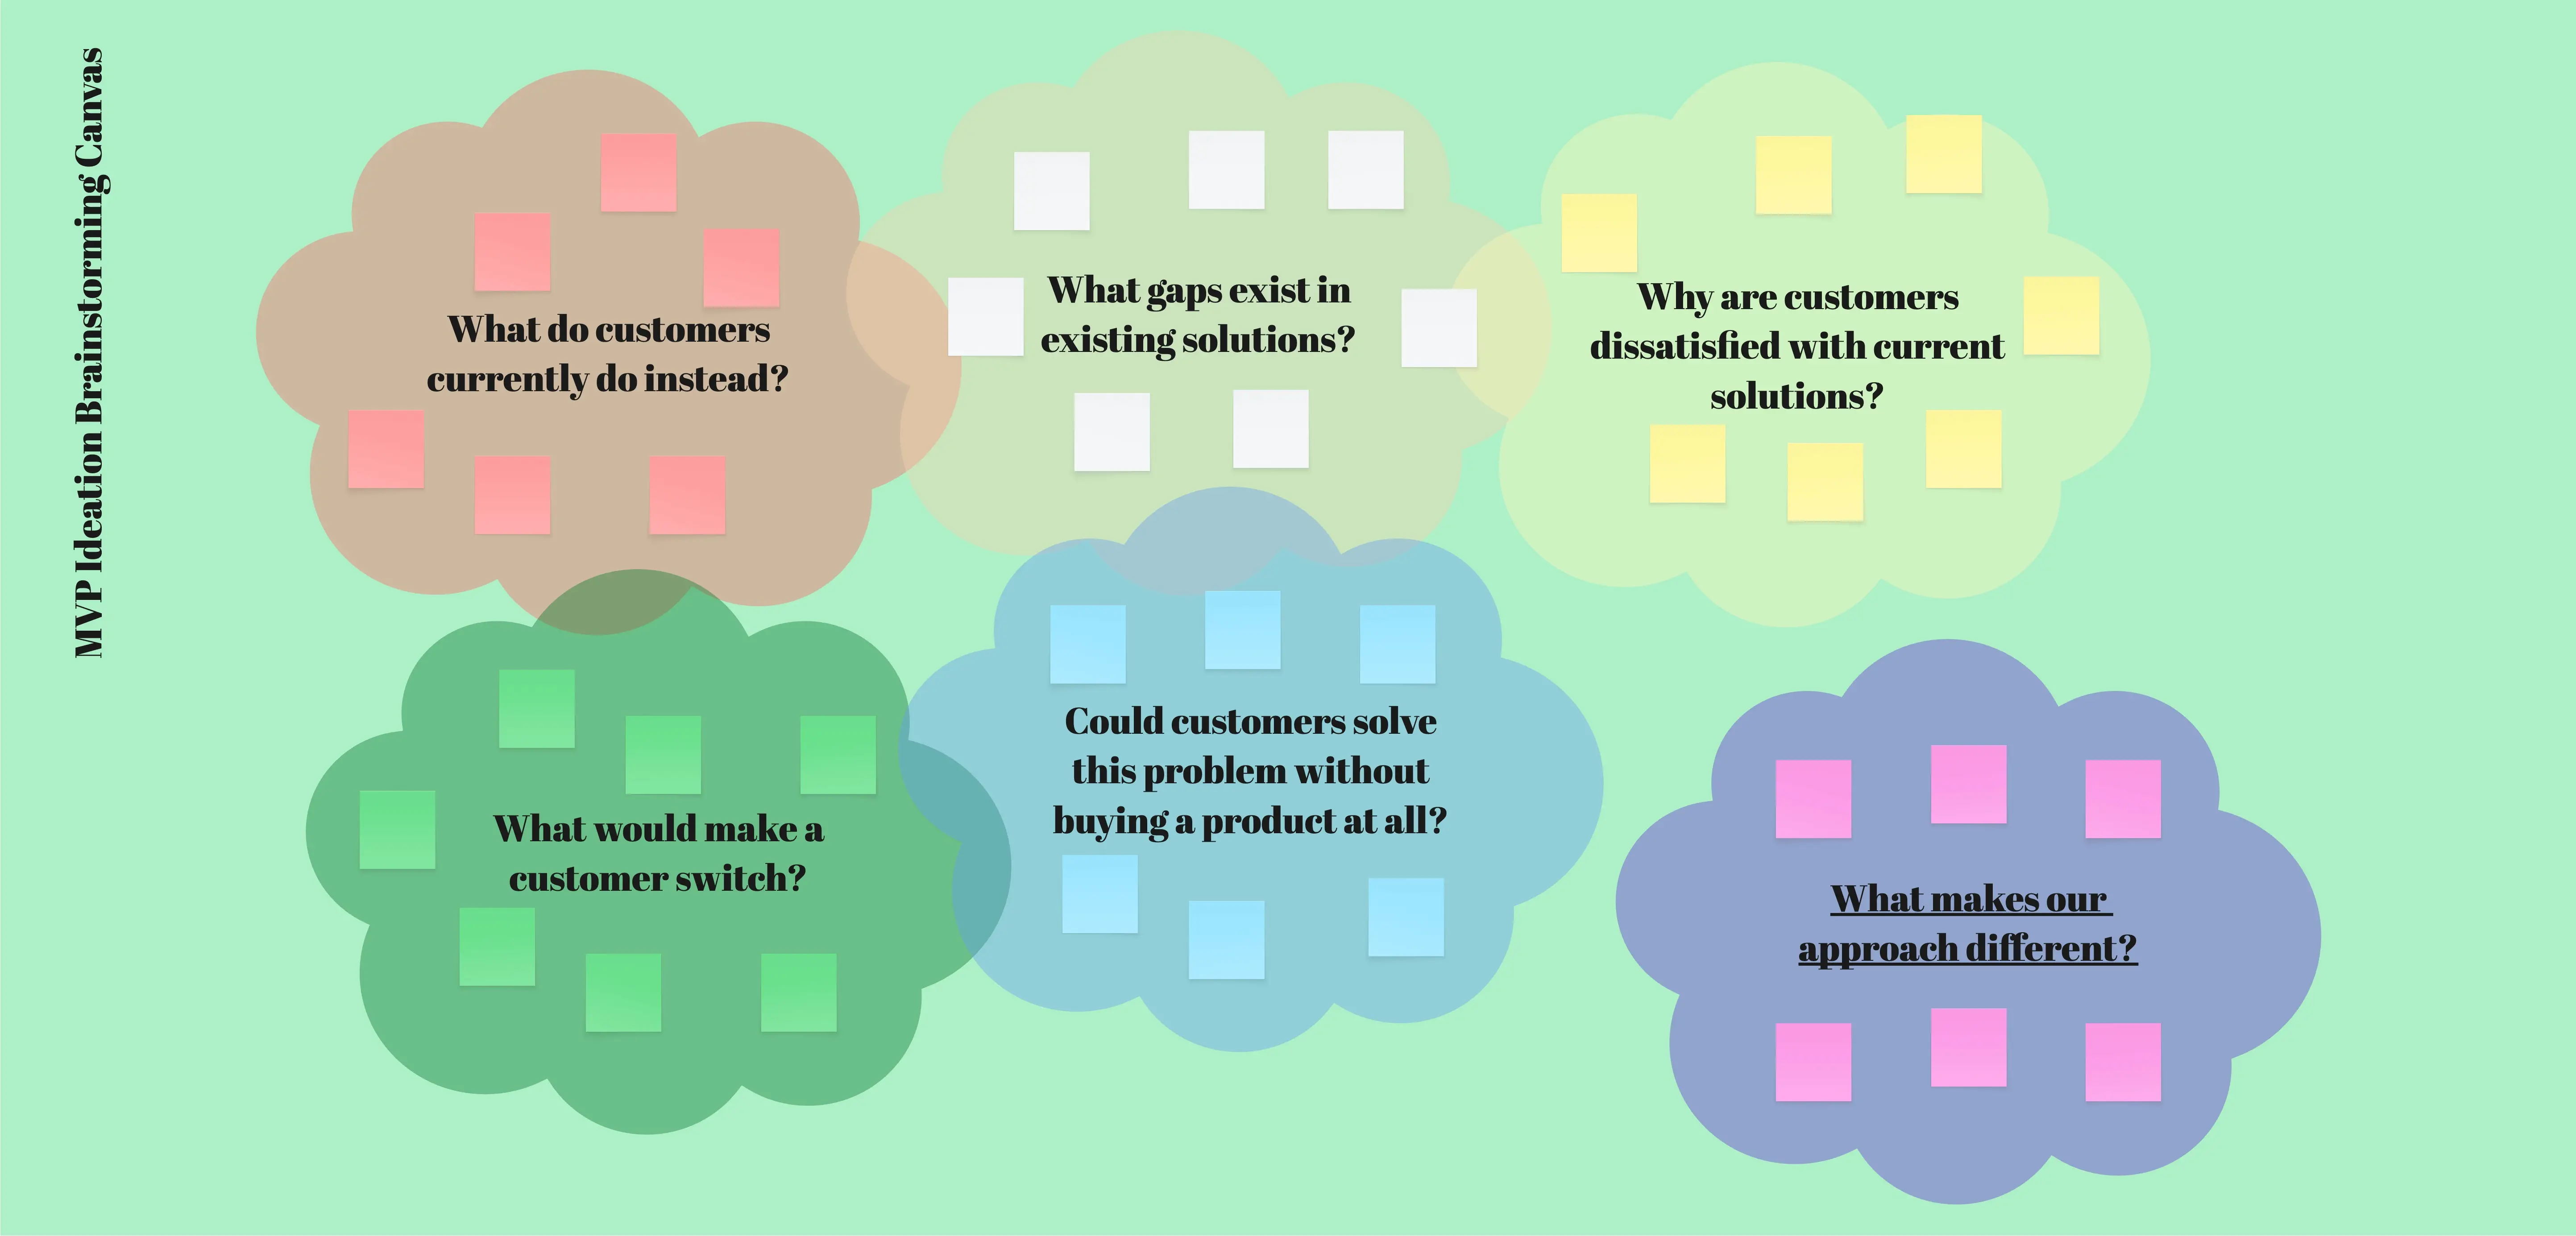
3. Brainstorm and Sift Features
Have the team freely drop feature ideas onto sticky notes. Once everything is on the board, systematically move them into your prioritization framework. Be ruthless: if a feature isn't mandatory for the user to achieve their primary goal, drag it below the MVP Slice Line.
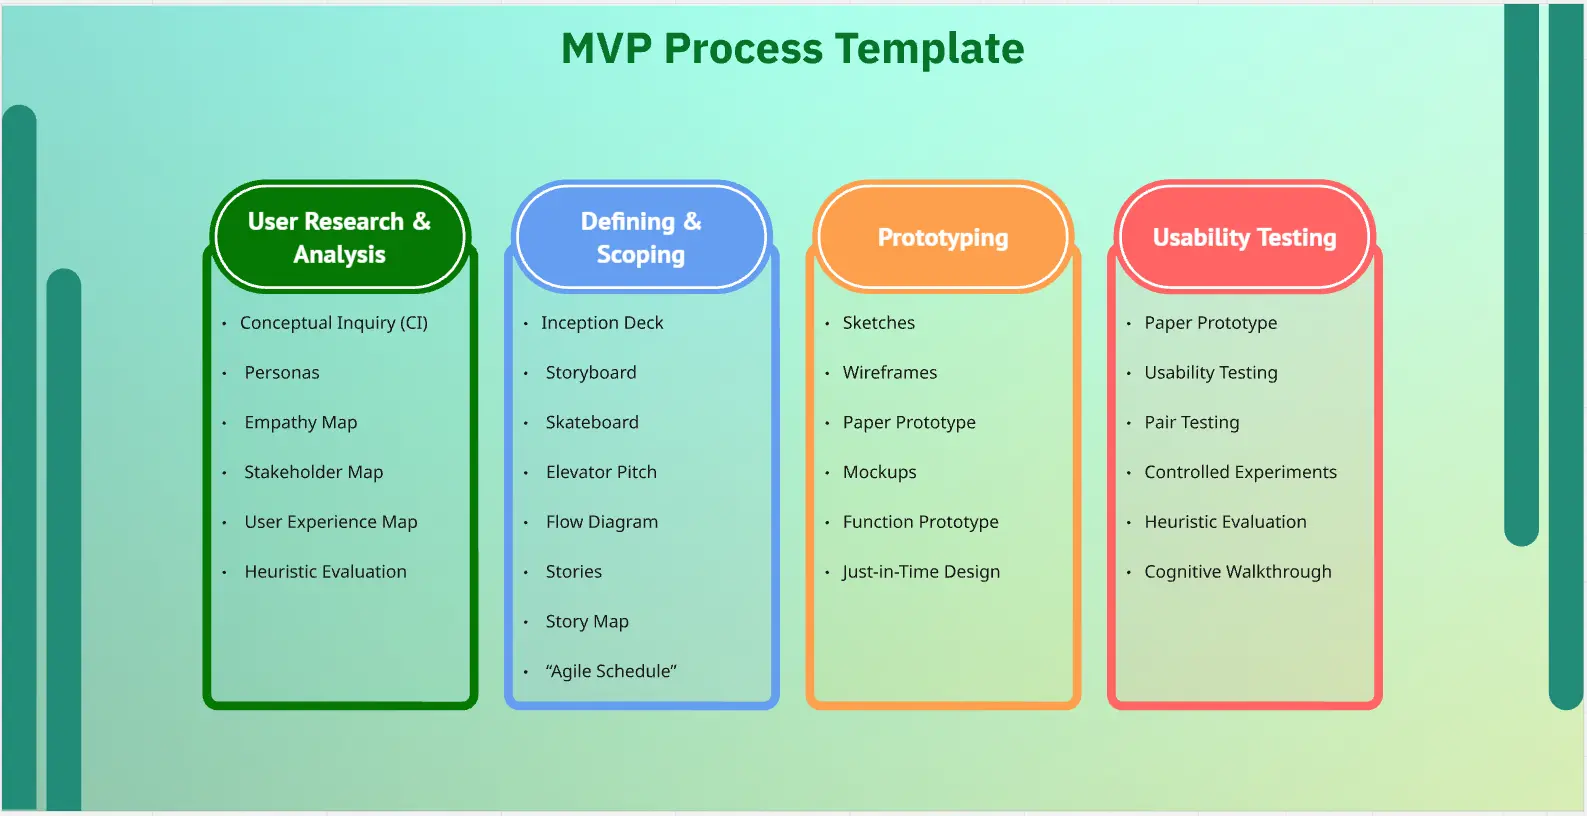
4. Choose Your Experiment Type
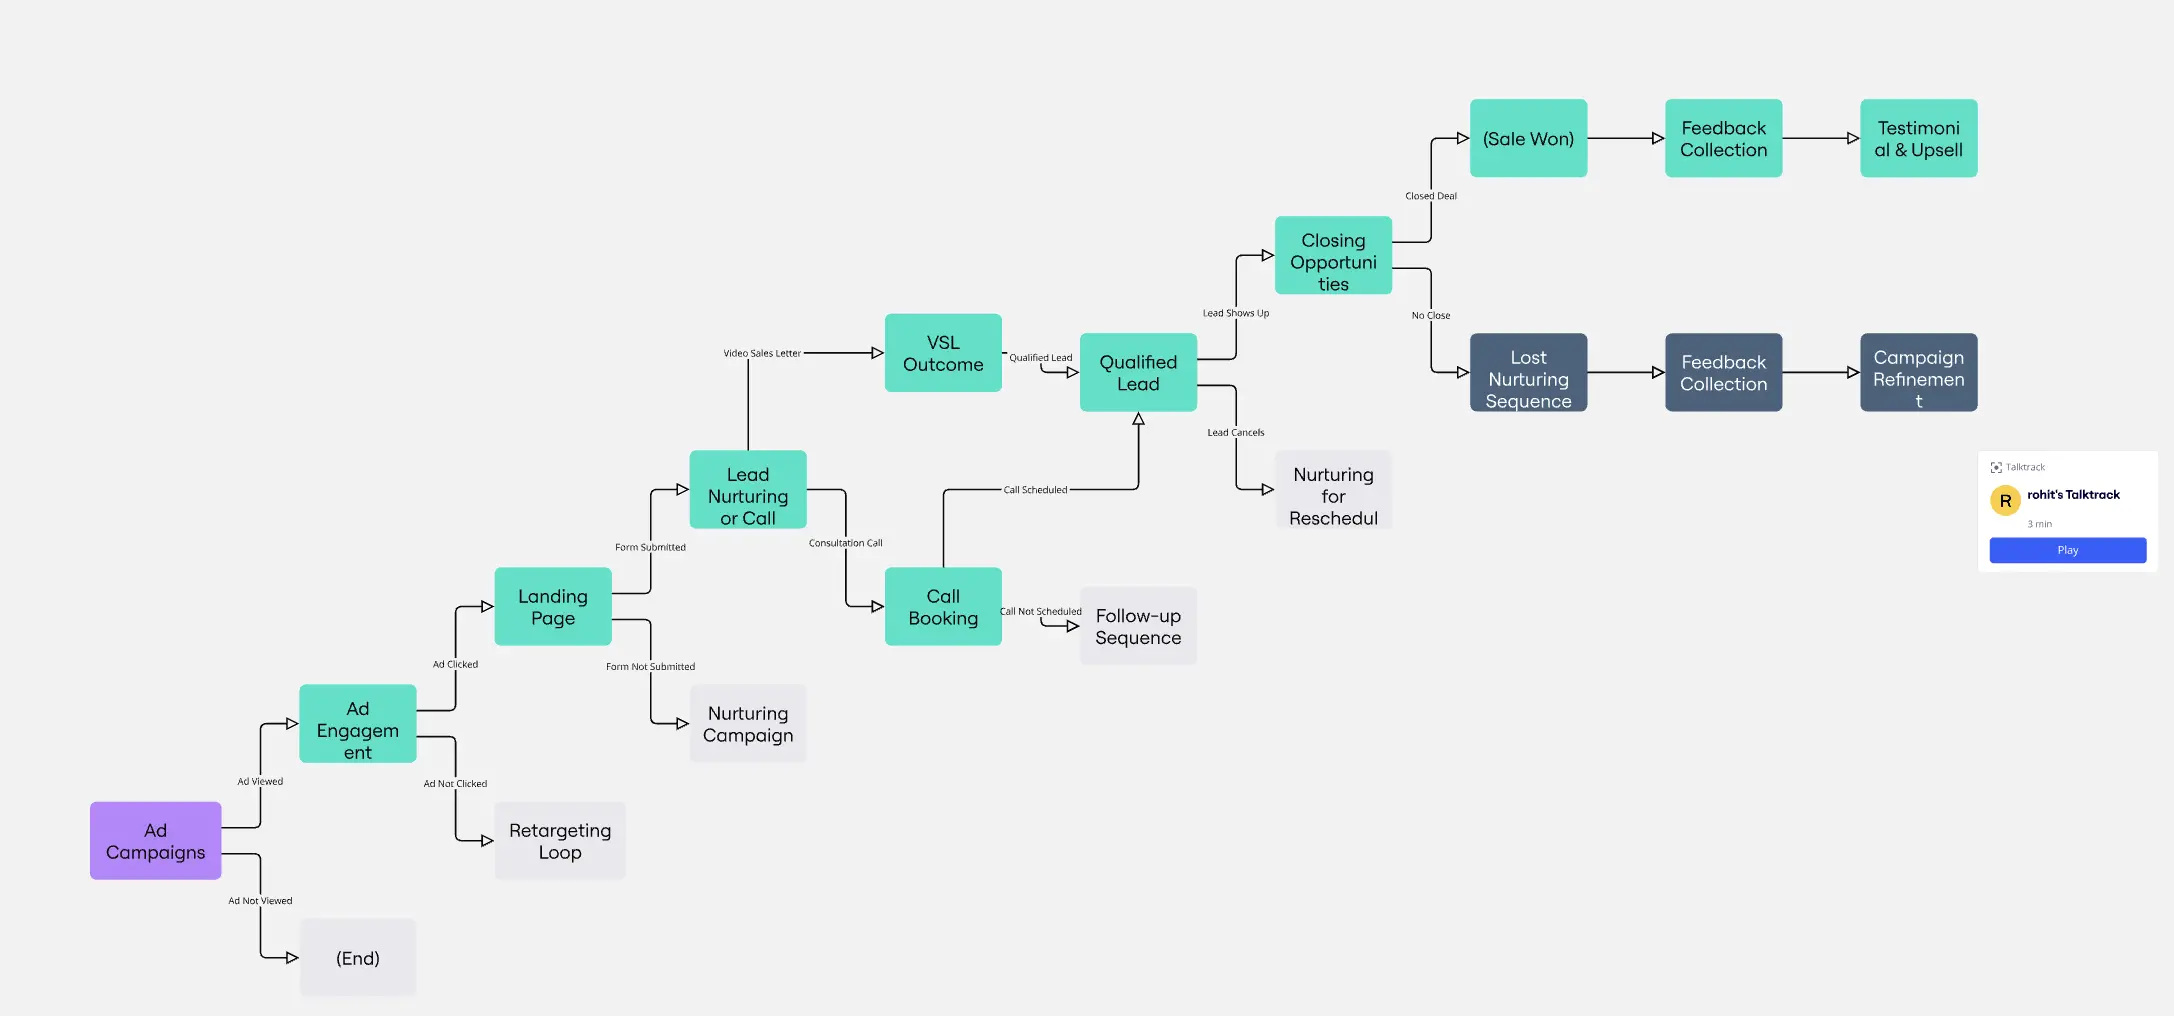
Review your prioritized MVP features alongside the MVP Typology Matrix. Ask the team: "Can we test this workflow manually or with off-the-shelf tools first?" Design your MVP experiment and sketch out the basic user flow directly on the canvas.
5. Establish Success Parameters
Before launching the experiment into the wild, explicitly write down your success metrics on the board using a bright, distinct sticky note. Setting these numbers in advance prevents retrospective bias (e.g., claiming a 1% conversion rate is "good" when your financial model actually required 5%).
6. Track, Learn, and Pivot
Once your MVP is live and gathering real-world data, bring the team back to the Miro board. Paste in the user metrics, feedback notes, and conversion data. Use this information to collaboratively decide your next strategic move: Persevere (keep building out the product), Pivot (change your angle based on findings), or Shelve (accept the lack of market fit and move to the next idea).