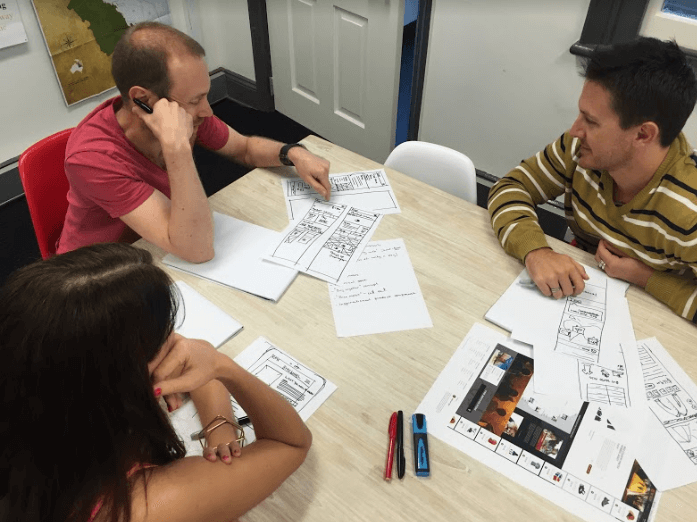

We at Miro love post-it notes, actually, we are fans. Recently we were inspired by the book Rapid Problem Solving with Post-It Notes written by David Straker. In this post we explain how to use online post-it notes for problem solving and focus on the methods described in the book: Post-up, Swap Sort, Top-Down Tree and Information Map.
Read our fresh post on how to improve your brainstorming sessions with better techniques, tips and rules.
Use your Miro post-it notes and creativity and go ahead!
Problem solving part 1. Step-by-Step guide for post-up in Miro
The first technique we are focused on is called Post-up, it provides methods for getting information into chunks. Post-up is based on four methods – Brainstorming, Brainwriting, Nominal group technique and Crawford slip method.
The Post-up method works in several dimensions. First, it allows people to work simultaneously, thus speeding the session and getting everyone engaged at once. It also gets people emotionally engaged as they are writing their own ideas rather than have other people write or interpret them.
Posting up one idea at a time by person ensures equality through the team and also allows that each idea is considered by all team members.
Try Miro for visual exercises – Sign up
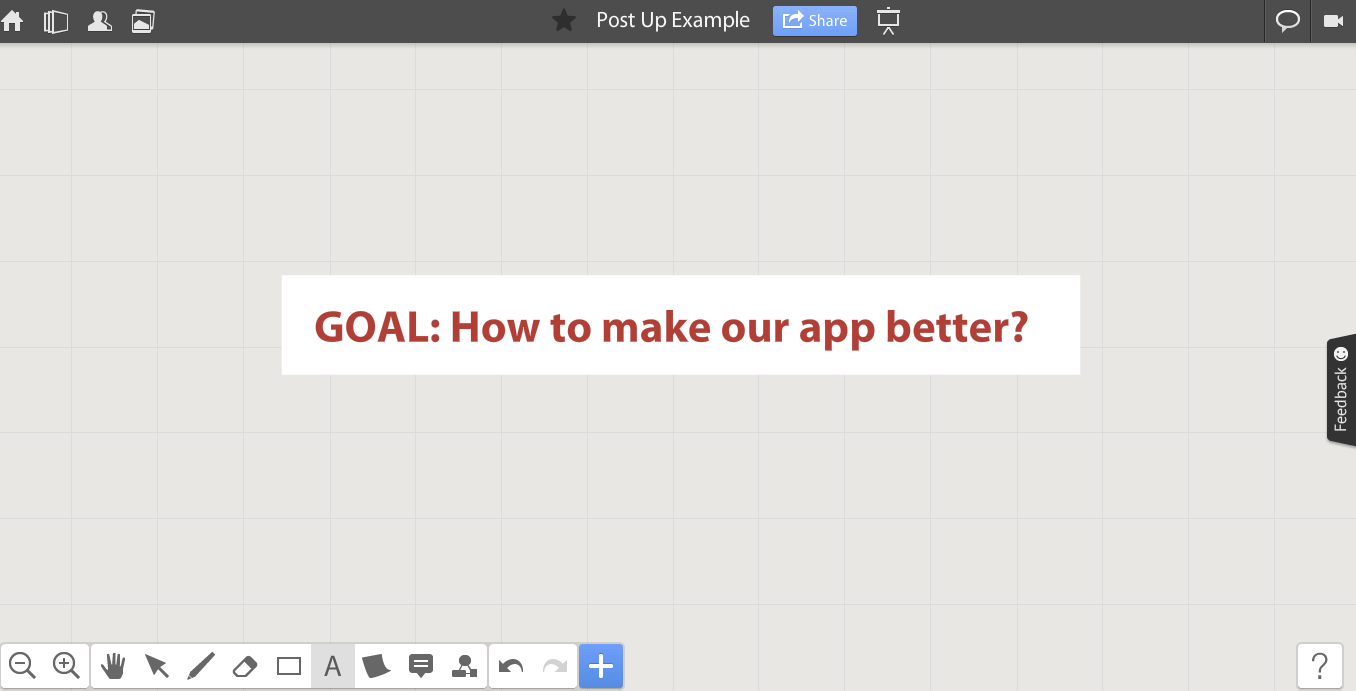
Step 1. Define the problem
First of all, you should decide about what are you trying to solve and make the problem visible for everyone. Use text tool and type your session goal. Let’s take ‘How to make an app better’ as the example.
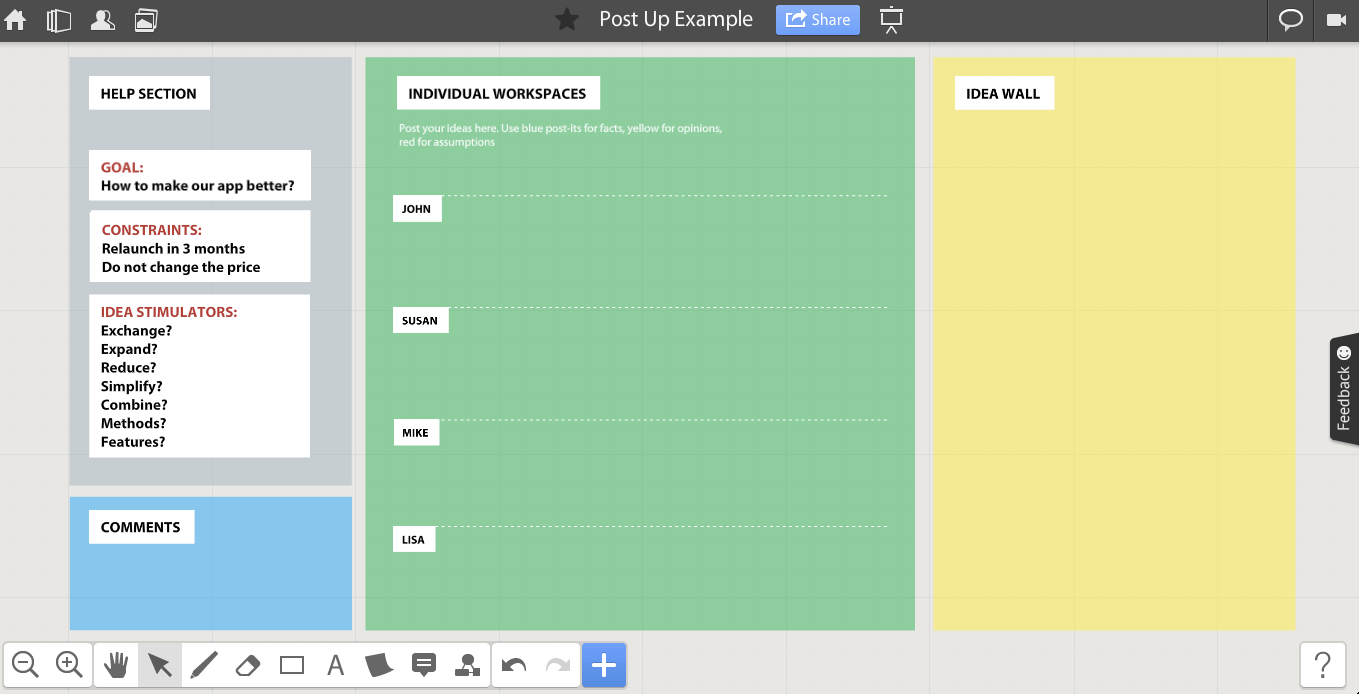
Step 2. Make special sections on your board
Divide your board into several parts using shapes, icons, and text tool:
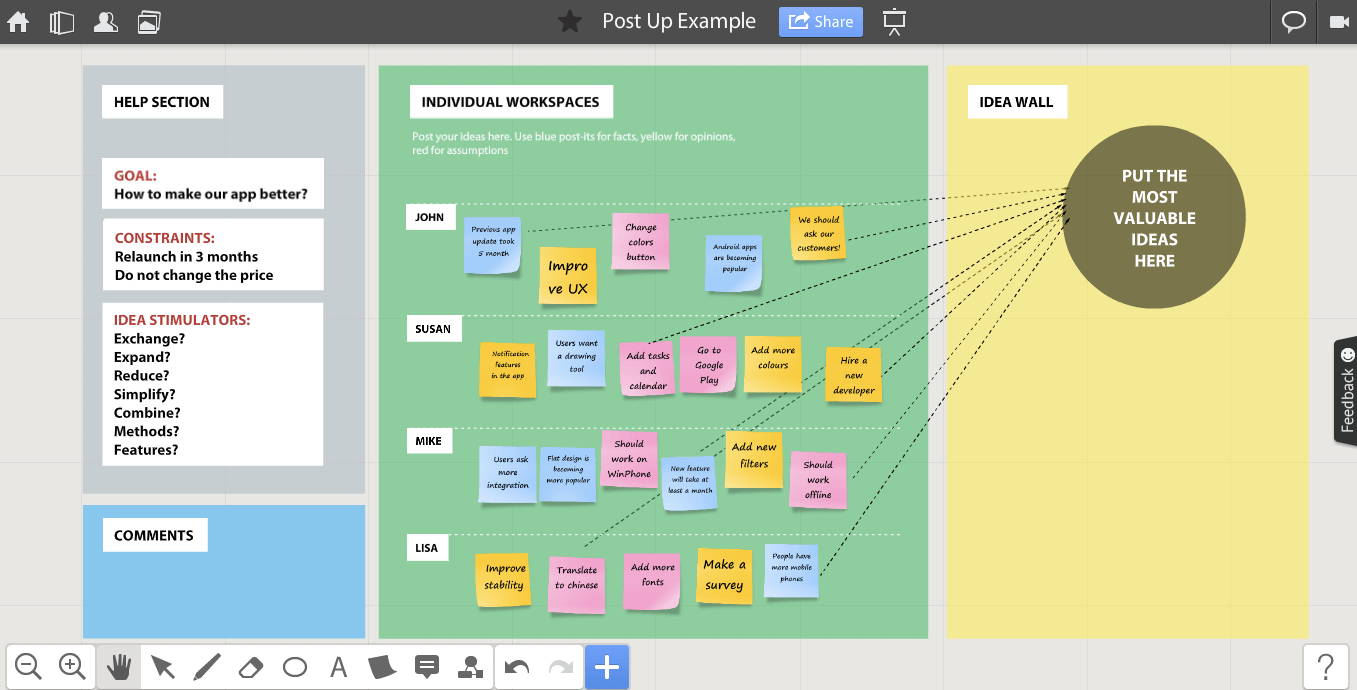
– Help section for Goals, Constraints, Idea Stimulators. Write them down before the start (we made it grey on the left).
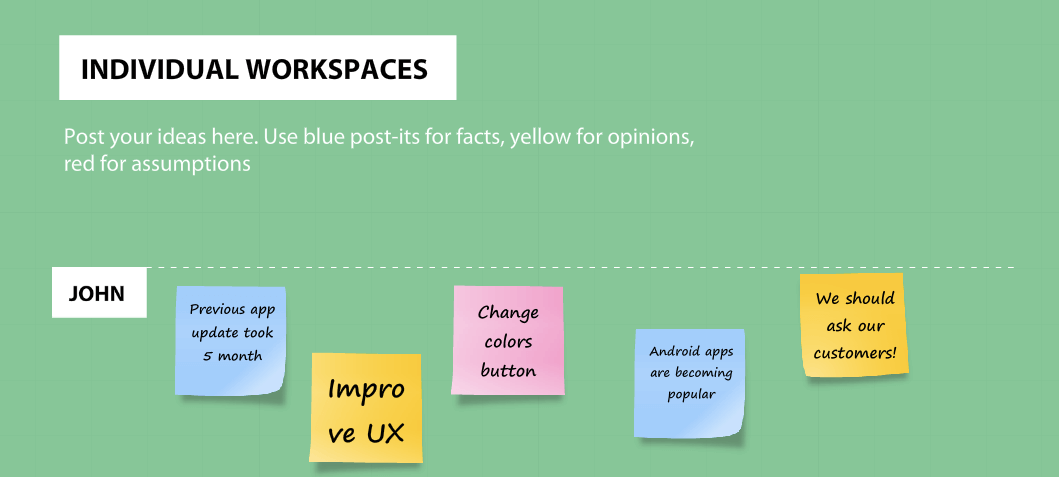
– Participants section – special individual zones where people can post their notes during the ideation process (green section in the middle, divided into 4 parts for 4 different people).
– Workspace for the best ideas (yellow section on the right side).
Try Miro for visual exercises – Sign up free
Step 3. Invite your team and explain the rules.
Invite your team to the board. The simplest way is to use “Share with the team” feature (if you have a Team account). Another way is to send them invites via email or add from friends list.
Tell them how to play:
– First, let people see the Goal and explore the help section.
– The only tool they should use is Post-It (key 7)
– Each post-it note should contain only one idea.
– Use color coding – blue post-its for facts, yellow for opinions, pink for assumptions.
No credit card required.
Step 4. Writing of ideas
Give your team some time to think and brainstorm individually (approx. 7-10 minutes, if you think they need more – give them more). They should not at this time stick their post-its to the common workspace.
Step 5. Post up ideas
The team then posts up their ideas on the ideas workspace. A good way of doing this is to have each person take turns to post one – the most valuable – idea.
If any idea triggers other ideas for anyone in the team, they can write them on more post-its and add them to their individual section. When all ideas are posted, then you can also use other creative methods to generate even more ideas (we put it into comment section).

Problem solving part 2. Step-by-step guide for Swap Sort in Miro
This part is devoted to the next technique – Swap Sort, which is based on Bubble sort, Paired comparison and Prioritization matrix templates. Swap Sort is extremely useful when you need to put a set of ideas into priority order.
Use it only when you have relatively few items to prioritize (not hundreds, really). If too many, it may become a trouble. You can try Post up or other techniques to identify ideas for prioritization.
We always make decisions by comparing and contrasting. Taking two items at a time, as in this swap-sort creates focus and attention on just those two items, making decisions as to which is more important easier.
The pattern of repeated comparisons and exchanges comes from computing, where it is known as a ‘bubble sort’. Swap sort takes the same concept and brings it to the board with post-its.
Step 1. Identify the problem
First of all, explain your team what problem you are trying to solve. We’ll take the previous case devoted to the app improvements. Now our goal is to decide what will be the order of the selected improvements. Take a look at the picture below.
You can continue working on one of your brainstorming boards or use your offline brainstorming results.
Step 2. Make special sections on your board
Use text tool, shapes, icons and anything that will help you to visualize. You should have the following spaces:
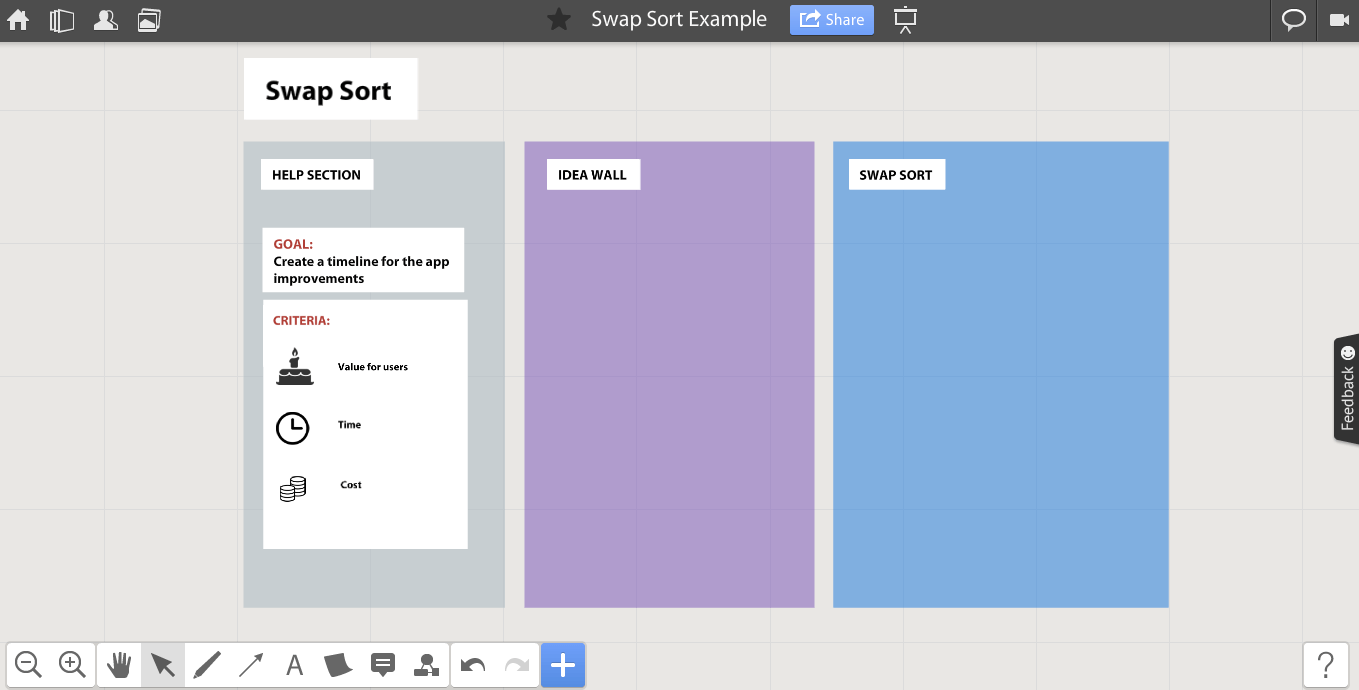
– Help section with the goal and criteria.
– Preparation zone where you put the all the ideas written on post-its.
– Workspace for swap sort and final results.
Step 3. Identify the criteria
Identify the criteria that you are going to be using to prioritize. These should be relatively few. One is just fine. Three is ok. Five is rather a lot.
Write them on Post-it notes and put these into priority order (use help section), using a ‘mini’-swap-sort. Then reference these for every comparison exchange.
Step 4. Invite collaborators
If you had a brainstorming session already, you can continue to develop the ideas and concepts with the same people or invite independent experts.
Use chat or video/voice chat (if you have Team or Pro account) if your team works remotely.
Step 5. Pairwise swapping
Write the items that you want to compare on Post-it notes. Shuffle them so they are not in any ‘leading’ order, then place them out in a line (vertically is often the best, though a horizontal line is just fine).
Now take the first two items and compare them. If the higher one (in a vertical setting) is more important than the lower one, then swap them.
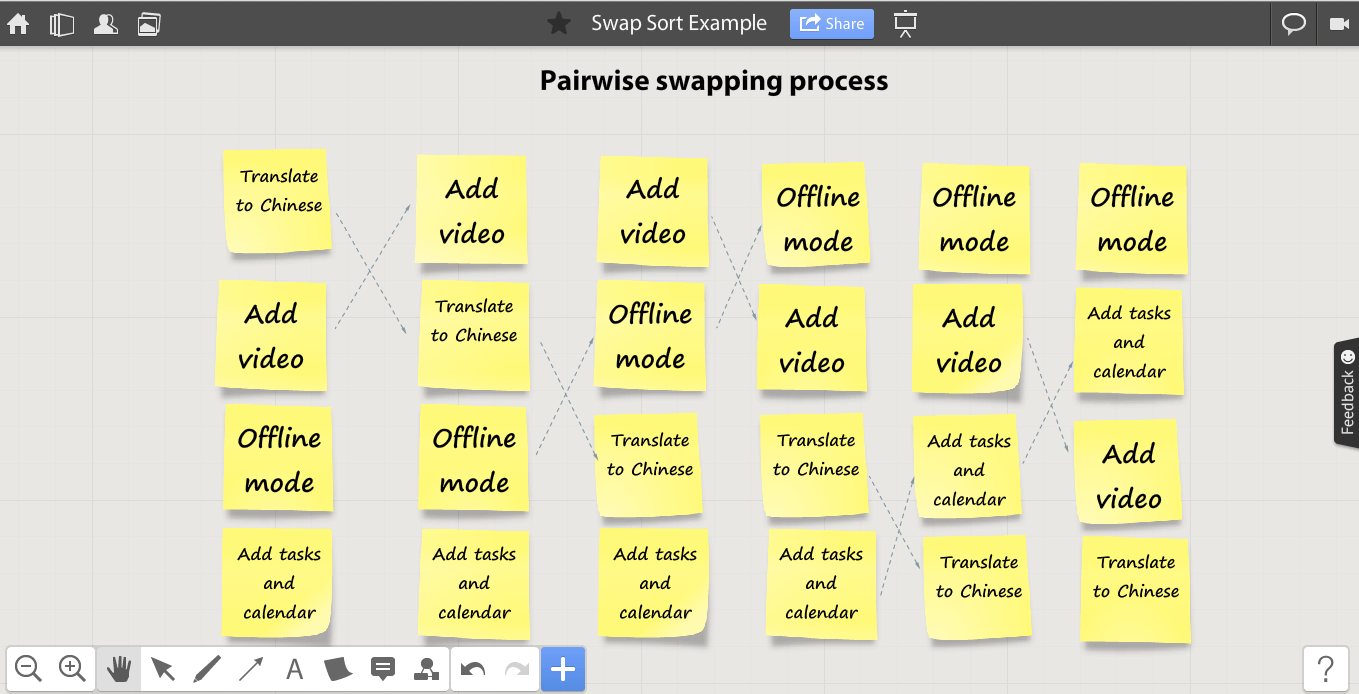
Then repeat this comparison and possible swap with the second pair, third pair and so on until you get to the bottom. Put the result on the right.
Don’t use color coding or post-its of different size in order to avoid misunderstanding or wrong prioritization.
Problem solving part 3. Step-by-step guide for Top-down Tree in Miro
This part is devoted to the next problem solving technique – Top-down Tree. This method is based on Tree Diagram, Why-Why Diagram, How-How Diagram and Process Decision Program Chart.
Top-down trees are used to break problems down into constituent parts with increasing levels of detail and are useful when the problems is fairly well known at a broad level, but complex. So, this technique works well when the nature of the problem is unknown and you need to find more details to solve it. Top-down tree is well-structured, that’s the distinctive feature of the method.
Short glossary
Node – a tree element (one post-it in our case)
Root – the starting node
The names of relationships between nodes are modeled after family relations:
- A node’s “parent” is a node one step higher in the hierarchy (i.e. closer to the root node) and lying on the same branch. “Child” is lower than parent.
- “Sibling” (“brother” or “sister”) nodes share the same parent node.
- A node’s “uncles” are siblings of that node’s parent.
- A node that is connected to all lower-level nodes is called an “ancestor”. The connected lower-level nodes are “descendants” of the ancestor node.
How to visualize trees – different approaches
We consider five of them for top-down trees – top-down, star, comb, right to left and fishbone. Take a look at them.
Step 1. Define the goal
First of all, think about the problem you are trying to solve and invite the participants. As you can remember from the previous posts, we are trying to find out how to improve the app. The goal of this brainstorming session will be to define the key factors, which affect the app popularity among users.
Step 2. Make special sections on your board and prepare the questions
Use text tool, shapes, icons and anything that will help you to visualize your sections on the whiteboard. You should have the following spaces:
– Help section with the goal and questions.
– Preparation zone where you put the all the ideas written on post-its
– Workspace for top-down tree and final results.
Step 3. Write the key question on the root post-it note
Use the goal from the first step to identify problem. For example, in our case the problem may be “people don’t use our app for entertainment”. Write the problem on a post-it and place it on your workspace. This will be the root node, and all the others will be children. We have chosen the top-down structure and put the root node on the top.
Step 4. Define children nodes
Ask the questions from the help section to identify the children and write them on post-its. You can initially put them on idea wall.
Step 5. Link the nodes
Link the nodes (parents and children) between each other and define families. Now you will be able to see the whole tree structure.

Step 6. Check the whole tree
When you finish the work on your tree, check if it is complete (it answers every question from the help section), clear (relationships between parents and children are obvious), and useful (helps to achieve the initial goal).
Analyze the results and add necessary comments/decisions.
Problem solving part 4. Step-by-step guide for Information map in Miro
We have already reviewed 3 useful methods – Post-up, Swap Sort and Top-Down Tree, which are great for generating ideas and prioritizing them. Now we will talk about Information map. This method is based on Relations Diagram, Mind Maps, Entity-Relation Diagram and State-Transition Diagram.
How it works
Information map is useful when you need to find interrelations between different elements. Use Information map when you know (or at least suspect) that different elements have interconnections between each other. This tool is extremely useful during creative sessions when you have no strict structure and need to connect the dots.
Information maps can reflect not all the possible interconnections, and in order to discover some hidden but important things you should act consequentially asking the questions which will lead to the goal. Note that maps are not so well-structured as trees.
When you are building interrelations, consider some important points you can face with:
- Chain of post-its with one arrow between each node. This means that the elements have straight connection, and if you exclude the first one, the last will never happen.
- Bottleneck. If one post it has a lot of ‘input’ arrows, and only few of ‘output’ arrows, this means you have a so-called bottleneck, which potentially may cause incidents.
- Source. Post-its which have only output arrows are called sources (these can be information sources, suppliers, etc.)
- Stocks. These are post-its that have only input arrows (i.e. information stocks).
No credit card required.
Step 1. Define the goal
First of all, think about the problem you are trying to solve and invite the participants. As you can remember from the previous posts, we are trying to find out how to improve the app. The goal of this brainstorming session will be to understand the connections between app updates growth of popularity.
Step 2. Define the principles
What question will you use to find related elements? Note that the question should contain a verb, which will describe the characteristics of relations (i.e. induce, connect, improve etc.). Our question is “What factors affect the growth of app popularity?”
Step 3. Make special sections on your board and prepare the questions
Use text tool, shapes, icons and anything that will help you to visualize your sections on the board. You should have the following spaces:
– Help section with the goal and questions.
– Workspace where you put the all the ideas written on post-its
– Zone for information map and final results.
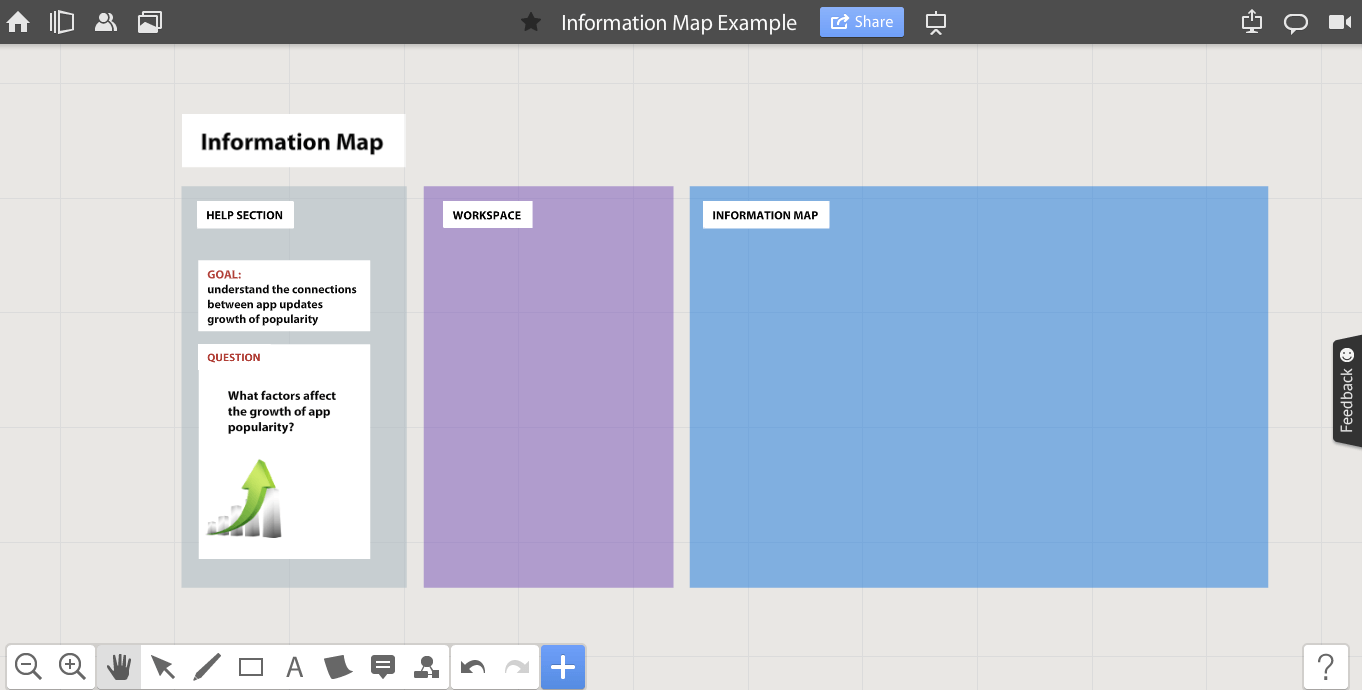
Step 4. Find the root post-it
Find the root post-it and put it in the center of your workspace. In our case the root will be ‘Growth of app popularity’. Use another color or mark-up tools to make this post-it special and visible.
Step 5. Find interrelations
Start asking questions to find from the Step 2 to find the related pieces of information. When you collect some, place them around your root post-it note.
Step 6. Repeat the previous step to find more post-its
Repeat the previous step to find more related elements asking the question from step 2. Place the new elements around related post-its. Leave enough space between post-its to add links between them.
Step 7. Add arrows (links) to show the connections
When you are finished with the post-its, add links between them (use the Link tool on the tools panel below. If you see that the elements don’t have straight connection, but one affects another, use another type of the link.

Step 8. Check the map
Check the whole map, review the connections, correct if necessary and be ready to make decisions.
Well, now aftre we have revised for ultimately effective ways to use post-it notes for problem solving, hope you are inspired enough to practice it and solve your problems using Miro’s visual workspace. Don’t forget to invite your team and conduct a real-time brainstorming session to make your problem solving 100% effective.