
Table of contents
Table of contents
How to make a prototype
Summary
In this guide, you will learn:
- Define clear goals and questions for prototyping.
- Consolidate customer data for prototype insights.
- Use AI tools for data analysis and journey drafts.
- Visually map and collaborate on prototypes with Miro.
- Use techniques like affinity mapping to identify pain points.
- Integrate AI insights with Miro for design improvements.
So, you want to make a prototype? Here’s how to get it done (and done well)
Do you have a promising idea taking shape? That's excellent. But how do you effectively demonstrate its potential without immediately committing to months of development and significant investment? This is precisely where the value of prototyping becomes clear. If you're looking into how to make a prototype, you've come to the right place. We're about to explore the essential knowledge for transforming those insightful concepts into something tangible, testable, and ready to impress.
Collaborative AI Workflows
Join thousands of teams using Miro to build the right thing, faster.
First things first: why is creating a prototype so important?
It can be appealing to dive directly into the full build, can’t it? However, pausing to create a prototype is often one of the most strategic decisions you can make. Consider it a key asset in your product development toolkit. Prototypes enable you to test your ideas at an early stage, identify potential challenges before they escalate into costly issues, and gather vital feedback when adjustments are still straightforward. Furthermore, they are exceptionally useful for aligning your team and any stakeholders. A visual representation is often the most effective way to communicate an idea. And in today's dynamic environment, a tool that facilitates this process quickly and collaboratively, like Miro, can be a significant advantage.
Before you even think about sketching: setting the stage for success
Beginning the design process without a clear plan is much like navigating without a map – you might eventually reach a destination, but it likely won’t be the one you intended. Let's cover the foundational work that ensures a smoother prototyping journey.
What’s the core objective? Nailing down your prototype’s goals
Before you make a single mark, ask yourself: What exactly do I want this prototype to achieve? Are you aiming to validate your fundamental concept with users? Do you need to assess the usability of a particular feature? Or perhaps you're preparing to secure buy-in from investors. Identifying your primary goal helps you determine what to include in your prototype and the necessary level of detail. This clarity prevents misdirected effort and keeps your prototyping focused and efficient.
Who are you building this for? Developing a deep understanding of your users
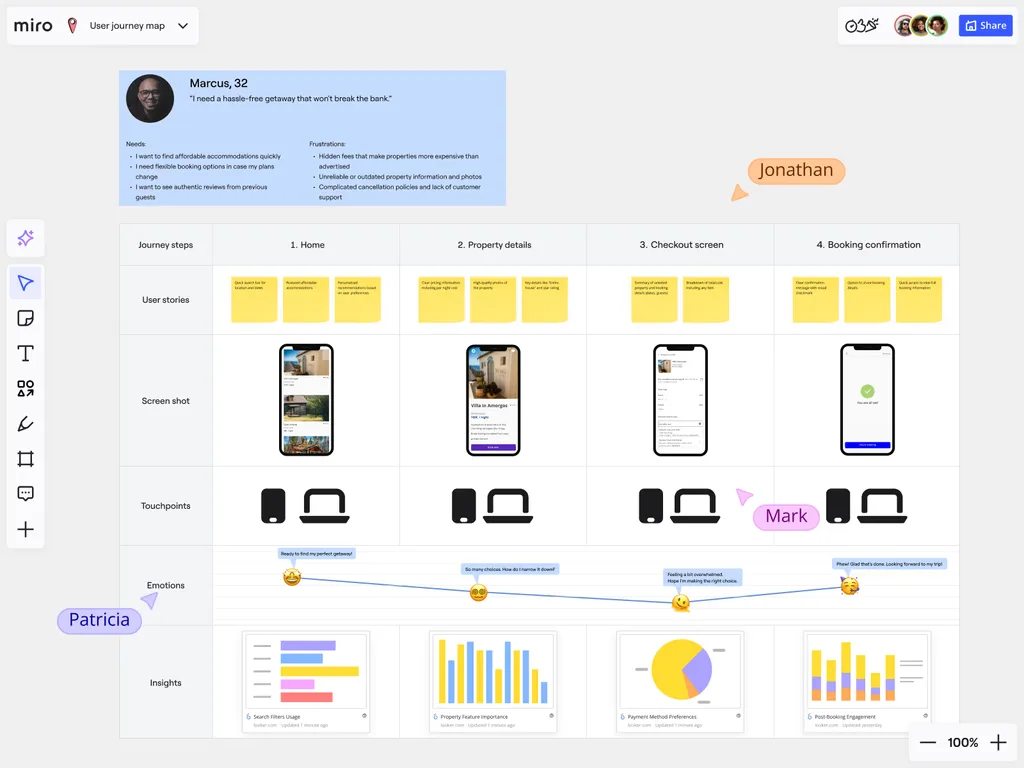
Your product isn’t being created in isolation. To create a prototype that truly resonates, you need a solid understanding of the people who will ultimately use it. What are their specific needs? What problems are they hoping to solve? What are their motivations? Investing time in user research now – through methods like targeted surveys, brief interviews, or developing user personas – offers substantial benefits later. It ensures your design decisions are centered on their requirements, not just your assumptions. Our intelligent canvas offers excellent features for consolidating this research, crafting empathy maps, and keeping user personas visible and accessible. Miro's visual planning capabilities are particularly helpful here, allowing you to clearly map out user journeys and pain points.
What’s in, what’s out? Defining your prototype’s scope
It’s natural to want to include every innovative feature idea in your prototype. However, it's wise to resist this inclination. Especially in the initial phases, concentrate on the core functionality – the essential elements that directly address your primary objective or the key concept you're testing. This approach keeps the prototype manageable and makes it easier for users to provide focused, relevant feedback. You can always incorporate additional features in later iterations. Deciding on the appropriate level of detail, or fidelity, for the current stage is also a critical consideration.
Let's get building: The essential steps to follow to make a prototype
Now that you’ve laid the groundwork, it’s time for the engaging part: bringing your prototype to life. Here are the fundamental steps to follow to make a prototype, keeping in mind that this is often an iterative cycle of refinement, not just a linear progression.
Step 1: Encourage idea generation through effective brainstorming
This is the phase where you and your team can explore a wide range of possibilities. Consider techniques like sketching, mind mapping, or creating storyboards that illustrate how someone might interact with your product. The aim is to generate many initial thoughts and concepts without premature filtering; often, the most unconventional ideas can lead to the most innovative solutions. Focus on quantity and broad exploration before you begin to narrow your focus.
Step 2: Choosing your level of detail – matching the tool to the task
"Fidelity" in prototyping refers to how detailed and polished your prototype will be. There isn't a universal answer; the best fidelity depends entirely on your specific goals for the prototype.
- Low-Fidelity (Lo-Fi) Prototypes: Think of these as quick, foundational representations. They include paper sketches, basic digital wireframes, or even interactive mockups created from rough drawings. Lo-fi prototypes are excellent for testing core concepts, exploring different layouts, and gathering early feedback on user flow. Because they aren't highly polished, users often feel more comfortable providing honest, critical feedback.

Miro Tip: You can create a prototype very rapidly in Miro by simply photographing your paper sketches and linking them to demonstrate a sequence. Or, even more efficiently, use Miro AI to transform those sketches, existing screenshots, or a collection of digital stickies into editable wireframes almost instantly. This is a prime example of rapid prototyping.
High-Fidelity (Hi-Fi) Prototypes: These prototypes look and function much more like the final product.
They typically incorporate more visual details (such as colors and branding elements), realistic content, and interactive features like clickable buttons and animations. Hi-fi prototypes are well-suited for usability testing, refining specific interactions, and presenting your vision to stakeholders who require a more concrete representation.
The advantage of the prototyping process is that you can (and often should) begin with lo-fi versions and progressively increase the fidelity as your ideas become more defined and validated. Miro’s flexibility allows you to transition smoothly between these stages, often within the same board if that suits your workflow.
Step 3: Wireframing it out – creating the blueprint for your idea
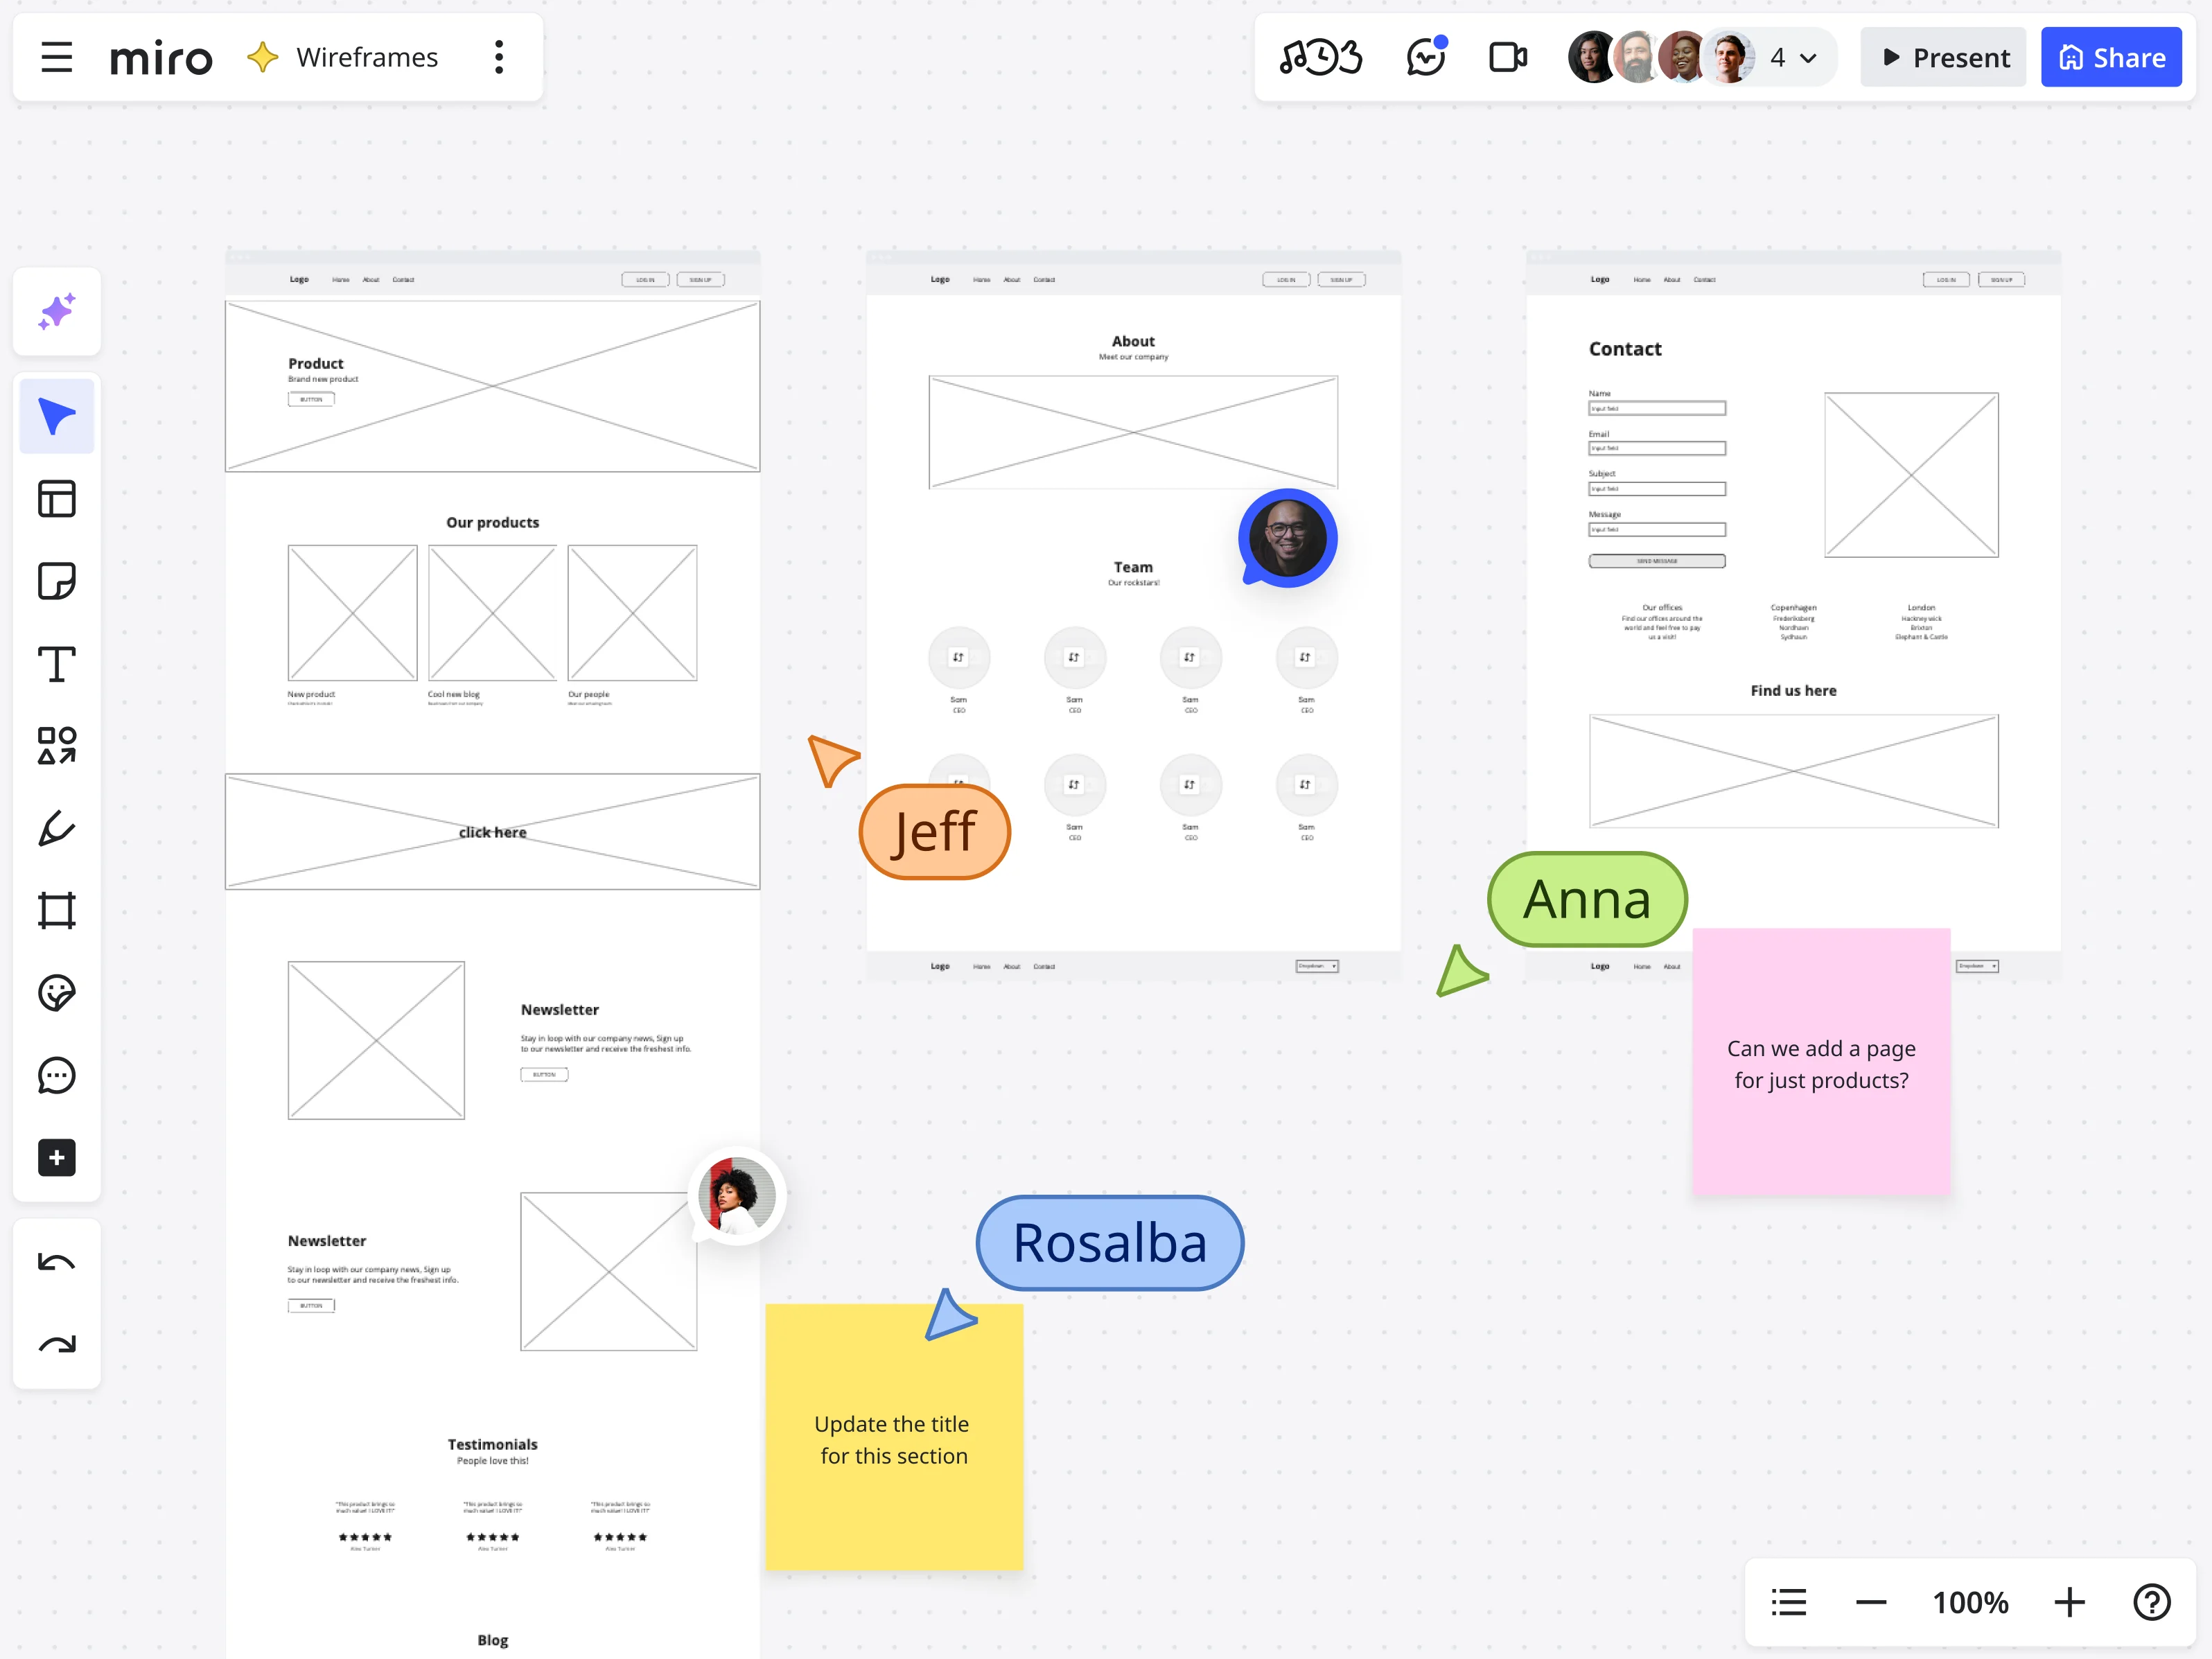
If you're developing a digital product, wireframes are invaluable. They are simple, often monochrome, layouts that concentrate on structure, information hierarchy, and the user's navigation path through your product. Consider them the architectural blueprints for your application or website. They help you determine the placement of elements and their connections before investing time in visual aesthetics.
When you create a prototype in Miro, you can use our dedicated wireframing library, which is filled with common UI elements. It's a simple process of dragging, dropping, and connecting.
Step 4: Adding refinement – designing the interface and interactions (for mid to hi-fi)

Once your fundamental structure is solid, and if your objectives call for it, you can begin to focus on the visual design and how users will actually interact with your prototype. This is where you’ll consider:
- Visuals: Colors, typography, imagery, and other design elements that reflect your brand identity.
- Interactions: What occurs when a user clicks a button, swipes a card, or completes a form? Define these user flows and transitions.
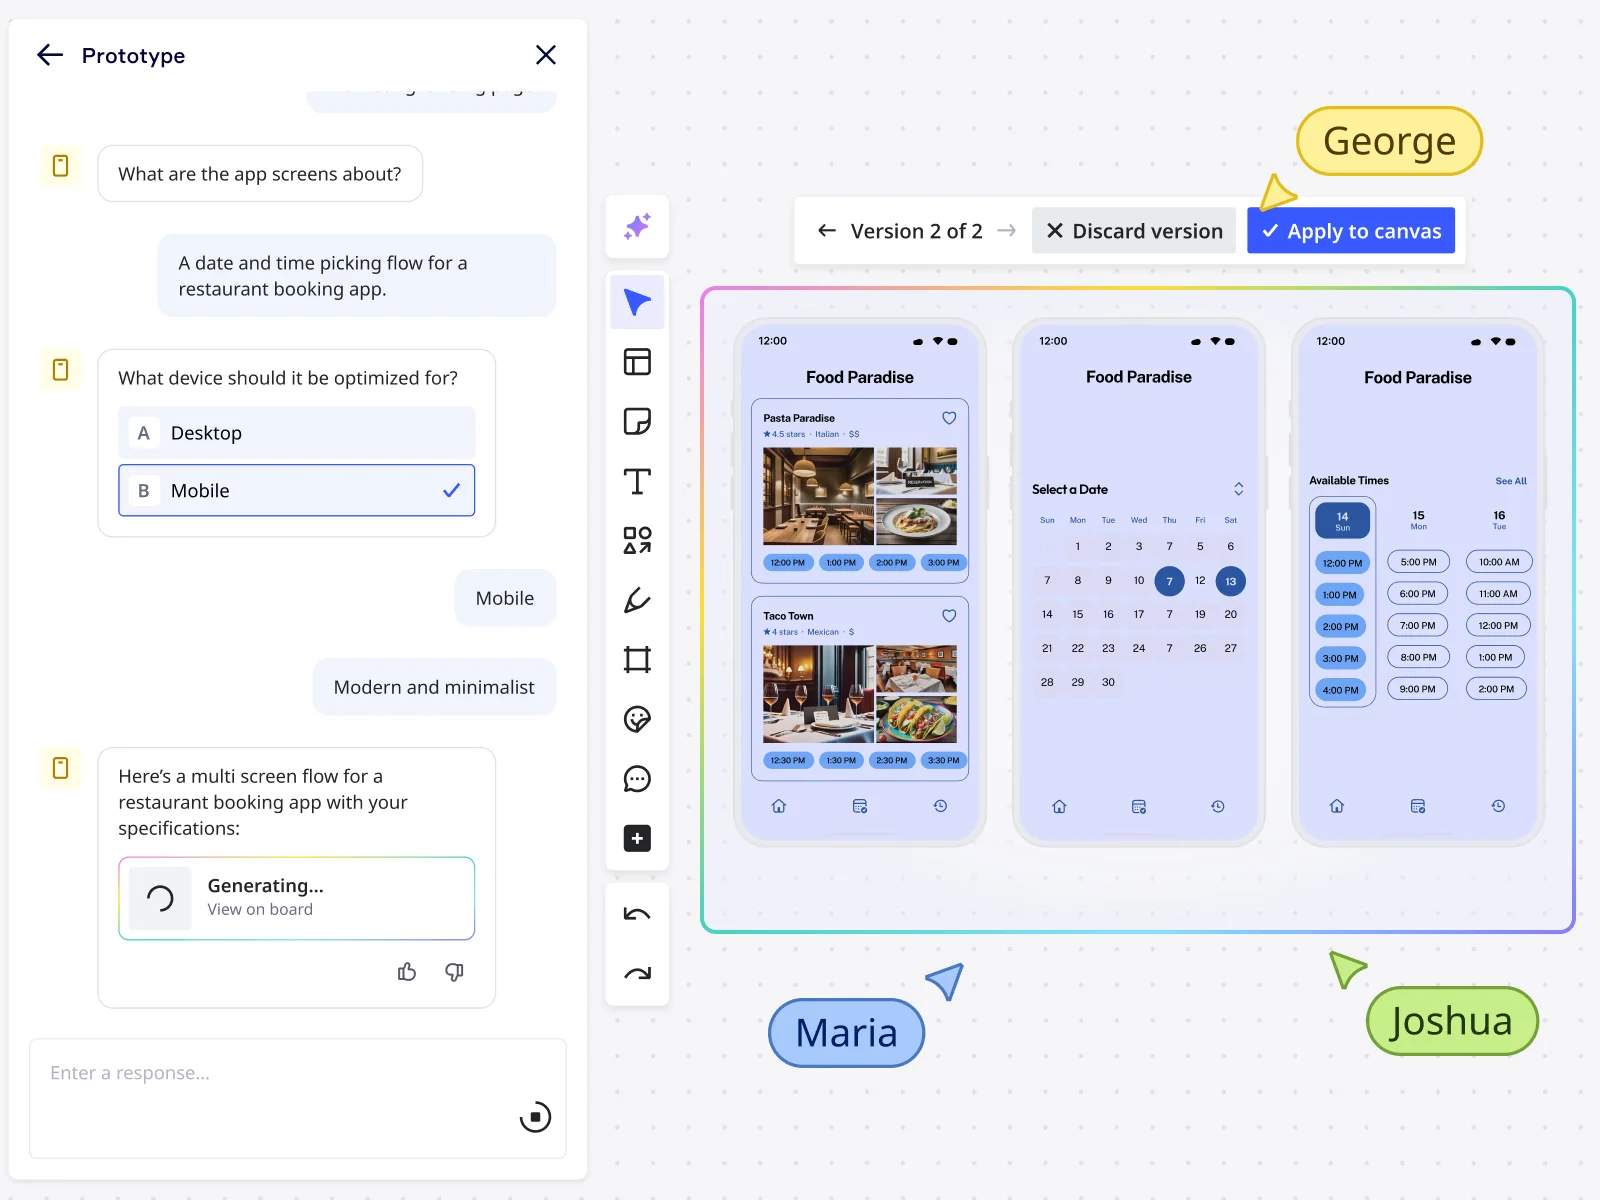
This is a critical part of learning how to make a prototype that feels realistic enough for effective testing. In Miro, you can make your designs interactive by linking different screens or objects to simulate a click-through experience. You can import designs from other platforms or build them directly within Miro. And remember the Miro AI capability? It can generate editable, interactive prototypes from your prompts, offering a significant head start on this step.
Step 5: Putting it to the test – time for some real-world feedback
You’ve constructed a prototype – now it’s essential to see if it effectively meets user needs. Testing your prototype is arguably the most crucial step. Present it to your target users, stakeholders, or even colleagues who haven't been directly involved in its design. Observe their interactions. Pose questions. What aspects are unclear? What do they particularly like? Where do they encounter difficulties?
The feedback gathered during this phase is exceptionally valuable. It helps you identify usability issues, validate your design choices, and uncover insights you might have otherwise overlooked. And because Miro simplifies sharing, you can distribute a link to your prototype, and testers can provide comments and feedback directly on the board. This centralizes all information, which is a significant advantage for efficient iteration, especially with our real-time and asynchronous collaboration features.
Step 6: Iterate and refine – the cycle of improvement
Prototyping is rarely a single, linear process. Based on the feedback you receive, you will likely want to make adjustments. Perhaps you need to modify the layout, simplify a workflow, or clarify instructions. This iterative process is fundamental to prototyping. Make those adjustments, re-test if necessary, and continue to refine your prototype until it effectively achieves its purpose.
Because Miro is such a flexible workspace, making these iterations is straightforward. You can quickly duplicate boards or frames, experiment with different versions, and track your changes without losing previous work. This speed is critical; the faster you can iterate, the faster you learn, and the more informed your design choices become. Miro genuinely assists in getting prototypes developed quickly, enabling faster and more intelligent iteration cycles.
Pro tips for making prototypes that truly shine
Looking to elevate your prototyping skills? Here are a few additional suggestions:
- Start early, iterate often: The sooner you materialize a rough idea, the sooner you can begin the learning process.
- Keep the user at the heart of it all: Consistently ask "How does this benefit my user?"
- Don't aim for perfection (especially at first): Your initial prototypes are for learning and exploration, not necessarily for final presentation.
- Simplicity is a strength: Concentrate on the core message or functionality you’re testing.
- Foster open communication: Collaboration is key. Maintain clear communication with your team and stakeholders.
- Use the right tools for the job: A flexible, collaborative platform significantly enhances the process.
- Document your progress: Record your key decisions, feedback, and the insights you’ve gained.
Sidestepping common traps: what to avoid when prototyping
While learning is part of the process, here are a few common prototyping pitfalls you can strive to avoid:
- Aimless prototyping: Always establish a clear goal for what you intend to test.
- Mismatched tools or fidelity: Using a high-fidelity tool when a simple sketch would suffice (or vice versa).
- Skipping user testing: Your perspective is valuable, but it doesn’t replace direct user feedback.
- Over-attachment to initial ideas: Be prepared to modify or even discard concepts based on feedback.
- Premature focus on visual perfection: Avoid getting bogged down in minor visual details during early-stage prototyping.
Why Miro is your strategic partner for rapid, collaborative prototyping
Throughout this guide on how to make a prototype, you’ve likely noted how Miro's capabilities align with each step. That’s because we’ve intentionally designed our innovation workspace to support this creative process. Here’s why it’s a strong choice:
- Improved collaboration: Whether your team is co-located or distributed globally, Miro unites everyone. Real-time co-creation, intuitive commenting, and asynchronous feedback ensure all voices are heard and integrated.
- Designed for speed: We aim to help you move efficiently. From brainstorming and wireframing with our user-friendly tools and templates to generating interactive prototypes with Miro AI from your existing sketches, screenshots, or sticky notes, you can transition from idea to testable concept remarkably fast. This speed is vital for effective iteration.
- Adaptable for any fidelity: Whether you need a quick, low-fidelity sketch or a more polished, interactive mockup, Miro accommodates your needs. You can start with the basics and progressively add detail, all within a single, consistent platform.
- Centralized hub for your project: Keep your research, user personas, journey maps, brainstorming sessions, wireframes, designs, and feedback consolidated in one organized location. This eliminates the inefficiency of searching through disparate applications and communication threads.
Ready to bring your ideas to life?
Learning how to make a prototype is more than just following a series of steps; it's about embracing a mindset of exploration, testing, and continuous learning. It’s about reducing uncertainty around your key ideas and building solutions that your users will find genuinely valuable. By following these steps to follow to make a prototype, you're well-equipped for this journey.
So, what's your next move? That promising idea deserves to be explored.
Ready to experience how straightforward it can be to create a prototype in a collaborative, visual workspace? We invite you to try prototyping with AI in Miro!
Author: Miro Team
Last update: October 16, 2025