How to make a process map: A step-by-step guide
Summary
In this guide, you will learn:
- How to define and list process steps using diagramming shapes
- Techniques to map complex decision points and their outcomes
- How to identify bottlenecks and inefficiencies through detailed mapping
- Ways to use Miro’s advanced diagramming tools and templates
- How to incorporate layers, color-coding, and connectors for readability
- Best practices for collaborating on process maps in real-time
Collaborative AI Workflows
Join thousands of teams using Miro to build the right thing, faster.
Understand process mapping basics
Let's kick things off with a simple truth: even the most straightforward processes can benefit from a bit of visual clarity.
Think about something as routine as making a sandwich. Easy, right? But break it down into steps, and you might discover more efficient ways to get it done—like gathering all your ingredients at once instead of making multiple trips to the pantry.
That's where process mapping shines. It's a visual tool that helps you see your current processes and uncover areas for optimization. Whether you're streamlining workflows, identifying bottlenecks, or enhancing team collaboration, a clear process map can be a game-changer for your product team.
A process map provides a detailed visual representation of each step involved in a workflow, making it easier to understand, analyze, and improve the process. By visualizing the flow of tasks, decision points, and interactions, you can quickly spot inefficiencies and areas for improvement. This can lead to significant gains in productivity and efficiency, ensuring that your team operates at its best.
Define the scope and objectives of your process map
Before diving into creating your process map, it's crucial to determine the scope and objectives. This sets the foundation for a successful mapping session.
Identify the process
Start by pinpointing the specific process you want to map. It could be anything from a user journey to an internal workflow.
Consider processes that significantly impact your team's productivity or those that frequently encounter issues. These are prime candidates for process mapping. By focusing on high-impact processes, you can ensure that your efforts will yield meaningful improvements. Gather input from your team to identify pain points and areas that could benefit from a more structured approach.
Set clear goals
What do you hope to achieve? Are you looking to identify inefficiencies, improve collaboration, or streamline operations? Clear objectives will guide your mapping efforts.
Define specific, measurable goals for your process mapping project. For example, you could reduce the time required to complete a task by 20%, eliminate unnecessary steps, or improve communication between departments. Having well-defined goals will help you stay focused and measure the success of your process improvements. Communicate these goals to your team to ensure everyone is aligned and understands the purpose of the process mapping exercise.
Gather your team
Process mapping is a collaborative activity. Bring together stakeholders from different departments to ensure you have a comprehensive view of the process.
Assemble a diverse team of people directly involved in or affected by the process you're mapping. This might include product managers, designers, engineers, and other key stakeholders. Each team member brings a unique perspective, crucial for creating an accurate and effective process map. Encourage open communication and collaboration to ensure all viewpoints are considered. This collaborative approach enhances the quality of your process map and fosters a sense of ownership and commitment among team members.
Collect necessary data
Gather all relevant information and documents related to the process. This might include existing workflows, performance data, and feedback from team members.
Before you begin mapping:
- Conduct a thorough analysis of the current process.
- Review any existing documentation, performance metrics, and feedback from team members.
- Identify areas where the process breaks down or where improvements are needed.
Collecting comprehensive data will provide a solid foundation for your process map and help you make informed decisions. Use surveys, interviews, and observation to gather insights from those directly involved in the process. This data-driven approach ensures that your process map is based on real-world conditions and challenges.
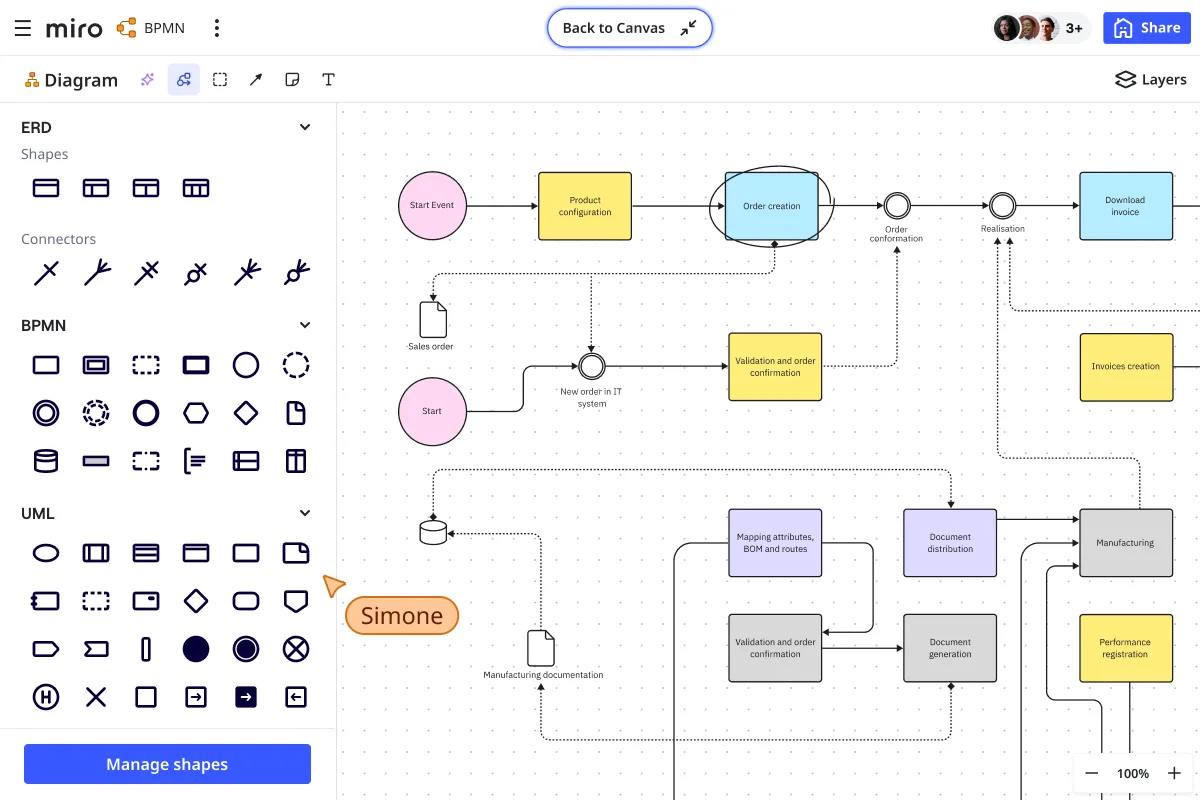
Process mapping step by step in Miro
Creating a process map in Miro is straightforward, thanks to our robust visual workspace for innovation. Here's how to get started:
1. Define your process steps
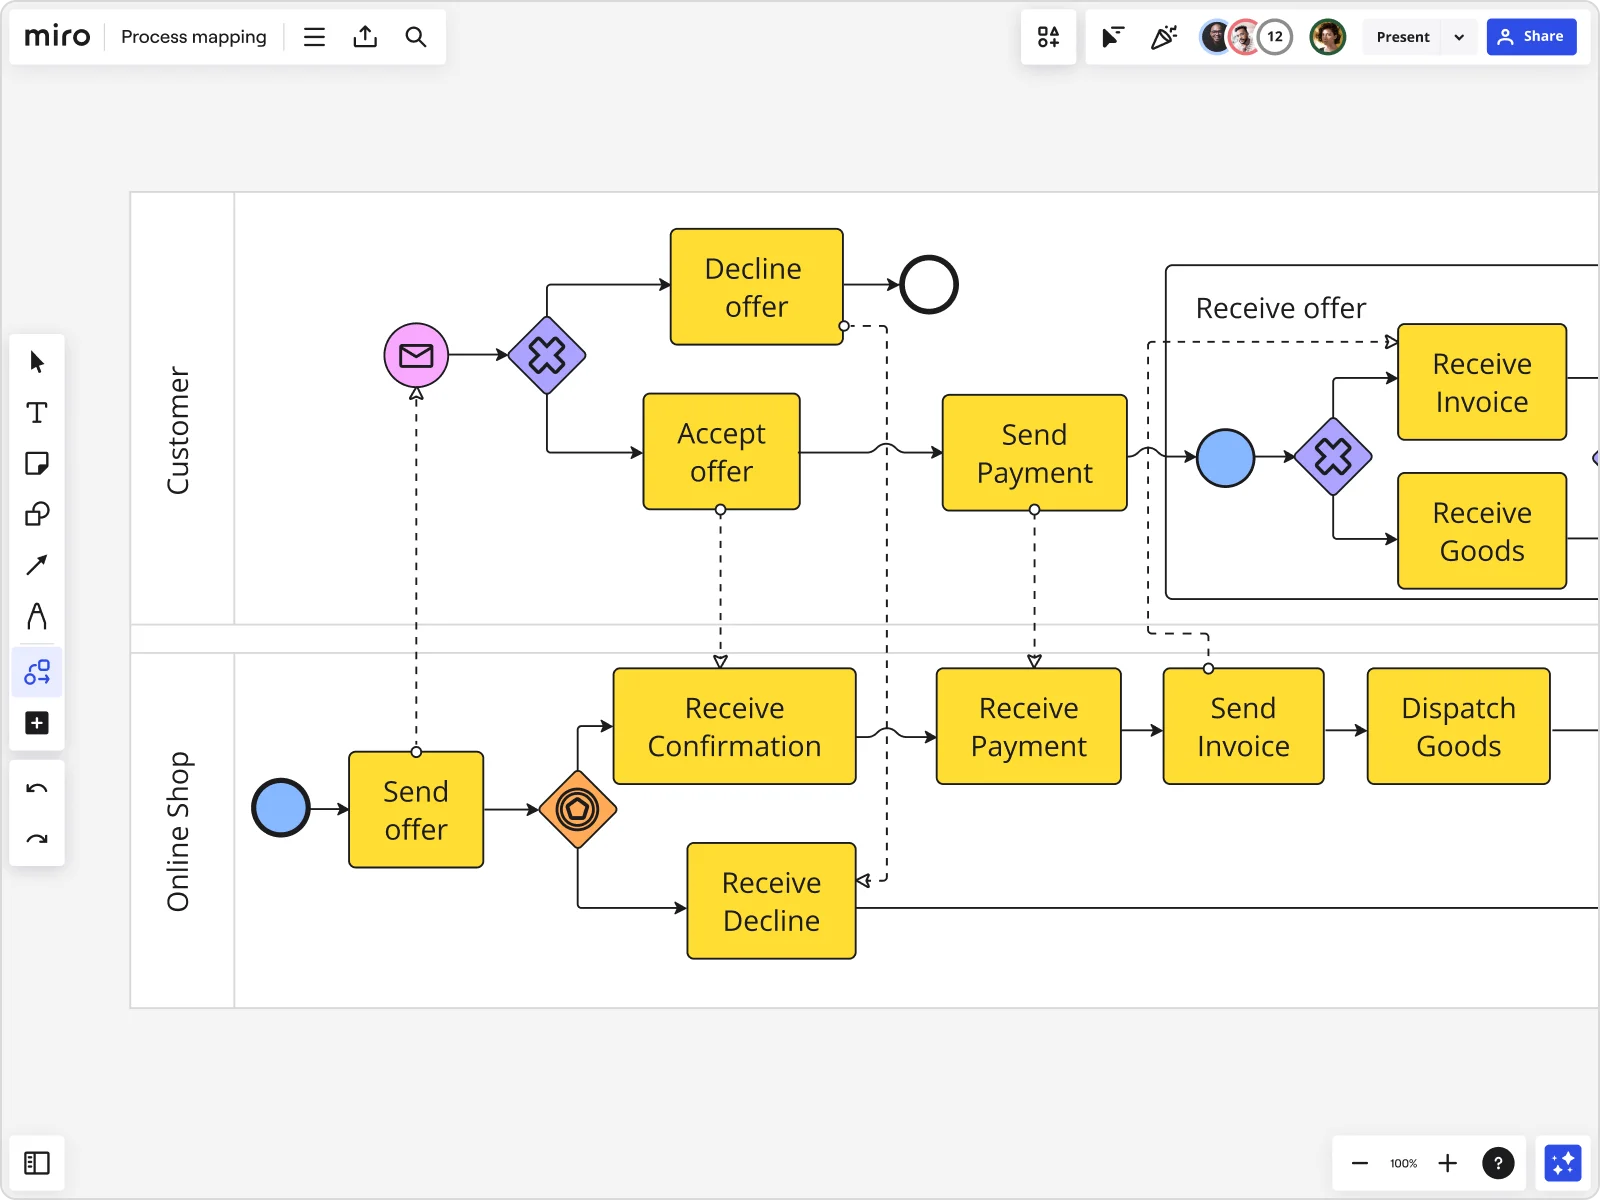
List out each step involved in your process. Use Miro's advanced diagramming shapes pack to add clarity and detail. For instance, use rectangles for tasks, diamonds for decision points, and arrows to indicate flow.
Break down the process into individual steps, focusing on tasks, decision points, and interactions. Use clear, descriptive labels for each step to ensure everyone understands the process. Or start by using process map templates.
Miro's advanced diagramming shapes pack provides a broad selection of options for creating detailed diagrams:
- Rectangles can be used to represent tasks.
- Diamonds indicate decision points.
- Arrows show the flow of the process, ensuring logical connections between each step.
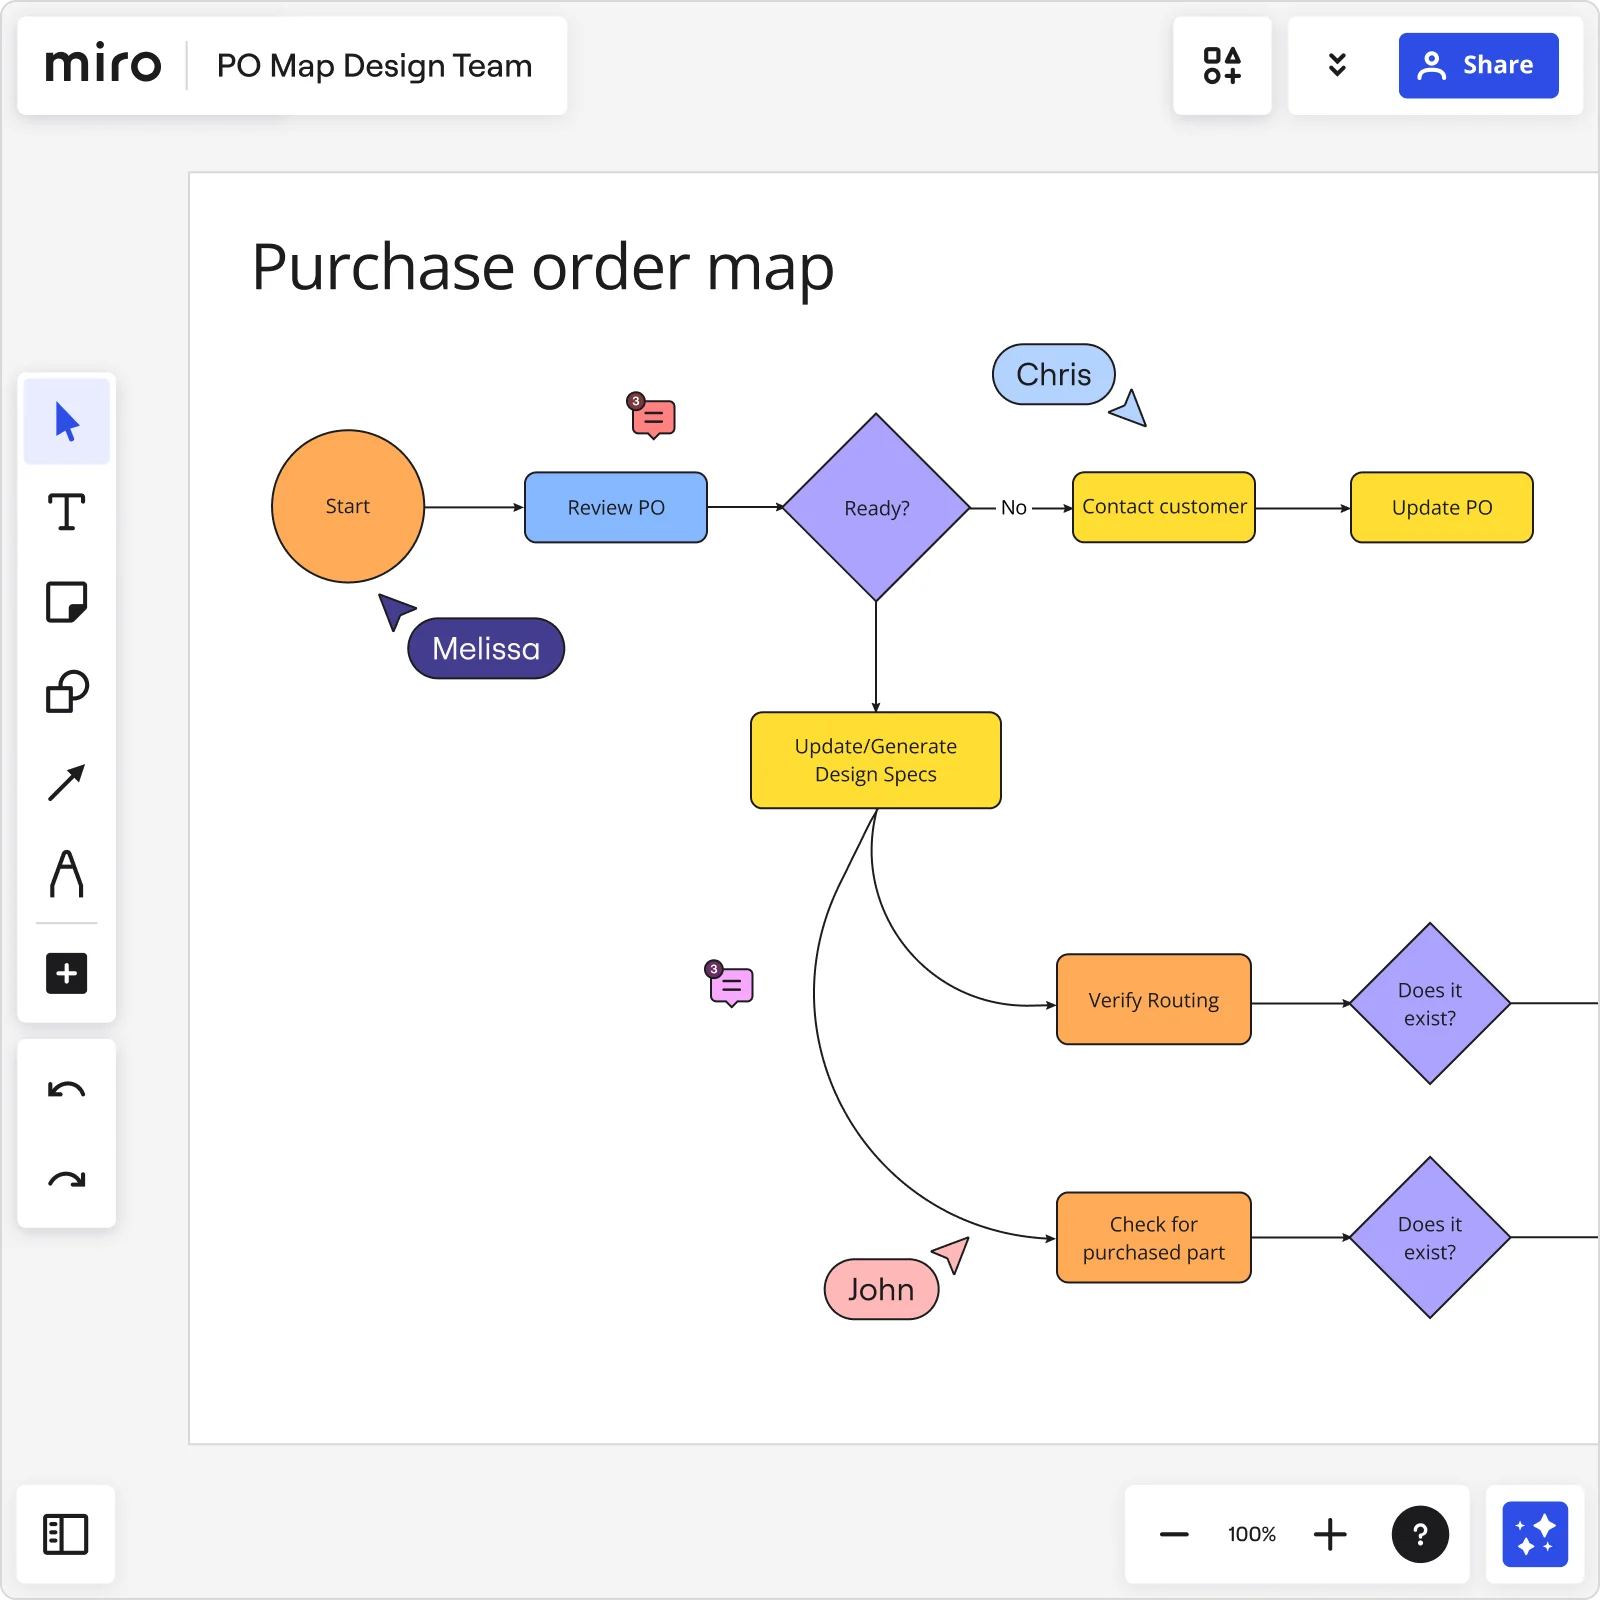
2. Map out decision points
Complex decision points can be challenging, so it is important to clearly delineate paths and potential outcomes. This ensures that everyone understands the potential directions a process can take based on different variables.
Decision points are critical junctures in your process where different paths may be taken based on specific criteria. Clearly mapping out these points is essential for understanding how decisions impact the overall process.
Use Miro's advanced diagramming capabilities to create detailed decision trees, showing all possible outcomes and their implications. This helps identify potential bottlenecks and ensures that everyone understands the decision-making process.
Incorporate color-coding or other visual cues to differentiate between various paths and outcomes, making the map more intuitive and easier to follow.
3. Identify bottlenecks and inefficiencies
Look for areas where tasks are repeated, issues escalate, or single points of failure exist.
Once you have mapped out the process, review it carefully to identify bottlenecks and inefficiencies. These are points in the process where tasks are delayed, repeated, or where issues tend to escalate.
Use Miro's visual workspace to highlight these areas, making them easy to spot. Miro AI can assist by analyzing your map and suggesting optimizations. For example, it might identify steps that can be combined or streamlined or highlight areas where automation could improve efficiency. By addressing these bottlenecks, you can significantly enhance the overall performance of your process.
4. Integrate feedback seamlessly
Collaboration is key. Invite your team to review the process map directly on your Miro board.
Effective process mapping requires input from all stakeholders. Use Miro's collaboration features to invite your team to review the process map. They can add comments, suggest changes, and provide feedback in real time. This ensures that all perspectives are considered and that the final process map reflects the collective knowledge and experience of the team.
5. Refine and finalize your map
Incorporate the feedback and make necessary adjustments. After gathering feedback, it's time to refine and finalize your process map. Incorporate the suggestions and make any necessary adjustments.
Miro's advanced diagramming capabilities make this process straightforward. You can easily shift parts of the process, add new steps, or remove obsolete ones. This flexibility ensures that your process map remains accurate and up-to-date. Use version control features to track changes and maintain a history of revisions. Once finalized, your process map should provide a clear, comprehensive view of the workflow, ready to guide your team toward greater efficiency and effectiveness.
6. Save and share
Once your process map is complete, save it and share it with your team.
Miro's cloud-based platform ensures that everyone on your team has access to the latest version, no matter where they are. Use the sharing options to distribute the map to all relevant stakeholders. For easy distribution, you can also export the map in various formats, such as PDF or image files. Regularly review and update the map to reflect any changes or improvements. By keeping the process map accessible and up-to-date, you ensure that it remains a valuable tool for ongoing process management and optimization.
What's next? Implement and monitor the process
Your process map is more than just a diagram—it's a roadmap for success. Here's how to make the most of it:
1. Implement changes
Begin by prioritizing the changes that will have the most significant impact. Assign responsibilities to team members and set clear timelines for implementation. Use Miro to track progress and document any challenges or adjustments needed. Regular updates to the process map ensure that it remains a living document, reflecting the current state of the process. This ongoing documentation helps maintain alignment and provides a clear record of improvements and changes.
2. Monitor performance
Establish key performance indicators (KPIs) to measure the effectiveness of the implemented changes. Regularly review these metrics to assess the impact on efficiency, productivity, and overall performance. This continuous monitoring helps ensure that the process remains optimized and that any emerging issues are promptly addressed.
3. Scale and adapt
Growth often brings new challenges and opportunities. Add new steps, integrate new tools, and adjust workflows to accommodate changing requirements. Miro's flexible platform ensures that your process maps can grow with your organization, providing a scalable solution for ongoing process management. Regularly revisit and refine your process maps to ensure they continue to meet the needs of your team and organization.
4. Foster continuous collaboration
Effective process management is an ongoing effort that requires continuous collaboration. Encourage your team to regularly review the process map and provide feedback. Miro's collaboration features make it easy for team members to share their insights and contribute to the process map. This continuous feedback loop ensures the process map remains dynamic and relevant, reflecting the latest insights and improvements. Foster a culture of continuous improvement by regularly discussing process enhancements in team meetings and making collaboration a core part of your process management strategy.
Map processes with confidence
Process mapping is a powerful way to visualize and improve workflows, identify bottlenecks, and enhance collaboration within your product team. Creating and maintaining process maps becomes a breeze with Miro's advanced diagramming capabilities and seamless integration features.
Ready to transform your processes? Explore Miro's visual workspace for innovation and take your process mapping to the next level. Happy mapping!
Author: Miro Team
Last update: October 16, 2025