How to create a sitemap
Summary
In this guide, you will learn:
- How to create a visual sitemap using Miro’s templates and tools
- The importance of listing primary and secondary website pages
- Steps to build a hierarchical sitemap with shapes, icons, and lines
- How to define website goals and scope before sitemap creation
- Ways to share and collaborate on your sitemap
- Tips for using sitemaps to improve UX design, navigation, and communication
Collaborative AI Workflows
Join thousands of teams using Miro to build the right thing, faster.
Your guide to creating a visual sitemap
Want to create a website your visitors can easily navigate and enjoy exploring? It all starts with knowing how to create a sitemap, which can help you visualize the interconnections of your website pages and ultimately, make things easier for search engines and your users.
In this article, we’ll walk you through how to create a visual sitemap in seven easy steps. You’ll learn what a visual sitemap is, why it’s important, and practical tips to help you map your website effectively.
What is a visual sitemap?
Before we cover how to create a sitemap, let’s get a clear definition. A visual sitemap is a planning tool that outlines the structure of a website's content and pages in a graphical format. Unlike an HTML or XML sitemap that lists code for search engines to crawl your website, a visual sitemap provides a bird's eye view of all your web pages and their interconnections — allowing you to plan the user experience (UX) and your website’s overall design.
Benefits of visual sitemaps
Understanding the benefits can help you learn how to create a visual sitemap with clear goals in mind.
At a glance, website mapping is a useful process for developers and designers to improve navigation, understand their scope of work, and avoid missing out on critical parts of a website’s architecture.
Let’s dive deeper to understand how sitemaps help the website design process.
Design with UX in mind
A clear sitemap will allow you to create a website with user flow in mind. It’s like creating a blueprint for your website’s hierarchy, allowing you to make sure any new page you add keeps it in balance.
Plan pages with confidence
When designing a website from scratch, you rarely know the exact amount of pages and subdomains you’ll need. In fact, it’s often an ongoing process. A visual sitemap helps you to plan for that number with confidence and even account for any new pages you might add in the future.
Spot errors early on
When you have a sitemap to base your website on, you can easily see where your site may become cumbersome or bloated ahead of time — allowing you to fix these problems before you start creating your design.
Create a roadmap for designers
For the coders and designers building your website, having a sitemap design to refer to helps keep tasks on track — paving the way for an efficient workflow and making important decisions with confidence.
When to use a sitemap
Learning how to create a sitemap can come in handy in many situations — even beyond creating a new website. Here are two other key scenarios:
Planning your marketing strategy
Even if you already have a website up and running, a visual sitemap can be useful for planning your content strategy before you start creating your website, minimizing the chances of a major redesign down the road. It’s also a great way to rethink your marketing strategy if things change later on.
Reorganizing your website content
Similarly, creating a visual sitemap is useful for reorganizing your website content, whether you’re adding new sections or making edits to optimize the user experience. And by creating an overview of all your pages, you’ll also be able to identify ways to make changes without disrupting your site's overall structure.
How to create a sitemap in 7 steps
Ready to begin creating a visual sitemap? We’ve got you covered with seven simple steps you can follow and apply — no matter what industry you’re mapping a website for.
Step 1: Use a sitemap template or tool
When creating a sitemap, using a pre-made template can help speed up your workflow. And if you’re working with teammates and stakeholders, it’s worth using a collaborative sitemap tool so you can document your decisions digitally and make them easily accessible to everyone on the team.
Miro, for example, is built for online collaboration, making it easy to create a sitemap together with your team — even if you aren’t in the same room. You can also use our free Sitemap Template to kickstart your design process.
Step 2: Define the goals and scope
Before creating a sitemap, it's crucial to define the goals and objectives for your website. This includes identifying the target audience, content types, and features you want to have.
Some tips for defining the scope of your website include:
- Conducting market research
- Analyzing competitors
- Identifying user needs
Step 3: Identify main sections and pages
The next step is to identify all the major sections and pages of your future website. Start by listing all the pages you want to include, then group the related ones together. Keep in mind that, at this stage, it’s not about perfecting your website architecture, but about identifying all the content you want to include. If you’re using Miro, you can grab sticky notes from the toolbar, write a page down on each one, and group the stickies by sections.
By organizing everything into sections and pages, you create a hierarchy among your content, making it easier for users to navigate your website. Some tips for identifying the sections and pages include:
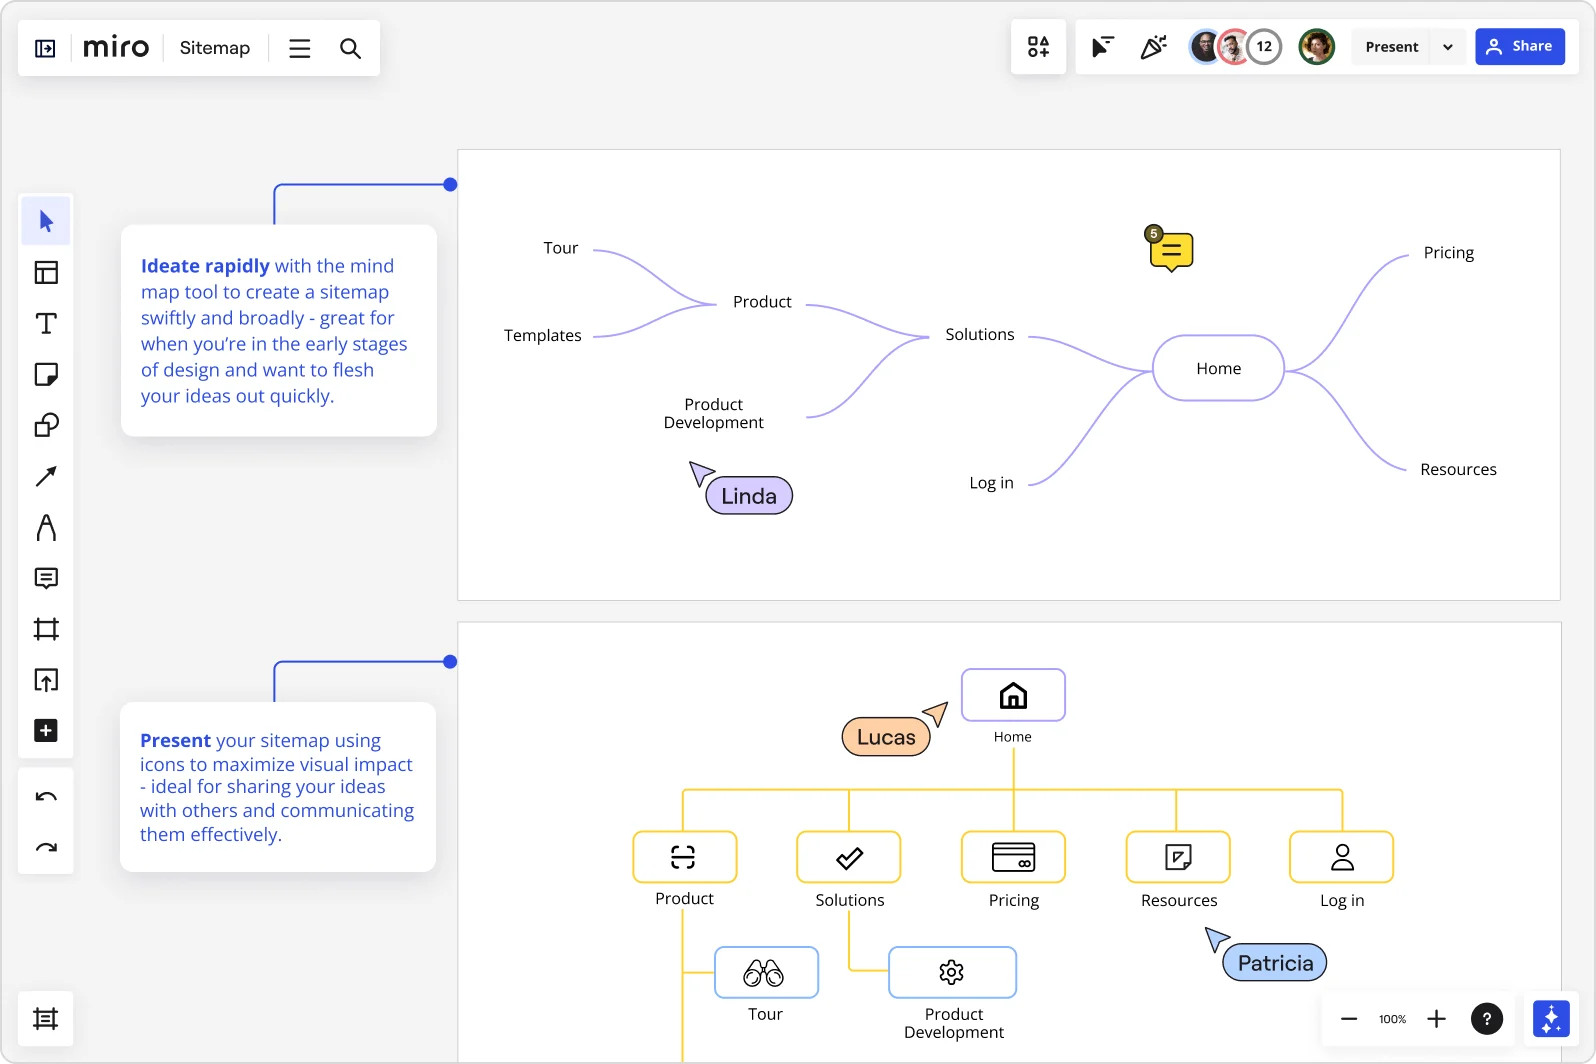
- Create a mind map to brainstorm the types of content and features you plan to offer
- Plot out the user journey for how your website visitors will find the content they’re looking for
- Start with the most general pages, like ‘home,’ ‘about us,’ and ‘ contact’ — then branch out to more specific ones
- Identify content categories and cluster them together by topic
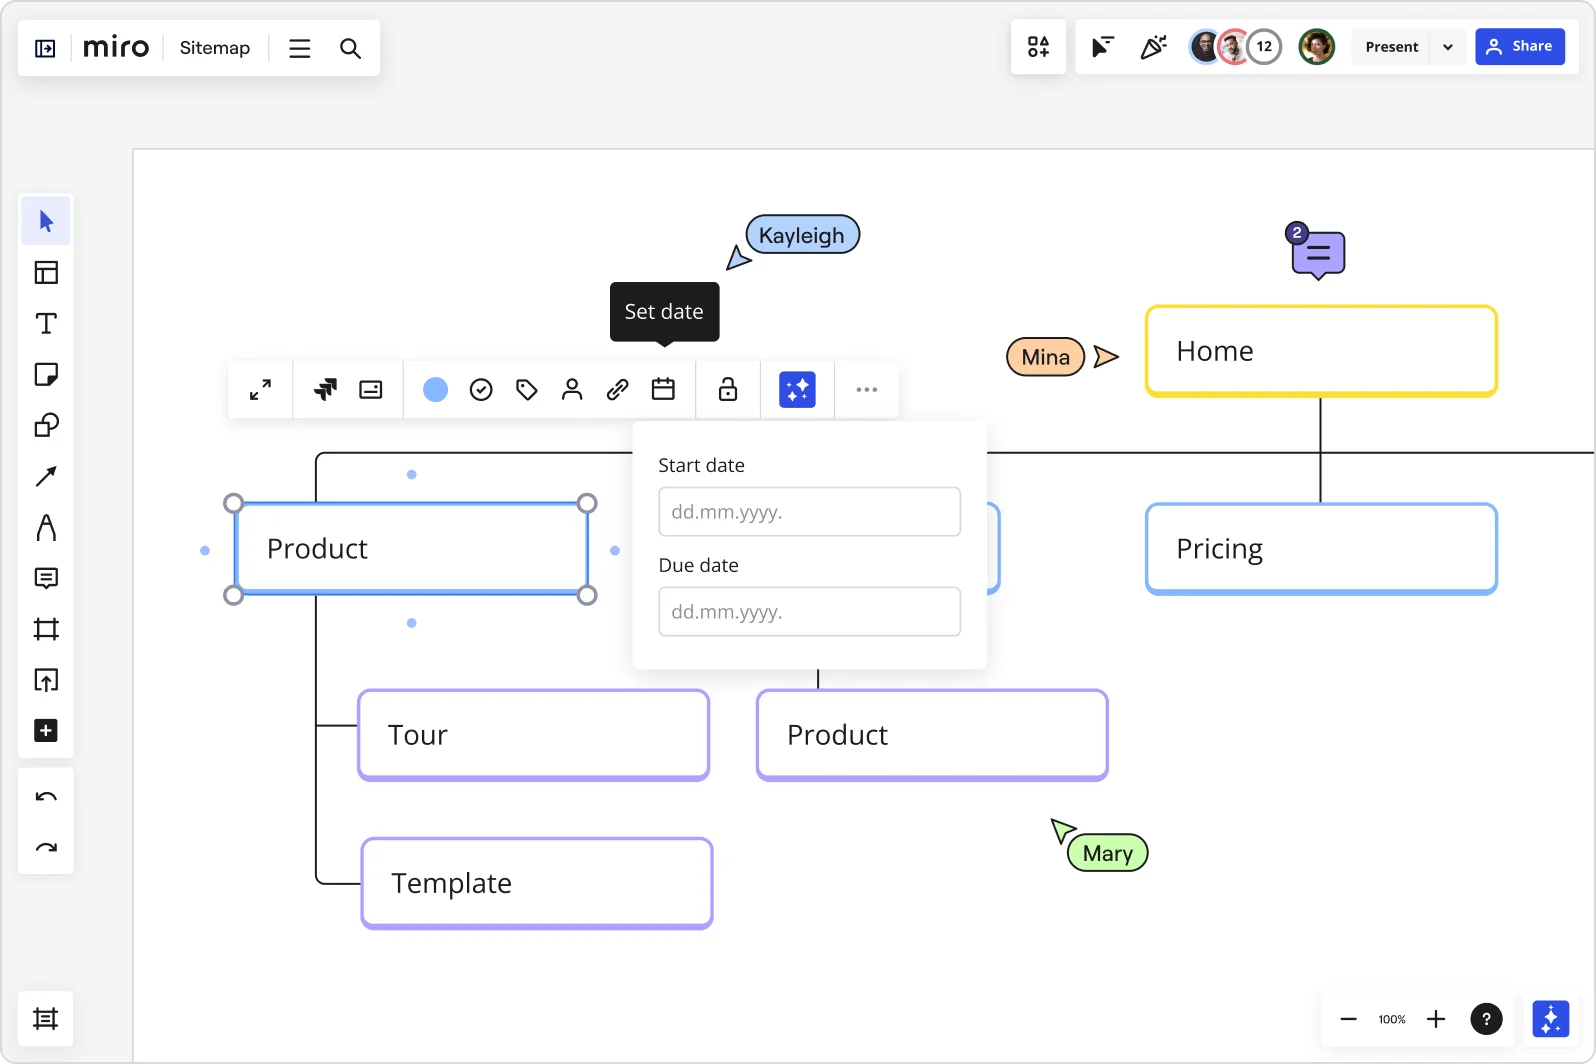
Step 4: Add pages to the sitemap
Once you’ve identified your website’s sections and pages, add them to the sitemap template.
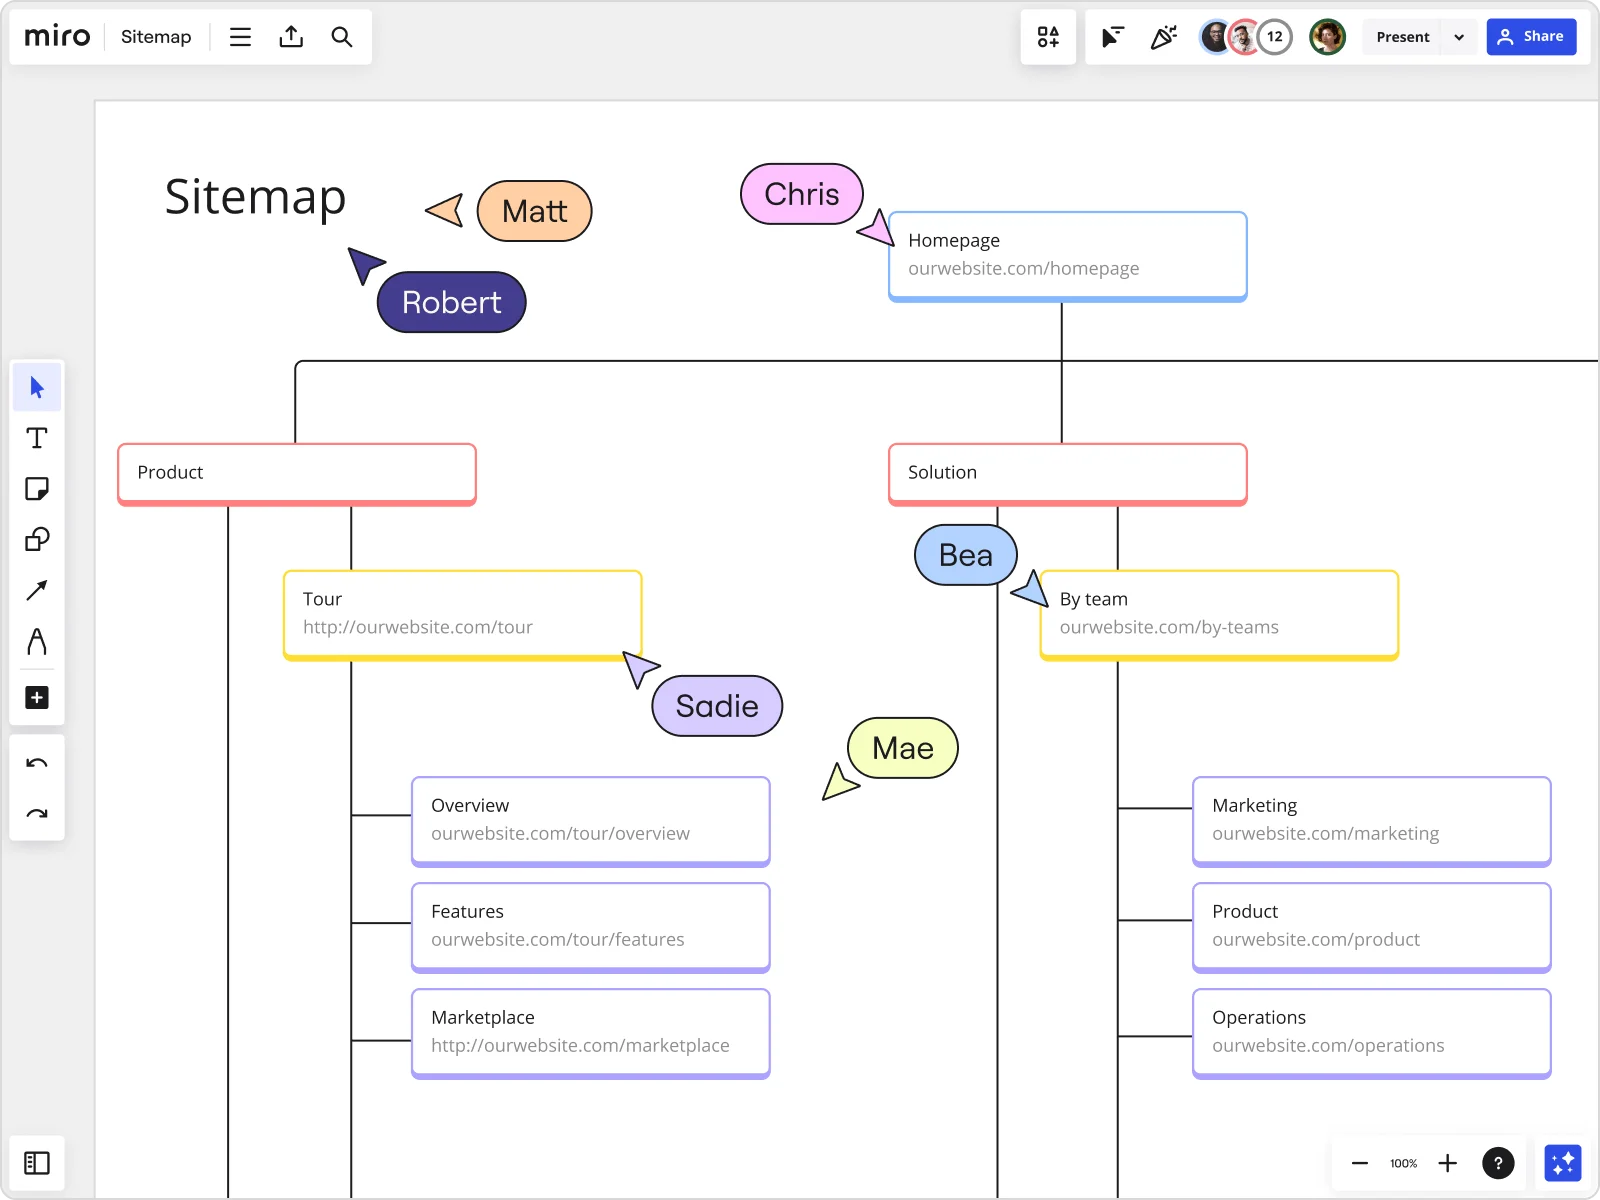
Visualize related pages using connection lines — creating a family-tree-type layout that makes it easy to understand the flow of content on your website. Add any important context that would help stakeholders understand what each page is for.
As you add pages to the sitemap, think about the user's perspective and whether the organization makes sense for someone navigating it for the first time. This also helps search engines crawl your website more easily, which will help drive traffic to your pages.
Don’t forget to include technical pages like sitemap.xml (for search engines), privacy policy, terms of service, and any special pages like a 404 error page.
Step 5: Get feedback from your team
Now that you’ve created a map of your website, have your team review it. Getting feedback can help you decide on what pages you might need to remove — and even what you might have missed that’s worth adding.
For example, if you’ve mapped out 20 different sections, your users might be up for an overwhelming digital experience. Consulting with stakeholders will help you clarify your team’s top priorities and streamline your sitemap design strategically.
Step 6: Iterate on the sitemap design
Applying the feedback you receive is key to creating an effective sitemap. Once you’ve iterated on your sitemap design, have your team review it again so you can refine it even more.
Remember, while the end goal of creating a sitemap is to work towards a smooth user experience, keep in mind that it should also function as a clear roadmap for designers and developers.
Step 7: Plan content and design
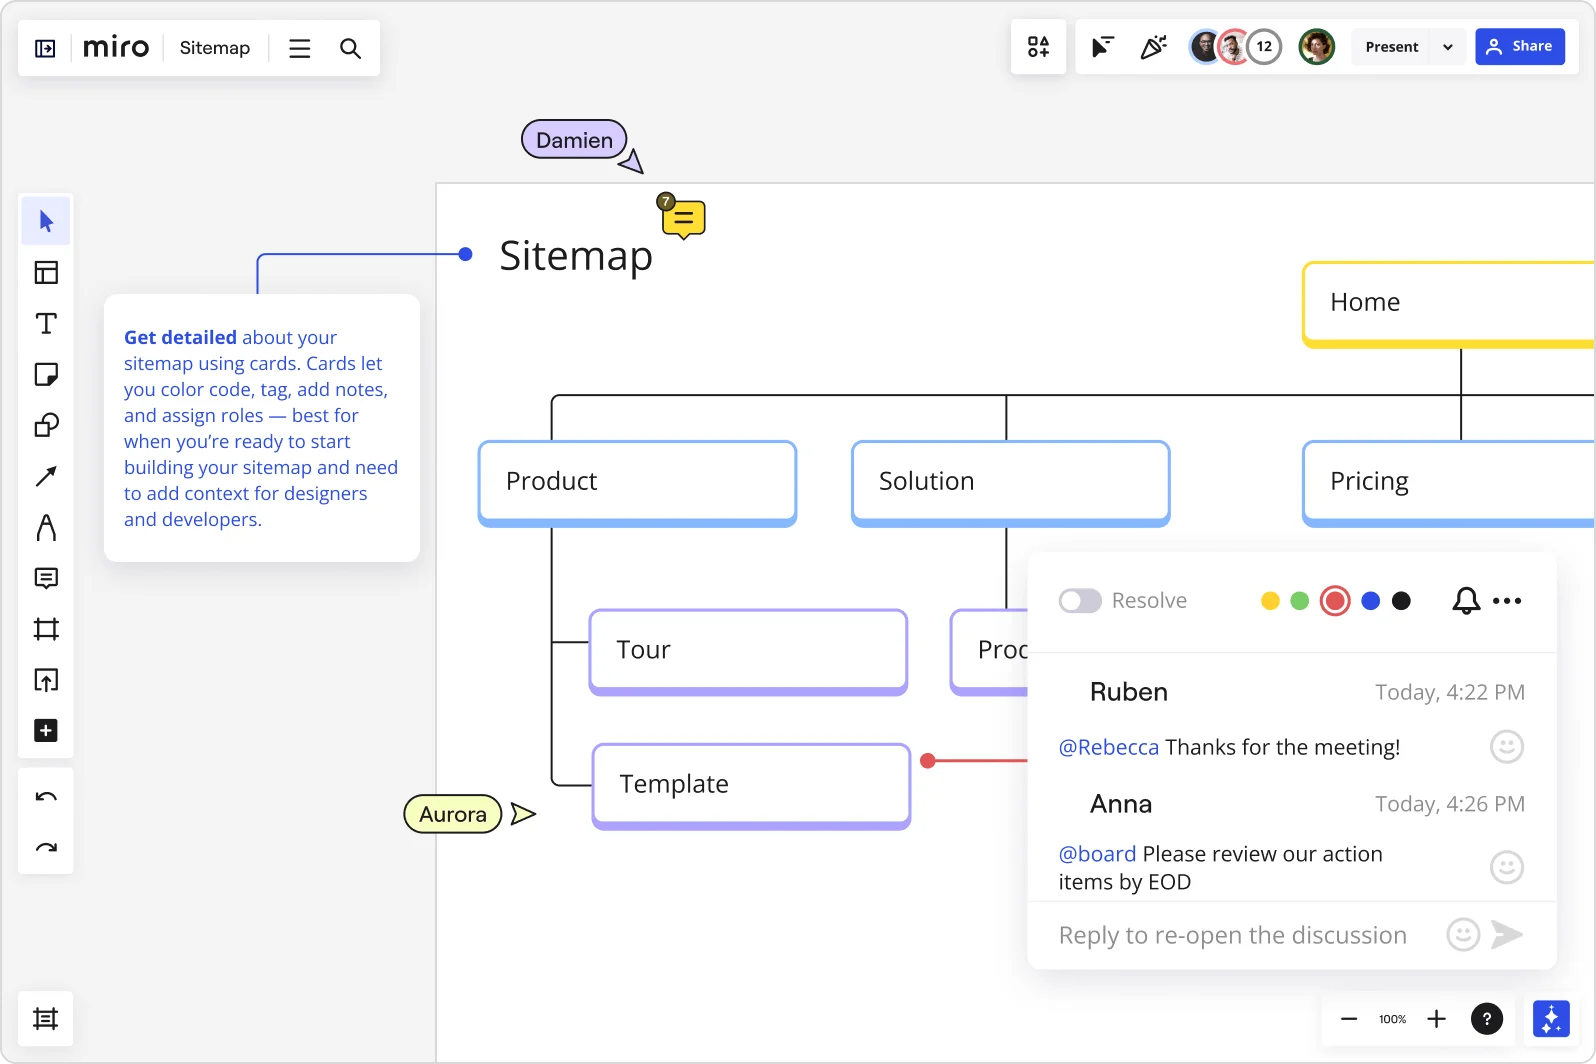
Now that you know how to create a sitemap, you’re ready to share it with designers and developers.
If you’re using Miro, choose from multiple ways to share your sitemap design — from sharing a link to your board, embedding it on other sites, or exporting it. You can even invite designers and developers to view and comment directly on your Miro board, literally keeping all your stakeholders on the same page.
How to make the most of visual sitemaps
To harness the power of visual sitemaps, it's important to grasp their purpose. Keep these two tips in mind:
- Understand page hierarchy: Examine the page structure and look for any patterns, gaps, or redundancies within the website's layout — considering how users will make their way through the site.
- Optimize website flow: Use the information you gained from the previous tip to enhance the website's flow, making sure that the most important pages are easily accessible.
Here are three practical scenarios for how you might apply the tips above:
Visual sitemap for fashion e-commerce
Imagine you're managing a fashion e-commerce website. A visual sitemap can help you determine the best way to categorize your products. You might discover that some items fit into multiple categories or that certain categories lack clarity. This information can guide you in making improvements to your website's navigation, enhancing the overall user experience.
Visual sitemap for a blog
If you're a blogger, visual sitemaps can be a game-changer for planning your content categories. By mapping out your blog posts and identifying common themes or categories, you might stumble upon new topics to write about or opportunities to reorganize your content. This can lead to more cohesive and engaging posts for your audience.
Visual sitemap for an SEO agency
For SEO agencies, visual sitemaps are invaluable tools to pinpoint areas for improvement on a client's website. By analyzing the website's hierarchy and structure, you can uncover opportunities to target specific keywords effectively. It also opens doors to enhancing the overall SEO strategy, benefiting both your agency and your clients.
Examples of visual sitemaps
Another helpful way to learn how to create a sitemap is to look at good and bad examples. To get the ball rolling, we decided to share Miro’s website map — including a hypothetical example of how it might look if we bloated the number of pages and didn’t think the structure through. You can use these as references during your own sitemap design workflow.
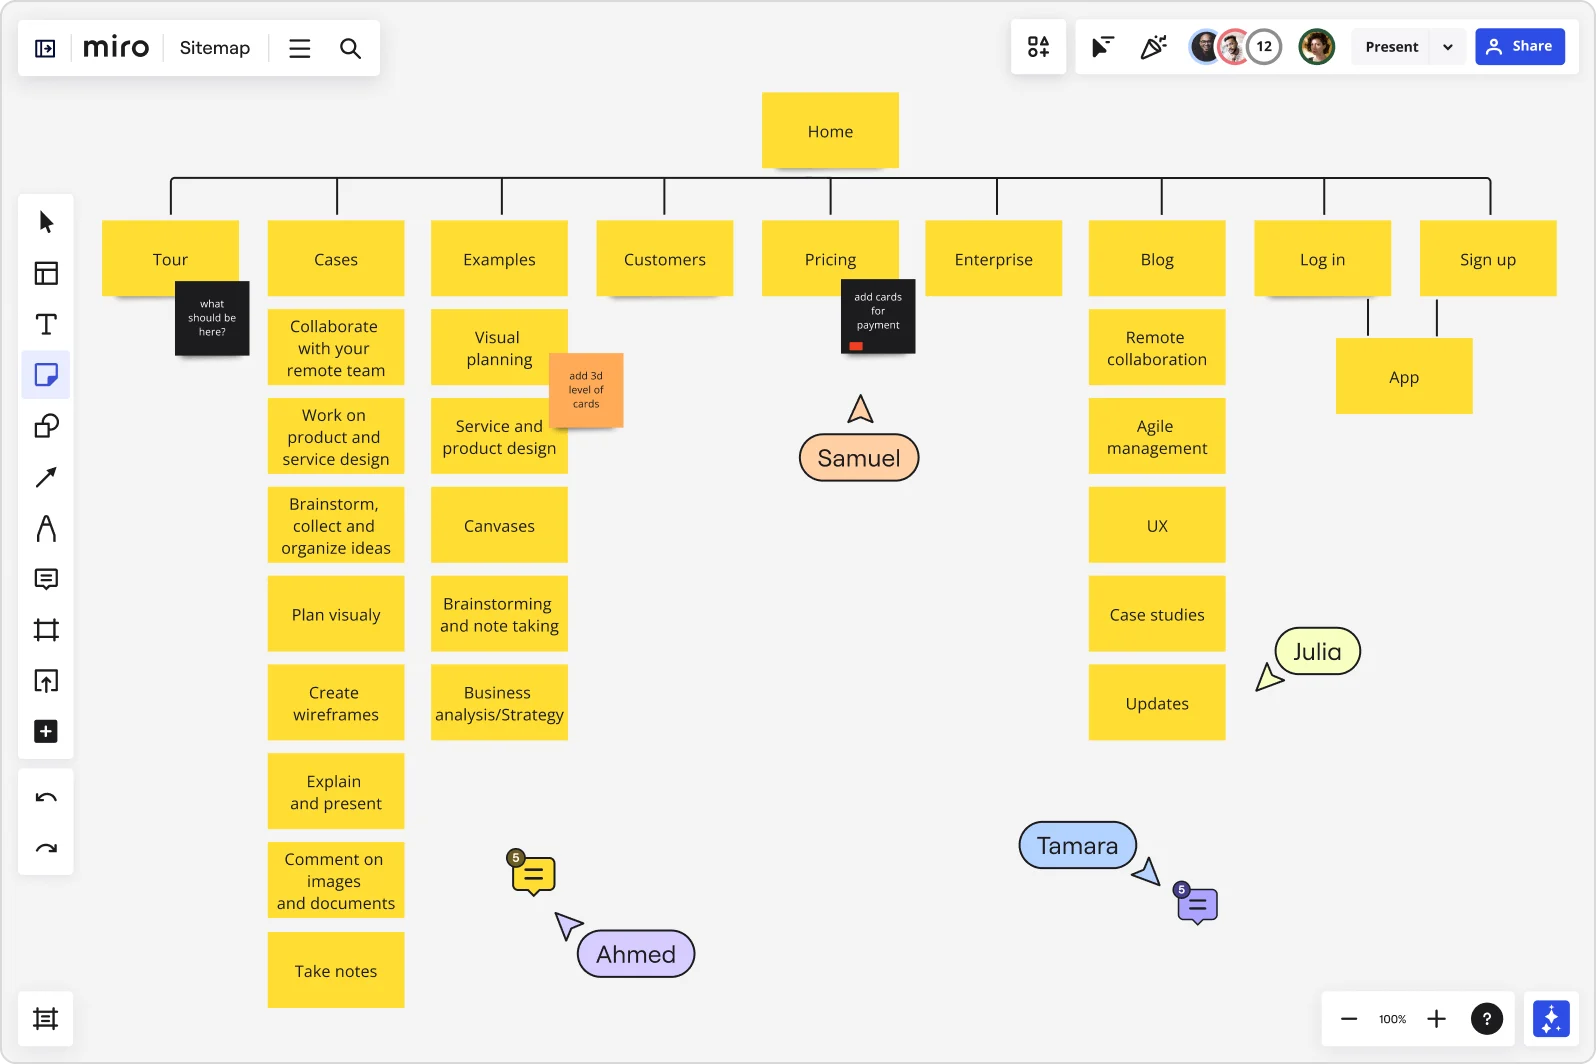
Example of a good sitemap
A well-designed sitemap represents all key pages of the site and structures them in a way that is clear to the user and doesn’t feel cluttered. In the image below, you’ll see nine main sections with plenty of pages, as well as some sticky notes that provide context for designers.
Example of a bad sitemap
In contrast, the sitemap design below is much more cluttered, featuring a total of 13 main sections — many of which are missing pages — not to mention that it provides little-to-no context for designers and developers to interpret important goals.

Get started with your own sitemap
Now that you know how to create a sitemap and what the benefits are, you’re ready to get started with your own. When done right, website mapping can lay a solid foundation for your product’s or service’s success, providing a clear framework for your customers to understand your value proposition.
The ultimate key to success is having a flexible tool for visual thinking, involving stakeholders early on, and being ready to iterate. Miro’s sitemap creator can help you make this process transparent for your team and create a source of truth everyone can refer to.
Sign up for free to start creating a powerful visual sitemap with your team in Miro.
Author: Miro Team
Last update: October 7, 2025