
Table of contents
Table of contents
What is a mind map and how to create one
Summary
- What a mind map is, how it works, and when to use one
- How to create a mind map in 5 simple steps — from defining a central idea to turning insights into action
- The key benefits of mind mapping and how it helps teams make sense of complex ideas
- The difference between mind maps and concept maps, and how to choose the right one for your goal
- How to create and present mind maps with Miro, using templates, AI assistance, and collaboration tools
What is a mind map?
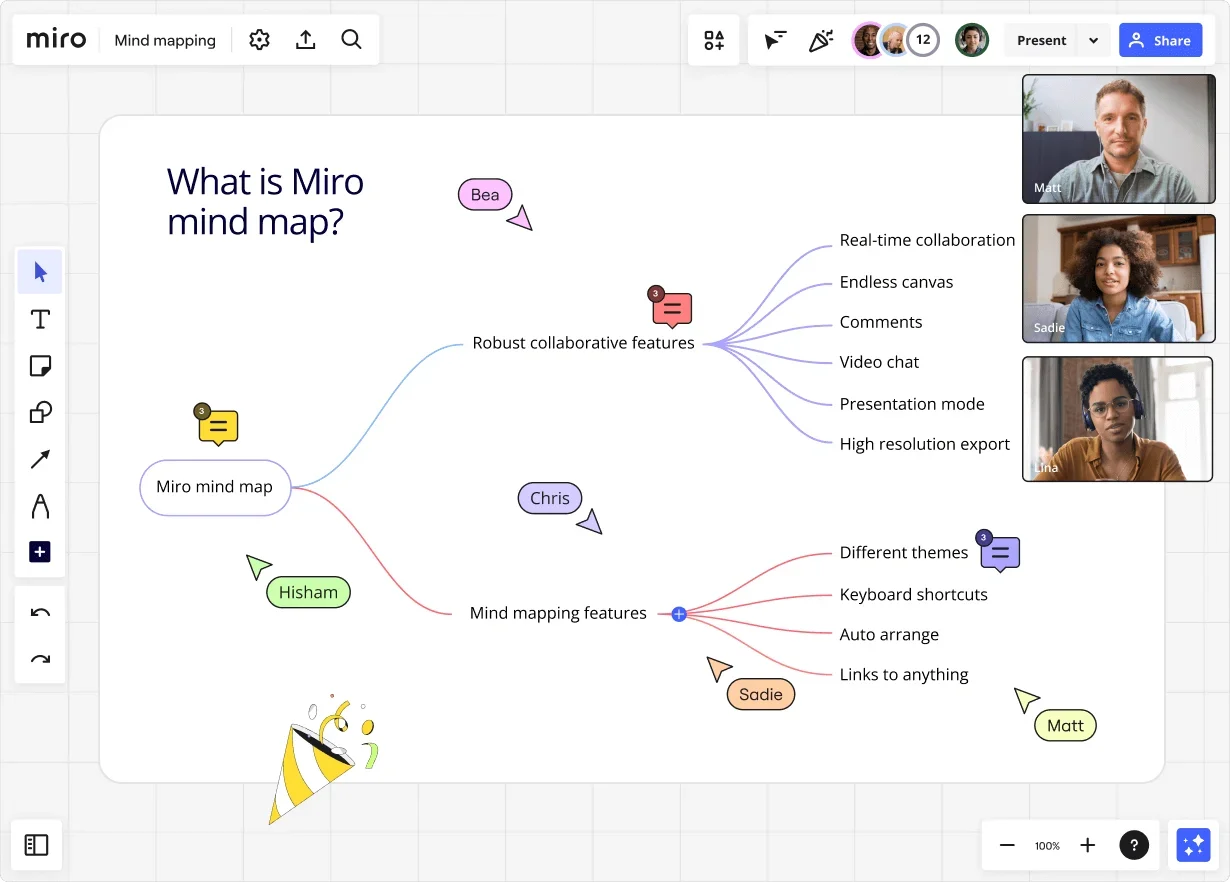
A mind map is a visual thinking framework used to explore, organize, and develop ideas around a central topic. Rather than capturing information in a linear list, creating a mind map adds structure to your thoughts. It helps you see how ideas connect, evolve, and influence one another. All in one shared view.
Mind maps usually start with a central idea placed in the middle of the diagram. From there, related thoughts branch out — typically represented by lines — with each branch representing a theme, question, or area of exploration. Those branches can then be expanded further as new ideas emerge. This simple format makes mind mapping especially great for brainstorming and ideation.
For example, let’s say you’re making a mind map about product development. You’d write ‘Product development’ in the middle of your map, and probably add branches that each point to one of the following sub-ideas:
- New features
- Customer feedback
- Market trends
- Competitor analysis
As patterns start to emerge, connections between sub-topics start to form naturally. For instance, if you have customer feedback about a new product feature that aligns with trends in the marketplace, you could connect these two ideas to highlight their relationship.
Collaborative AI Workflows
Join thousands of teams using Miro to build the right thing, faster.
Why use a mind map?
Now we know what a mind map is, we should also understand what makes them so effective. Simply put: it’s not just their structure, but the problems they solve.
In work, ideas are rarely short on supply, but clarity often is. When ideas live across documents, messages, and meetings, it’s easy to lose context, miss connections, or get stuck refining details too early.
Mind mapping creates space for open exploration — helping teams and individuals think broadly before narrowing focus. Every time a piece of information enters your brain, it gets added to a complex neural network made up of central nodes connected by smaller branches.
By placing everything in one visual system, you can think broadly, surface relationships between ideas, and explore multiple directions without committing to a single solution too soon. This is especially valuable when you’re working through ambiguity — whether that’s early-stage planning, creative exploration, or complex problem-solving.
Unlike linear note-taking, mind maps allow you to:
- Process your thoughts holistically — just as your brain does.
- Identify multiple thoughts at once and instantly draw connections between them.
- Build shared understanding with others as ideas take shape
This makes mind mapping ideal for innovation-driven environments and activities like brainstorming and ideation.
In spaces like Miro, mind maps can change with them — evolving as teams explore, challenge, and refine ideas together, rather than static diagrams created at the end of a process.
Tips for teachers: Using mind maps to keep remote classes aligned
When teaching large or remote classes, it’s easy for ideas to become scattered. Teachers use shared mind maps in Miro to bring everyone into one visual space, helping students brainstorm together, structure group projects, and stay aligned as ideas develop. See how teachers are using Miro’s online whiteboard for remote classes.
When is the best time to use a mind map?
Mimicking the way our brains naturally associate and connect ideas is what a mind map’s design is all about. This makes them an effective tool for brainstorming, problem-solving, and strategic planning.
Below are some common scenarios where teams use mind maps to regain clarity and avoid getting stuck too early.
Project ideation
Use a mind map to generate new ideas for upcoming projects. You can discuss what type of projects you should run, why they’ll benefit the business, and what those projects should involve.
Process improvement
Mind maps help you identify new ways to improve your existing processes. Think about HR processes as an example. You could use a mind map to figure out how to improve onboarding or streamline the hiring process.
Product development
Mind mapping can help you generate new ideas for product development. You discuss new product features, upgrades, and other relevant improvements to your current product line.
Problem solving
If you and your team are facing a problem, using a mind map can help you find new ways to solve it. For example, if you have a high customer turnover, you can use a mind map to identify the cause of the problem and devise a solution. Because mind mapping encourages creative thinking, it also helps teams develop solutions they might not have thought of otherwise.
How to create a mind map in 5 steps
In this section, we’ll walk through five simple steps to help you create a mind map that fits your goal. Along the way, we’ll also highlight key considerations when selecting a mind mapping tool.
You can start with a central idea using a ready-made Miro mind map template, or build your map completely from scratch and let it evolve as your thinking develops. The video below walks through how to create a mind map from scratch using Miro.
Let’s get started.
Step one: Define your central idea
Learning how to make a mind map starts with having a central idea. This is the topic you want to explore and expand on, so it’s worth taking a moment to define it properly.
Identify the purpose
Think about why you’re creating the mind map in the first place. Are you brainstorming ways to improve your website? Are you coming up with ways to increase sales? Having a central topic will help you make sure that any ideas you add to your mind map are always relevant.
Keep it clear and concise
Keep your central idea clear, concise, and easy to understand for everyone working on the mind map. This means using a few words of simple language to convey what the main topic is. For example, if you want to come up with ideas to improve your website, your main topic might be ‘website improvement.’
Use a focus question
Although the main topic is short and sweet, you can add a focus question to provide additional context to your mind map. Going back to the website improvement idea, your focus question could be, “How can we attract more traffic to our website?”
Though it’s a little longer, it still communicates a clear focus to tie all your ideas back to.
Step two: Branch out from your central idea
This stage is about exploration, not organization, so it’s okay if things feel messy at first. With your central concept in place, you can now branch out with broad areas you want to explore within it.
If you’re unsure whether something belongs as a main branch or a sub-branch, keep it lightweight. You can always adjust the structure as your thinking becomes clearer.
Let’s use website improvements as an example again. Some of the related ideas you might come up with for this mind map could include ‘search engine optimization,’ and ‘social media campaigns.’ From there, you can continue branching out into smaller sub-topics as ideas emerge.s.
Tip: Want to run a brainstorming session where every participant gets a chance to share their idea? Use our free Brainwriting Template to set your team up for success.
Step three: Add sub-branches and details
Once your main branches are established, go deeper by adding specific ideas, examples, or questions under each one. This helps turn broad themes into actionable insights. For instance, under ‘search engine optimization,’ you could branch out and add ‘create new content’ and ‘optimize existing content.’
Try to keep labels short and focused, so ideas remain easy to scan and build on. As the map grows, patterns will start to appear, making it easier to see where ideas connect or overlap.
Tip: If a topic starts to feel too complex, consider breaking it into multiple connected maps rather than forcing everything into one view.
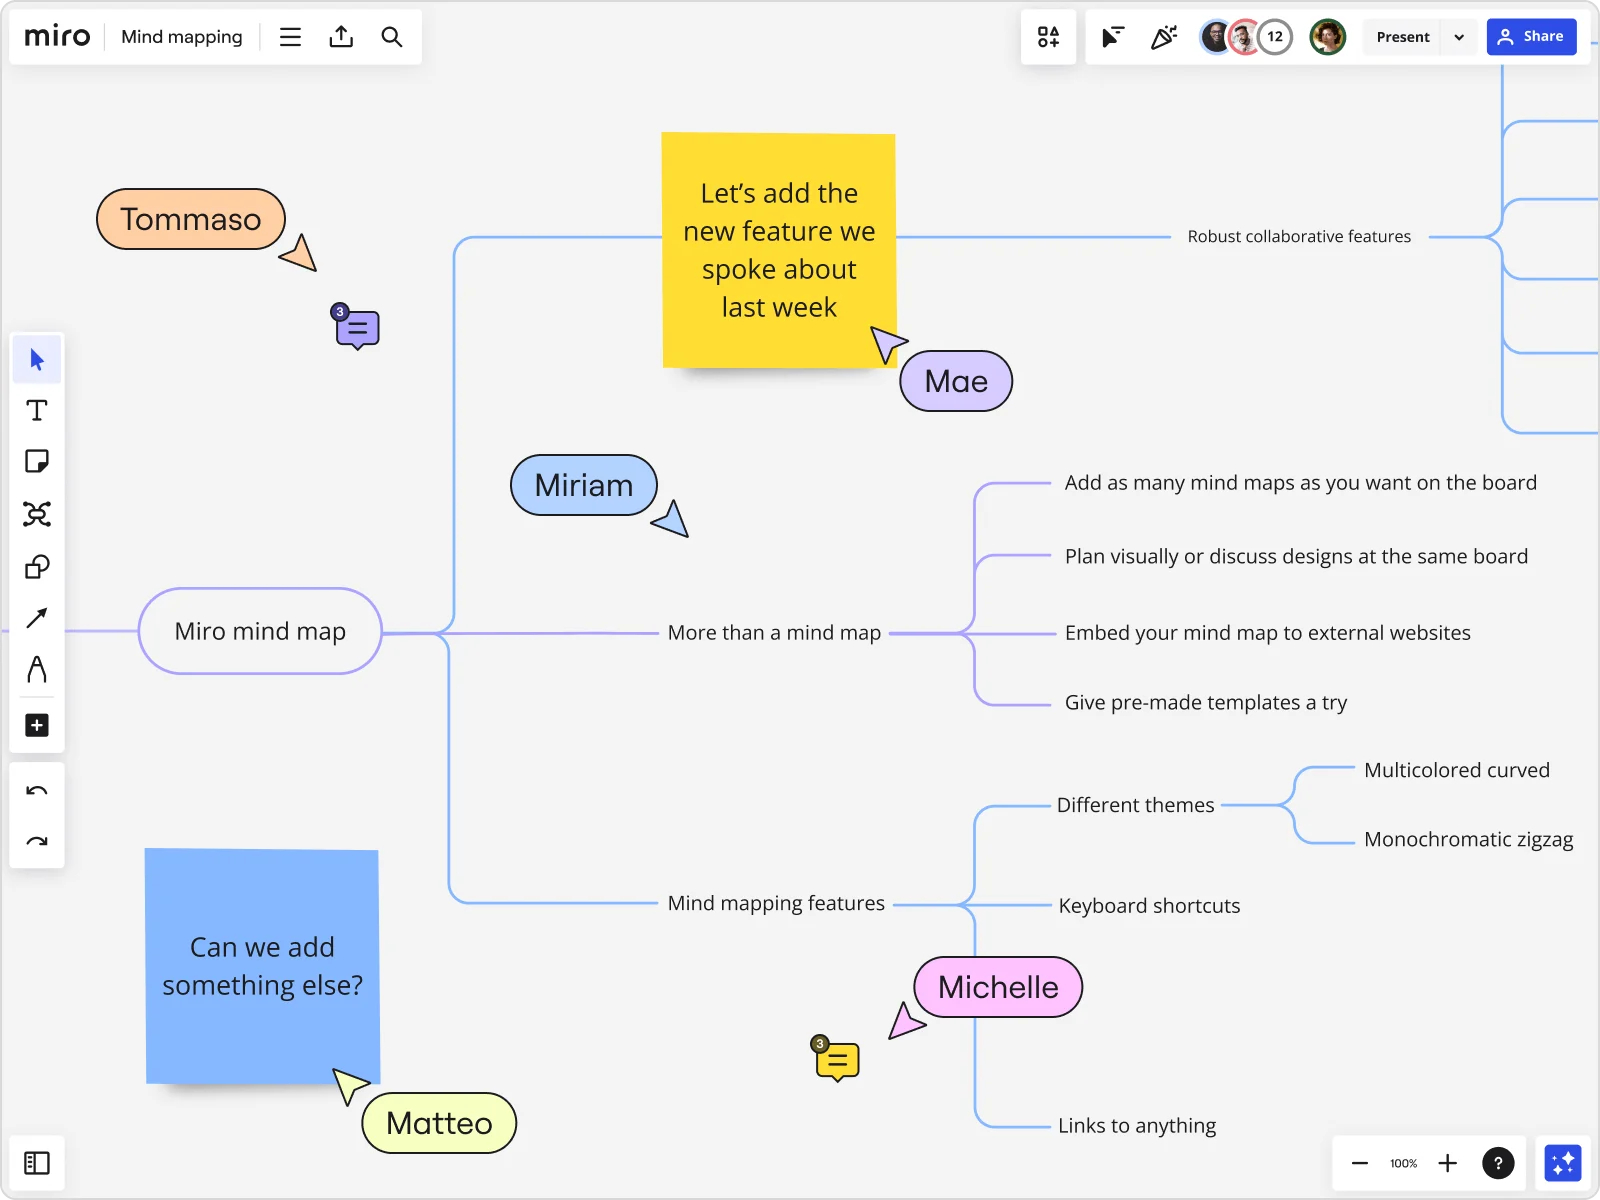
Step four: Customize your mind map
After adding all your ideas, take a second to customize the layout. It’s not only a chance to add structure to your thoughts but also to emphasize your brand’s unique style — which might come in especially handy if you’re presenting your mind map externally. Here are some examples of how to make a mind map pop:
Use colors
Colors are a simple but effective way to categorize your ideas. For example, all marketing ideas are green, while sales ideas are blue. At a glance, your team can see which ideas relate to which department.
Add images
Images can provide additional context for some ideas on your mind map. If you’re visualising a product or concept, adding an image can help others understand your thinking more quickly.
Group similar ideas
Keeping similar themes close together in your mind map is a good idea. That way, when planning your next steps, it’ll be easier to identify similar themes and topics.
In Miro, you can easily drag your ideas around, rearrange branches, and add sticky notes to label your groups — all in a matter of seconds.
Step five: Share your mind map and turn it into action
Depending on the goal of your mind map, you might want to share your mind map to gather feedback. Inviting teammates, clients, or stakeholders to review and comment can help refine ideas and avoid misalignment later.
Using a tool like Miro, it’s especially easy to share your mind map for both live and async feedback — whether that’s by inviting others to comment on your board, sharing a link, or exporting your mind map.
Pro tip: Want to present your mind map without having to schedule another meeting? Use TalkTrack to record interactive audio and video walkthroughs that your team can watch and comment on in their own time.
Once you’ve finalized your mind map, use it as the foundation for action. They work best as a starting point, helping you see the big picture before capturing detailed steps, documentation, or timelines elsewhere.
Try one of Miro's action plan templates to identify what you need to do to bring your new idea to life — whether that’s by creating and delegating tasks or creating a roadmap.
If your mind map generates ideas for new product features, you might create a product development roadmap. If you’re hoping to improve an internal process, you might create a process map instead. It all depends on why you made the mind map and what you wanted to achieve.
Create a mind map in seconds with Miro AI
When you’re stuck staring at a blank page or unsure where to start, Miro AI’s mind map generator helps you move from idea to structure in seconds. Simply enter a topic or prompt, and it creates a starting map you can refine, expand, and adapt as your thinking evolves.
Instead of beginning with a blank canvas, you get an instant foundation — which is especially valuable when time and focus are limited. Over half of knowledge workers (54%) say they lack the time and resources to use AI effectively.
By removing the “where do I start?” moment, Miro AI makes it easier to explore ideas, spot connections, and collaborate right away. From there, you stay in control, shaping the map to suit your goals.
What are the benefits of mind mapping?
Mind mapping offers numerous benefits that can enhance learning, productivity, and creativity. Learning about these advantages helps form a more solid understanding of what a mind map is. Let’s take a look:
Generate new and creative ideas
Mind mapping is a great way to encourage innovative thinking and develop new ideas. The visual format encourages teams to break free from conventional thinking patterns and venture outside the box.
It also helps teams generate new ideas by building on top of contributions from other team members. For example, if someone suggests an idea for a new software feature, it might spark a new idea for someone else.
Make complex ideas easier to understand
Creating a mind map is a simple way of breaking down a complex idea into smaller, more manageable parts. Let’s go back to our website launch as an example.
With so many moving pieces, from design and content to technical setup and timelines, it’s easy to lose sight of the bigger picture. A mind map helps you break it down and visualize how all the different parts work together. As Jane Ashley, Head of Design at DocuSign puts it: “When working through complex concepts, we put everything into Miro. It’s like opening a 100,000-piece puzzle and sorting through it visually on a board.”
Effective planning
Mind maps are especially useful when planning projects or strategies that feel too complex to tackle in a linear way. They provide a visual roadmap that helps communicate the entire scope and sequence of a project.
Improve collaboration
Mind mapping is an excellent place to start boosting team collaboration. It helps teams work together by encouraging open communication and discussing new ideas.
Collaboration becomes even easier if you use the right mind mapping tool. Miro, for example, comes with powerful live and async collaboration tools. You can tag team members in comments, upload visual notes, and easily add your mind map to presentations.
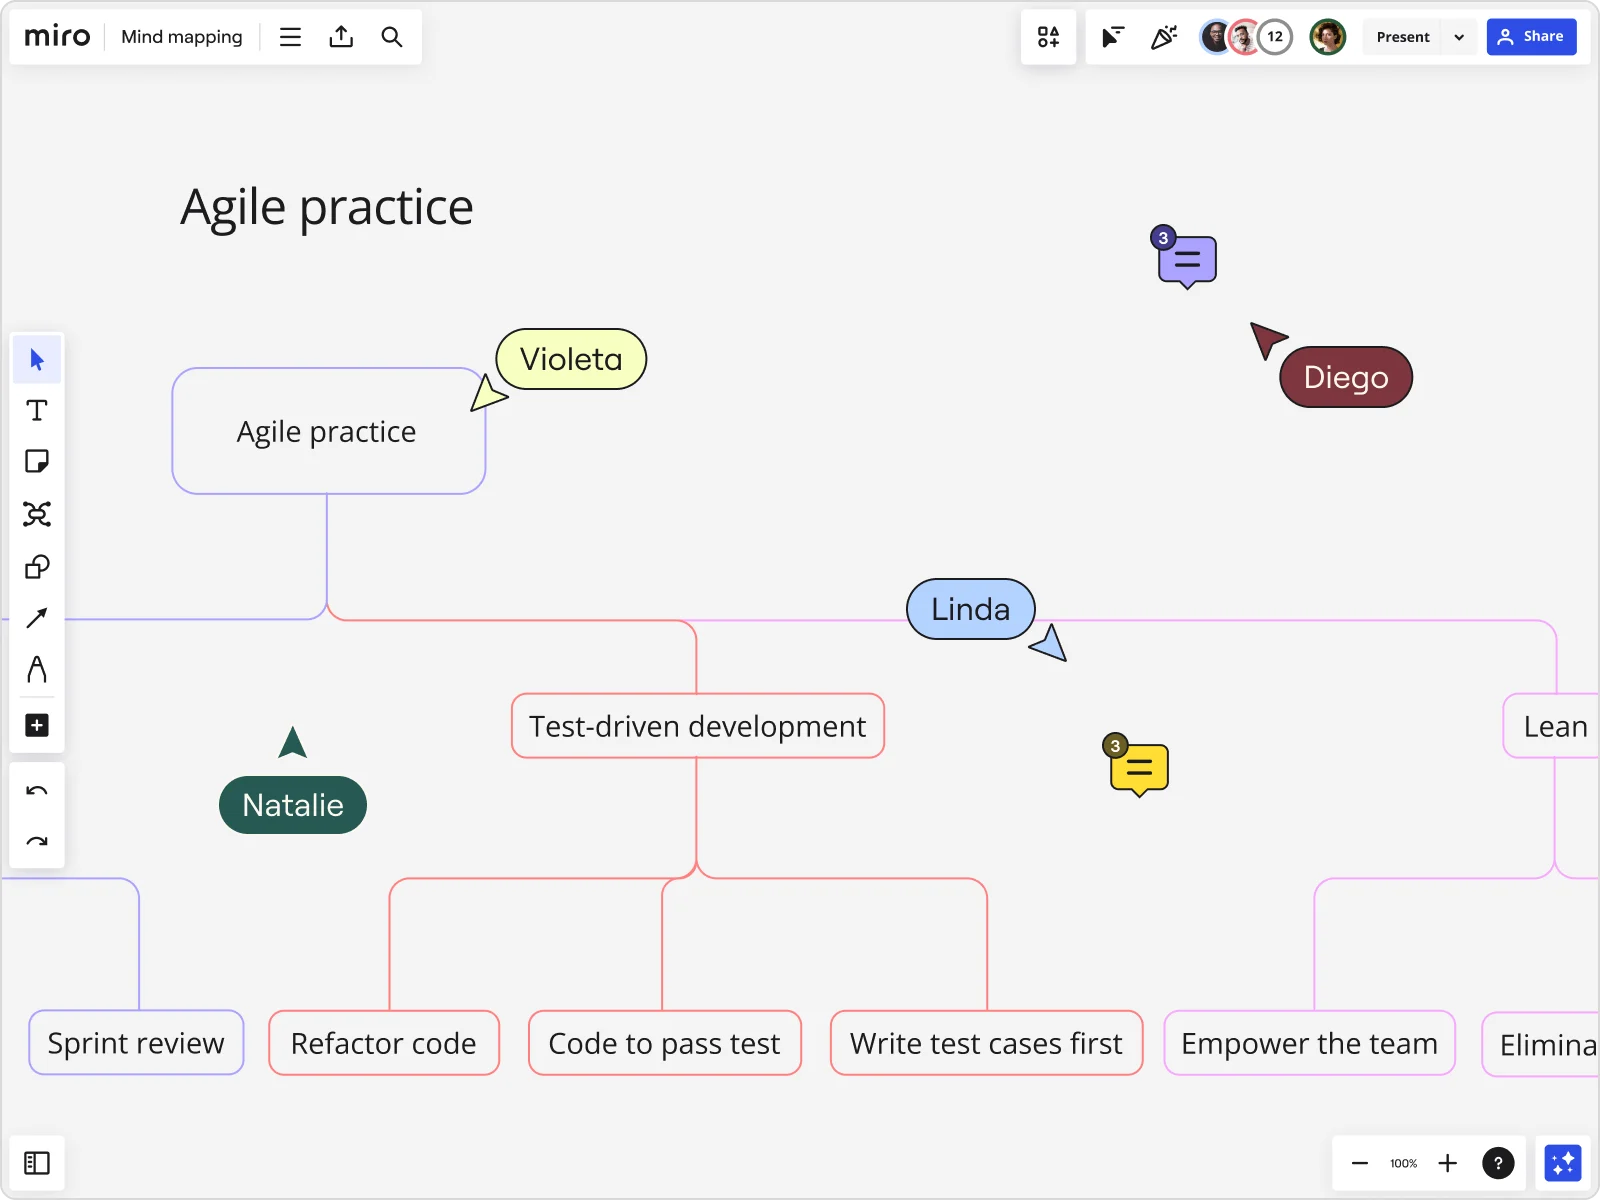
Mind map vs concept map: Which should I use?
To properly understand what a mind map is, it helps to clarify what it isn’t. Mind maps with concept maps are often confused, but they serve different purposes.
A mind map is best used when you’re exploring ideas around a single central topic. It’s designed for open-ended thinking to help you brainstorm, generate ideas, and see emerging connections without imposing too much structure too early.
A concept map, on the other hand, focuses on clearly defining the relationships between concepts. Teams use concept maps when they need to explain or understand complex subjects in a structured way.
Take software development as an example. If a team wants to understand how a system works, a concept map can show all the components of the software and how they connect. The diagram typically follows a hierarchical structure, with a core concept at the top and related ideas underneath, linked by labelled lines that explain each relationship.
In short:
- Use a mind map to explore and develop ideas
- Use a concept map to explain and organise established knowledge
Think you need a concept map instead of a mind map? Save time with our free and customizable Concept Map Template.
Our top tips for successful mind maps
A strong mind map isn’t just about structure; it’s about how you capture, refine, and share ideas. These tips will help you get more value from mind mapping, whether you’re working through a problem on your own or collaborating with others.
Let’s get started.
Capture ideas first, polish later
Start by getting everything out of your head and onto the map. Even if it feels messy. Early-stage mind maps are about exploration, not perfection. Once ideas are captured, you can step back to group, refine, and style them with more intention.
If your map starts to feel cluttered, that’s normal. Especially as ideas grow. In Miro, you can easily reorganize, regroup, or split ideas into multiple maps so complexity stays manageable as your thinking evolves.
Keep labels short and focused
Use single words or short phrases for each node to keep your map easy to scan and build on. Clear, concise labels make it easier to spot connections, remember key ideas, and avoid overloading the map with unnecessary detail.
Use collaboration
Mind maps are most powerful when they’re shared. Inviting others to contribute — live or asynchronously — helps surface new perspectives and refine thinking.
In Miro, comments, sharing, and tools like TalkTrack make it easy to align on ideas without needing everyone in the room at the same time.
Start mind mapping with Miro
Mind mapping is a powerful way to explore ideas, make sense of complexity, and move from early thinking to action. Now that you know how to mind map, you can start putting those ideas into practice.
You can start mind mapping instantly using templates or by building from scratch. Our Mind Map Templates are not only fully customizable but also come with automated diagramming tools, allowing you to quickly expand on ideas and connect them. Drag and drop shapes, lines, images, sticky notes, and more.
From early exploration to shared understanding, Miro gives you the space to turn thinking into momentum.
Sign up for Miro to get started with mind mapping and bring your ideas to life.
Mind map FAQs
How does Miro help my team collaborate on mind maps?
Miro gives your team a shared space to build and evolve mind maps together. Team members can contribute ideas in real time or asynchronously, add comments for context, and review changes as thinking develops. This makes it easier to align on ideas early, keep discussions in one place, and move forward with a shared understanding.
What’s the learning curve for teams new to Miro’s mind map and AI capabilities?
The learning curve is intentionally low. Teams can start with ready-made mind map templates or generate a first draft using Miro AI, then refine it as they go.
Most teams are able to start mapping ideas right away, without needing formal training, and discover more advanced capabilities naturally over time.
When should I use a mind map instead of a linear list?
Mind maps are best when you’re exploring ideas, working through complexity, or trying to see how different thoughts connect. If you’re brainstorming, planning, or solving a problem with multiple variables, a mind map helps you think more freely than a linear list.
Lists work better once ideas are already defined and need to be executed in a specific order.
How detailed should my mind map be?
That depends on your goal. Early-stage mind maps are usually broad and lightweight, focusing on capturing ideas rather than detail. As your thinking matures, you can add more depth where it’s needed.
A good rule of thumb is to keep expanding only while the map remains clear and useful. If it starts to feel cluttered, it’s time to refine or split it into multiple maps.
How many main branches should my mind map have?
There’s no fixed number, but most effective mind maps start with three to seven main branches. This range keeps the map easy to scan while still allowing enough space to explore key themes.
If you find yourself adding too many branches, consider grouping related ideas or creating a separate map for deeper exploration.
Author: Miro Team Last update: January 29, 2026