3 likes
42 uses
The Functional Specification Document Template is a comprehensive framework designed to help product managers, project managers, business analysts, and development teams translate business requirements into detailed technical specifications. This structured template guides you through documenting project scope, functional and non-functional requirements, user stories, acceptance criteria, and constraints—ensuring all stakeholders share a unified understanding of what needs to be built before development begins.
A Functional Specification Document Template is a standardized blueprint that transforms abstract business needs into concrete, actionable requirements. For product managers, it's a tool to articulate product vision and prioritize features. Project managers use it to define scope, manage expectations, and track deliverables. Business analysts leverage it to bridge the gap between business stakeholders and technical teams. Solution architects reference it to design appropriate system architecture, while developers and QA engineers use it as their north star during implementation and testing. Technical writers rely on it to create accurate documentation.
This template provides a structured approach to capturing:
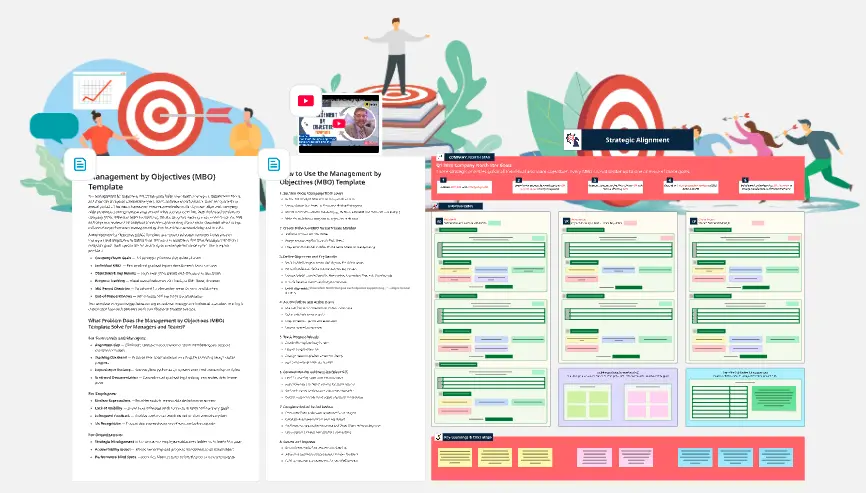
Project overview and strategic purpose
Detailed scope boundaries (what's in and what's out)
Functional requirements with priorities and dependencies
Non-functional requirements (performance, security, usability)
Agile user stories mapped to workflows
Assumptions, constraints, and risks
Clear acceptance criteria for project completion
Supporting documentation and diagrams
Eliminates Miscommunication and Ambiguity
Without a formal specification document, teams operate on assumptions that often differ dramatically. Developers build features based on their interpretation, product managers envision something different, and stakeholders expect yet another outcome. This template creates a single source of truth that everyone references, reducing costly rework and scope disputes.
Prevents Scope Creep
By explicitly documenting what's in scope and—critically—what's out of scope, this template helps teams resist the constant pressure to add "just one more feature." It establishes clear boundaries that protect project timelines and budgets.
Reduces Development Time and Costs
Teams that skip functional specifications often spend 30-40% more time in development due to constant clarification requests, requirement changes, and rework. This template front-loads the thinking, allowing developers to build confidently without constant interruptions.
Enables Accurate Estimation
Vague requirements produce wildly inaccurate time and cost estimates. Detailed functional specifications allow development teams to break down work realistically and provide stakeholders with reliable delivery timelines.
Provides Clear Success Criteria
Projects without defined acceptance criteria face endless debates about whether they're "done." This template forces teams to agree upfront on what success looks like, enabling decisive project closure.
Step 1: Set Up Your Project Foundation
Start by completing the project overview section with your project name, project manager, and date. Use the text boxes provided to clearly articulate your project's purpose—explain the problem you're solving, why it matters now, and the expected business impact. This context keeps everyone aligned on the "why" behind the work.
Step 2: Define Crystal-Clear Boundaries
In the scope section, list everything included in the project using the bullet point structure provided. Be specific about features, user types, platforms, and integrations. Equally important: document what's explicitly out of scope to manage expectations and prevent scope creep. Use the grid layout to organize in-scope versus out-of-scope items side by side.
Step 3: Document Functional Requirements
Use the structured requirement cards to capture each piece of functionality your system must provide. For each requirement, assign:
A unique ID (FR-001, FR-002, etc.) for traceability
A detailed description using "shall" or "must" language
Priority level (High/Medium/Low)
Dependencies on other requirements or systems
Add as many requirement cards as needed by duplicating the template sections.
Step 4: Specify Non-Functional Requirements
Complete the non-functional requirements grid covering performance, security, usability, reliability, and scalability. Be quantitative: instead of "fast," specify "page loads in under 2 seconds." Instead of "secure," detail "AES-256 encryption for data at rest."
Step 5: Create User Stories
Fill in the user story table using the format: "As a [user type], I want to [action], so that I can [benefit]." Each story should represent a complete workflow from the user's perspective. These stories bridge business requirements and development implementation.
Step 6: Capture Assumptions and Constraints
Document all assumptions you're making about resources, infrastructure, user capabilities, or external dependencies. List constraints like budget limits, timeline restrictions, technology requirements, or regulatory compliance needs. These factors significantly impact project planning and execution.
Step 7: Define Acceptance Criteria
Establish specific, measurable conditions that must be met for the project to be considered complete. Make criteria binary (pass/fail) with no ambiguity. Include functional completeness, performance benchmarks, testing coverage, and stakeholder approval requirements.
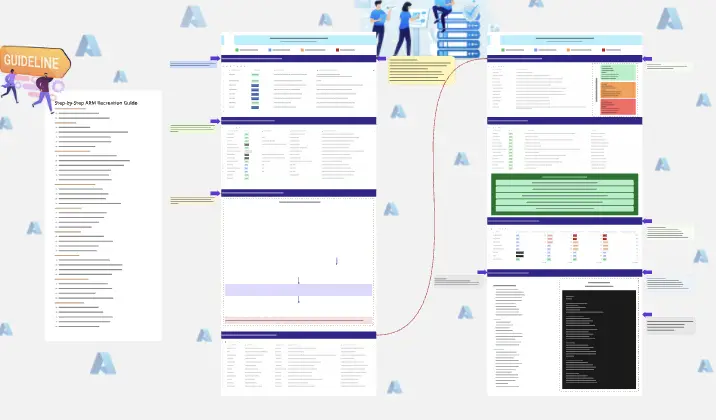
Step 8: Add Supporting Documentation
Use the appendices section to link or reference wireframes, architecture diagrams, API specifications, data models, and other supporting materials. Keep the main document focused while making detailed technical documentation easily accessible.
Step 9: Collaborate and Iterate
Share your board with all stakeholders. Use Miro's commenting features to gather feedback directly on specific requirements. Tag team members to resolve questions. Update the document based on discussions and get formal sign-off before development begins.
Step 10: Maintain as a Living Document
As requirements evolve (and they will), update the specification document with change tracking. Note what changed, why it changed, and who approved the change. This maintains the document's value throughout the project lifecycle.
Q: How detailed should my functional requirements be?
A: Requirements should be detailed enough that a developer unfamiliar with the project could implement them correctly without asking clarifying questions. Include the "what" and "why," but avoid prescribing the "how" (implementation details). A good test: Can your QA team write test cases from the requirement description alone? If yes, it's detailed enough.
Q: Should we complete the entire template before starting development?
A: For waterfall projects, yes—complete the full specification upfront. For agile projects, you can adopt a hybrid approach: complete the Purpose, Scope, and high-level requirements initially, then elaborate specific requirements 1-2 sprints before implementation. However, critical sections like assumptions, constraints, and acceptance criteria should be defined early to prevent surprises.
This template leverages Miro's powerful features to create an interactive, collaborative specification environment:
Docs: Rich text documentation areas allow you to write detailed descriptions, format text with headers and lists, and maintain professional-quality specifications within your Miro board.
Tables: Structured tables organize user stories, requirements tracking, and acceptance criteria in a scannable format that teams can easily update and reference during sprints.
Grid Layout: The underlying grid structure ensures consistent spacing and alignment across all sections, creating a professional appearance and intuitive navigation flow.
Text Boxes: Flexible text boxes throughout the template enable you to capture varying amounts of information—from brief purpose statements to detailed requirement descriptions—while maintaining visual consistency.
Good luck
Khawaja Rizwan

Rizwan Khawaja
Solution Architect @ ICT Consultant
I hold master's degrees in computer science and project management along with trainings and certifications in various technologies. All this is coupled with 25+ years of industry experience.