Today we are excited to share a guest post by Kyle Chipman, who coordinates process and brand content management at Chipman Design Architecture, a leading architecture and interior design firm whose clients include Ulta Beauty, Chick-fil-A, Shinola, Fusion Academy, Kerasotes, Senior Lifestyle, Mendocino Farms and many other national brands. As one of the early adopters of Miro, Kyle shared some of the techniques that help him reduce the time his team spends on figuring out a seating plan at the office from a couple of weeks to less than two hours.
To accommodate a recent surge in new clients and even newer team members, the leadership of Chipman Design Architecture decided it was time for a holistic seating re-arrangement.
Traditionally, this decision would trigger countless folks to gather in a brightly lit room, each jockeying for position to mark up a set of plans that struggled to retain legibility by the session’s end. The plans would be scanned, sent, changed, re-scanned, re-sent, re-changed, over and over again, with the brunt of the work resting with the IT and operations departments to sort out the logistics. With Miro, what would have taken several days we were instead able to complete in about an hour and a half (less my board prep time).
This has been tradition at our company and countless others. Fortunately, Chipman has an enterprise account with Miro and an author who’s acquainted with its virtues.
Throughout this post, I’ll explore how grouping, using layers and locking squelched the time-consuming process detailed above and established a precedent of consolidated elegance. I’ll be using a core template of Text-Lorem, Square-Ipsum, Circle-Dolor as a starting point for the examples (please check out my previous article, Creating a Dynamic Visual Hierarchy, for reference on building and deploying templates). I cannot emphasize enough how helpful it is to create a core template based on your needs and applications.
Precursor: setting preview areas
Before going any further, I’d urge you to set a preview area for every board you create. This practice is critical to quickly identifying a given board in question, particularly as your list of collaborators grows.
To set your board preview area, click the board title in the upper-left-hand corner followed by “Select preview area.” From here, establish your bounding box and click “Okay.” This will ensure that the contents of your board are visible from the thumbnail. You can go one step further by organizing your boards into Projects using a standard naming convention.
Selecting multiple objects
In order to create a group, you first need to select multiple objects. This can be accomplished using one of two techniques:
Individually, by holding Shift and left-clicking:
In a batch, by holding Shift then dragging, selecting all objects within the bounding box:
These two techniques can be combined; individual objects can be selected and added to with a batch-drag selection, and vice versa. Becoming familiar with these Shift/ selection techniques can dramatically speed up a Miro workflow and becomes essential when employing the more advanced grouping, locking and layering techniques.
When updating our seating chart, these simple Shift techniques allowed us to make decisions more easily and move multiple individuals at once.
Grouping objects
With multiple-object selection comes grouping. Grouping is a straightforward process in Miro and uses the shortcut Ctrl + G (Cmd + G on a Mac). You’ll know that you’ve successfully grouped your objects when they quickly blink in and out of view.
To un-group, click the assembly in question, then press Shift + Ctrl/Cmd + G. You’ll see the affected objects blink in the same way as previously. You can un-group multiple groups at once; this will leave all objects selected together. This is helpful when creating more complex layouts, where certain relationships need to remain, while others need to be folded in.

This action of batch-selecting, grouping and Alt + Drag pasting our team member dots (see my previous article for reference) was incredibly helpful when I initially prepared our seating chart for leadership review. By arranging the dots on the board and creating a group from the resulting batch, I could quickly copy–paste seating arrangements with uniform spacing from desk system to desk system.
Layering + locking objects
The true power of grouping objects comes into play when combined with layering, using “Send to Front/Back.” These two forces introduce the dynamic scale that drives the best results inside Miro. While the manipulation of layers isn’t as granular as you might find in other platforms, using Send to Front/Back can create an even quicker workflow than manually re-ordering a stack of slices. As always, our starting point is the shortcut:
Send to Front is Page Up (Fn + up arrow on a Mac) and Send to Back is Page Down (Fn + down arrow).
These shortcuts are invaluable when dealing with large-scale impact text. Because text offers the most minute control over size when dragging from a corner (remember, scaling shapes leaves the text size unaffected), I’ll often create headers that signify a section scaled relative to a graphic matching the exact height or width. This gives boards and layouts a great sense of dimension and dynamism.
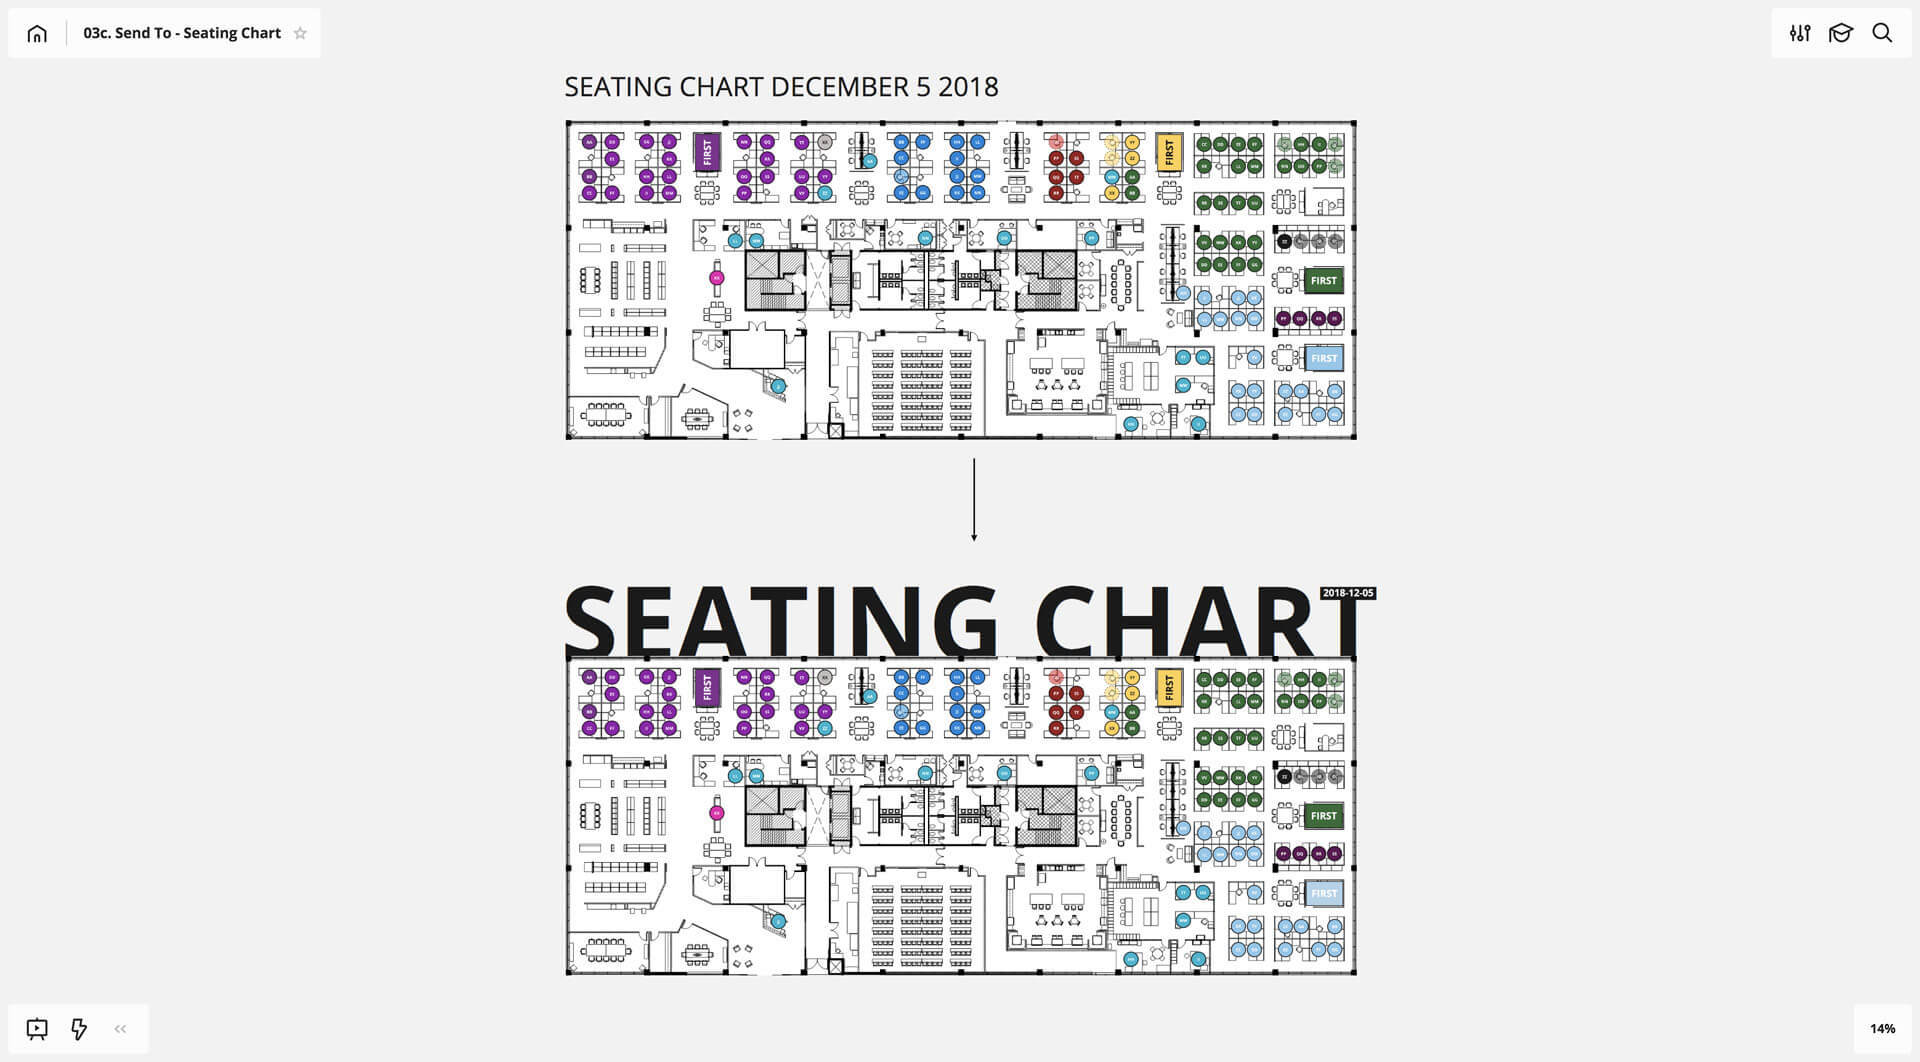
When you begin layering and scaling, you will invariably need to lock your larger background objects. By locking your background, you’ll be able to batch select (Shift + Drag) and quickly make sweeping adjustments.
Press Ctrl/Cmd + L to lock an object and Shift + Ctrl/Cmd + L to unlock. In the example below, I tried making a Shift + Drag batch selection to move multiple team members but instead moved the floor plan. To prevent this movement, I locked the header, date, logo and floor plan. I no longer have to worry about disrupting the underlying plan and can, in turn, make any final adjustments before receiving approval.
Collaborating with a team
Now on to the fun part: collaboration! The seating chart example came to life with the invitation and participation of account leaders company wide. After setting up leadership with Miro accounts and providing basic training, we asked everyone to gather with their tablets and laptops in one of our conference rooms.
Here is how our meeting was organized:
- Prior to the meeting, I did a bit of prep work. I had prepared the plan with team member dots arranged in the existing seating plan as well as client logos retrieved via the Google Image Search tool inside Miro. We used client logos to create a preliminary block plan.
- We started our exercise by creating a block plan, using the client logos to claim sections of office space.
- Then we split into small breakout groups. Navigating to the Advanced section of the Share button, I opened the board to any member of # Chipman Design Architecture and sent the link to everyone in the room. Each team leader and account manager was able to concurrently edit their team’s placement.
- Once the arrangement was finalized, I used the eyedropper tool to match each team member dot to the client logo color before locking the group entirely.
The meeting took us only 95 minutes (less my board prep time). The final plan was distributed to our IT department, which was then able to more effectively plan the physical move. When we were confident about the timing and phasing, we published a view-only link to distribute company wide, serving as instruction and reference.
The move went off without a hitch, thanks in large part to Miro, a leadership team willing to try something new and a terribly clever process manager.
ABOUT THE speaker
Kyle Chipman
Kyle Chipman is a Chicago-based designer who specializes in providing workflow solutions for national accounts, with particular focus placed on how the principles of graphic design can create organizational standards and illustrate abstract ideas. You can follow Kyle on LinkedIn.
Profile
Chipman Design Architecture
(CDA) is a third-generation nationally licensed architecture and interior design firm servicing restaurant, retail and hospitality clients. With over 140 team members across five offices and four time zones, CDA has run flagship, prototype and rollout programs that leverage innovative project management methodologies alongside visualization services and experiential design.
Founded: 1952
Founders: Albert Chipman, John + Debbie Chipman
Team: 141
HQ: Des Plaines, IL