Miro is widely used in education as an important component of paperless classroom, and we are happy that teachers and students share their experience of using Miro. Today we are happy to share a great case written by Tim Jefferis, a teacher at British boarding school, who explains how he uses Miro in his paperless classroom. Enjoy the story below!
What projects are you working on in your paperless classroom?
I am a teacher in a British boarding school and use Miro for almost all of my teaching having stumbled across it last year. Aside from my duties as the academic deputy I also teach a good number of geography classes and — in order to fill a short term staffing shortage — recently also turned my hand to religious studies teaching.
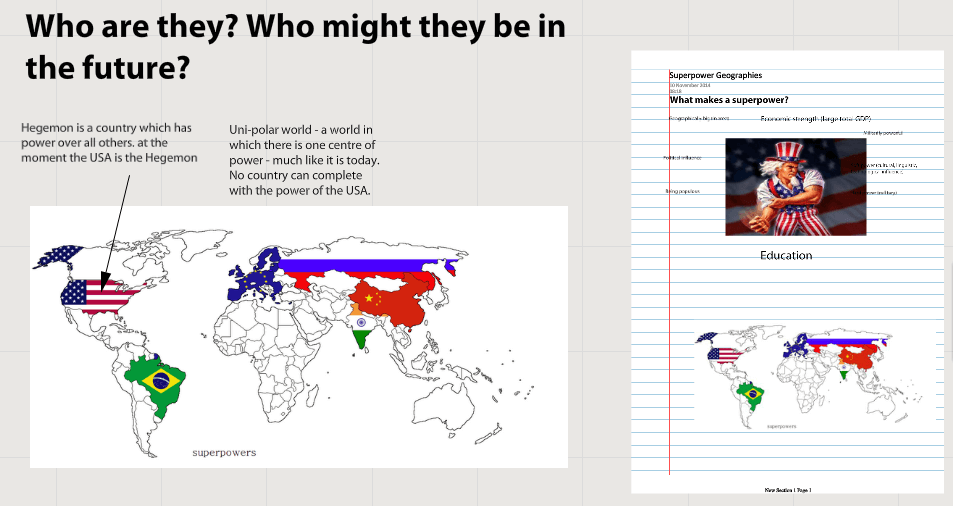
In my geography teaching I tend to use a new board for each topic. British teachers might be interested to know that the geography department at Oswestry follow EdExcel’s specification and so I have set up boards for going global, world at risk and upper sixth topics like energy security. Here’s a screenshot of a typical board to give you an idea of the layout we use:
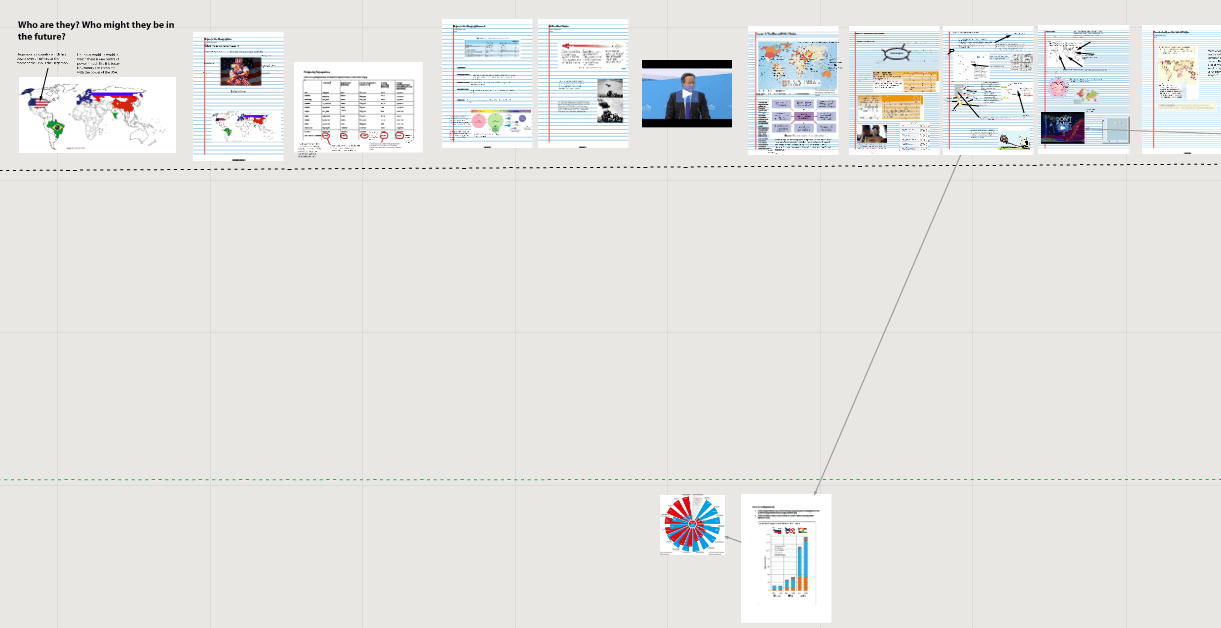
Zoomed out a little you can see how we arrange things. I have experimented with various different layouts, but have settled on a pattern where blank sheets of paper a used to structure the board in a linear fashion. Homeworks are posted below the classwork to keep them separate (hence the lines going across the board). I found that if I didn’t have rules about structure the board quickly got out of control and became difficult to follow:
What is the biggest challenge in setting paperless classroom?
Geography teachers are magpies and, unlike maths and science teachers, our material quickly goes out of date. Keeping all the resources I collect in a neat and orderly fashion and in manner that allows for easy retrieval has long been one of the biggest challenges in keeping my classroom teaching interesting and current. Before Miro the solution was this:
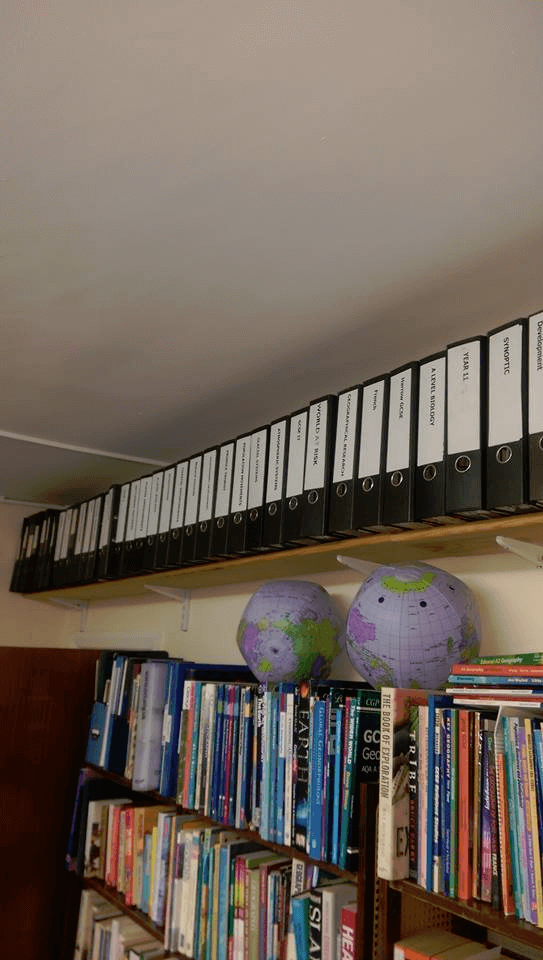
But now it is far easier to organise store and use material that I come across on a day-to-day basis. I’ve even started scanning in some of the best of my old worksheets and uploading them to my boards. But possibly one of the single most useful tools associated with Miro is the Chrome extension. It now takes a fraction of the time that it used to to cut, copy and paste useful images or text into a format that can be used in a lesson. And to think that not long ago this involved scissors, glue and hours spent at a photocopier…
How do you work together on the projects in a paperless classroom?
The best type of collaboration I find works with small classes (of 3 or less). With larger sets using Miro to its full effect can become a bit chaotic unless very carefully managed. It is for this reason that I’ve found that it’s in my religious studies teaching (where I tech just one pupil!) where I’ve really been able to adopt the dream workflow. Before the lesson I set the board up with some skeleton resources, perhaps a YouTube clip, an article or a table in a Google Doc that we’ll fill in together. My pupil then arrives, logs on (I sometimes lend him my Chromebook to speed things up yet further) and off we go. Sitting opposite each other we work in a genuinely collaborative way. I don’t have to breathe over his shoulder as he works; but can see second-by-second exactly how he’s doing and guide hime as necessary. It works a treat. As an added bonus the other religious studies teacher, teaching the same topics at the same time to a larger set (don’t ask!), can see exactly what we’re doing and where we’ve got to. For him as the head of department it is the ultimate way of keeping an eye on what I’m doing.
How do you use Miro for your paperless classroom projects?
As I’ve explained, I mainly use Miro for my classroom teaching, though I have occasionally used it as a presentation tool, or as a means of getting ideas from adults in a meeting. With my larger classes, if I’m honest, I tend to use it much as I would have used PowerPoint in the past, though it has many significant advantages over PowerPoint, not least in being fully shareable and in enabling different file types to be used seamlessly. Where it really comes into its own is when I get to use it collaboratively:
- It’s great for collecting ideas from a class and getting them to write the around a spider diagram.
- Integration with Google Docs is excellent – so pupils can move seamlessly from the board to a shared Google doc, work on it and know that a record of their work will be stored for all to see on the board.
- It’s great for note-taking too. Rather than getting pupils to copy stuff down off the board pupils can be picked on to write their own notes for the rest of the class to see – a great way of checking on learning and consolidating.
What was the process before Miro and what has changed?
I’m old enough (just) to remember a long-in-the-tooth teacher castigating me for using an overhead projector which he said was ‘new-fangled nonsense.’ We used to use a combination of paper handouts and printed or handwritten acetates to get our points across. There was always a queue around the photocopier and a good deal of (real, not virtual!) cutting and pasting going on to get things in the right place.
Since then things have moved fast. When I started at Warwick School in 1999 none of the geography classrooms had a data projector and we used OHPs and whiteboards for all our presentation needs. But it wasn’t long before data projectors started popping up and by the time I arrived at Uppingham School in 2002, no classroom was without one. The OHPs were thrown out and kids were subjected to death-by-PowerPoint. The next ‘must have’ was an interactive whiteboard but I never really got into these and to my mind applications like Miro all but supersede them. There is virtually nothing that can be done on an IWB that can’t be done with imaginative use of laptops and Miro.
What advice could you give to our users?
If you are planning to set a paperless classroom you’ll need a lesson or so to get the pupils really proficient with the use of the board. Make sure you have clear rules about how and where material can be posted or else things rapidly get out of control and pupils get lost on the board. Logging in can eat into lesson time if you’re not careful. I’d direct any pupil who asks towards a Chromebook.
Get used to using the Chrome extension and make sure your pupils do too. It is a fantastic tool for research based projects and speeds up the collection of text and images from the internet greatly.
Lastly I’d recommend just going for it — you won’t look back. Using this sort of application is clearly the way things are going to go in the future.
Learn more about Miro for Education.

