Build customer journey maps that actually drive decisions

Gain a deep understanding of customer needs and business priorities
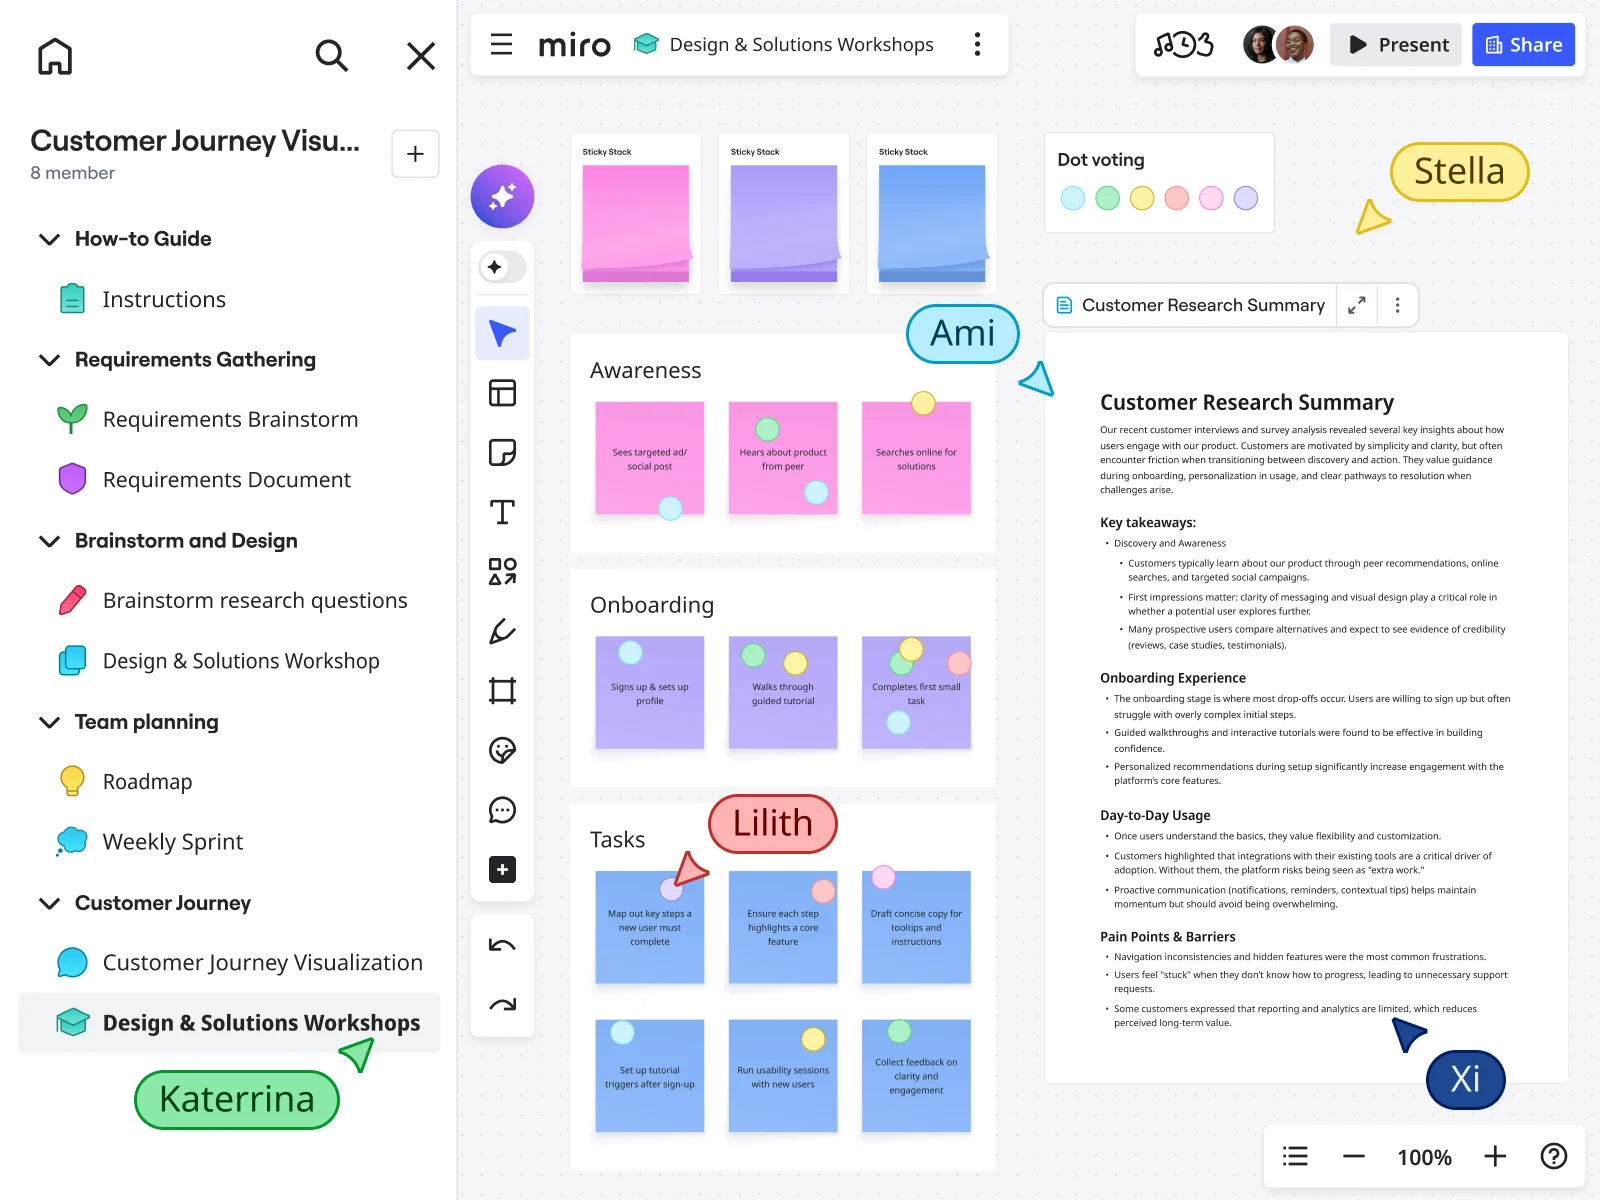
Stop recreating context for every conversation
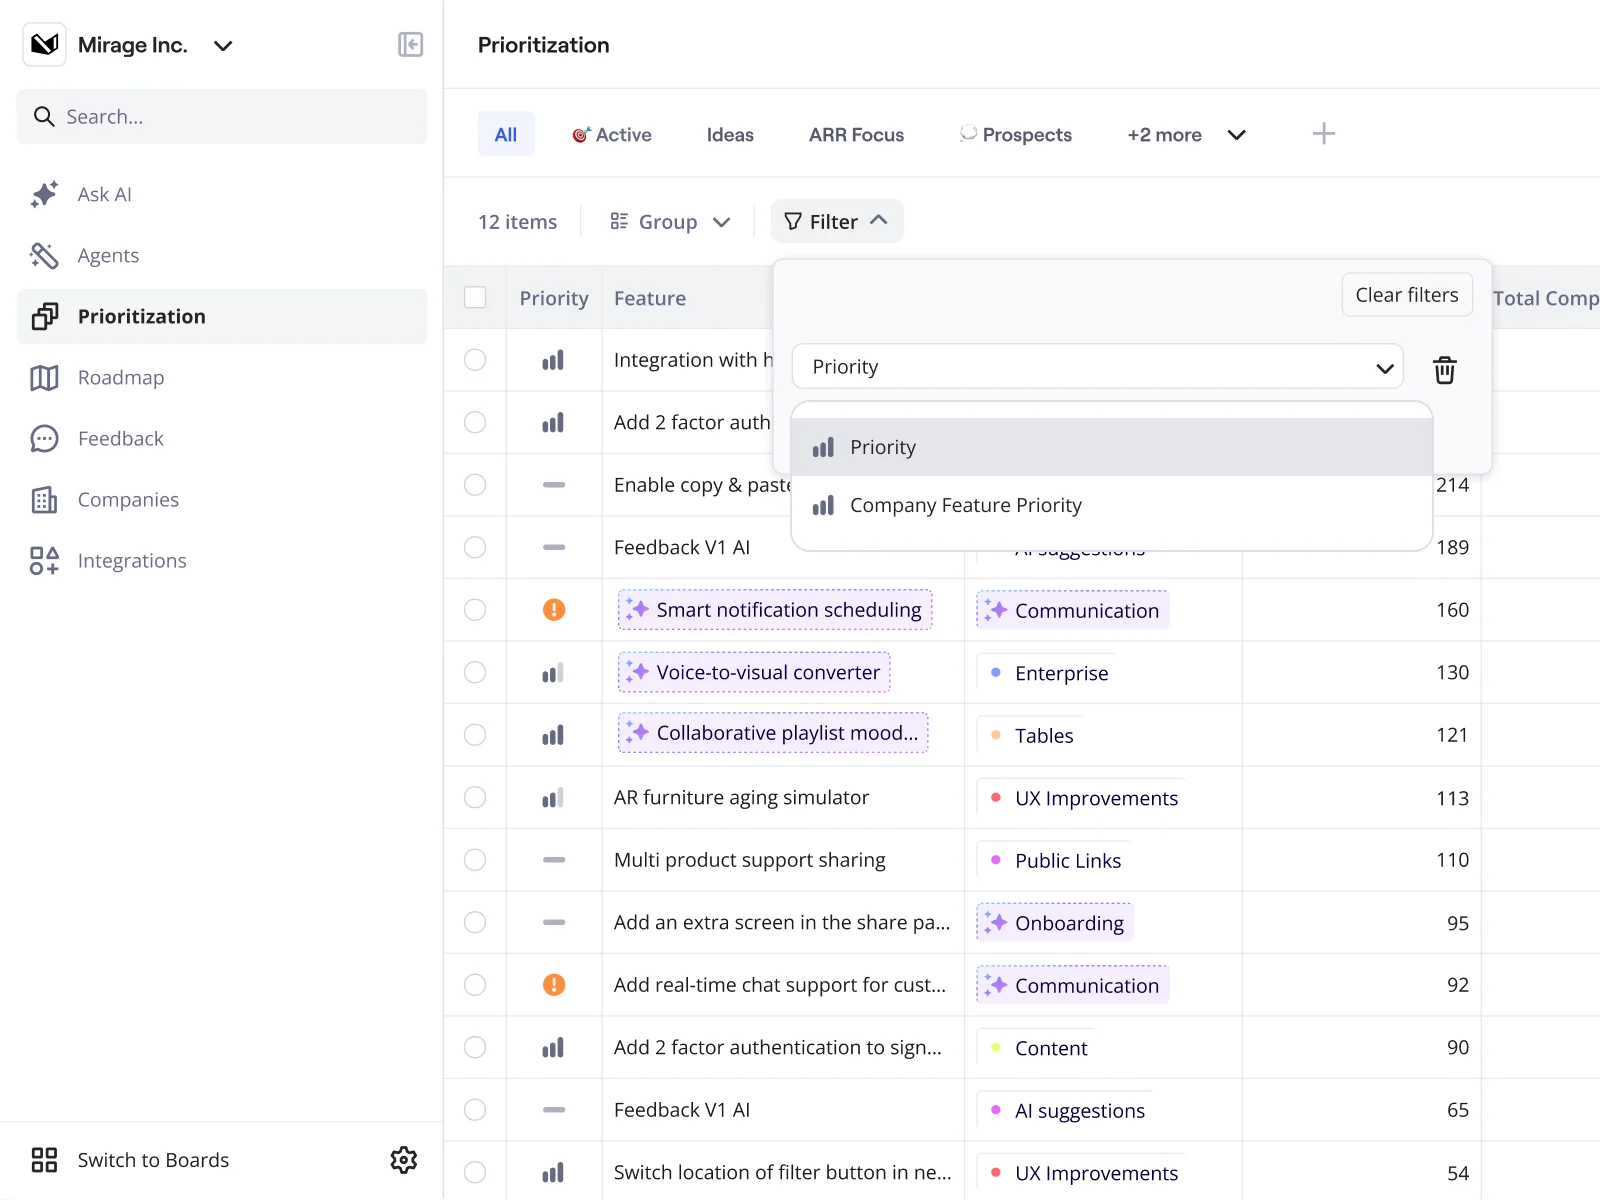
Your journey maps live where your team collaborates. When executives ask "what should we prioritize?", pull up the board with customer pain points and votes already tallied. Engineers see journey maps linked to user quotes and research. No more reformatting insights for different audiences.

Ship improvements while insights are fresh
Cut weeks from research to roadmap. Use our customer journey mapping tool to synthesize interview patterns with AI in minutes, run async voting on priorities, and link opportunities straight to Jira tickets. Watch insights become shipped features, not forgotten recommendations.
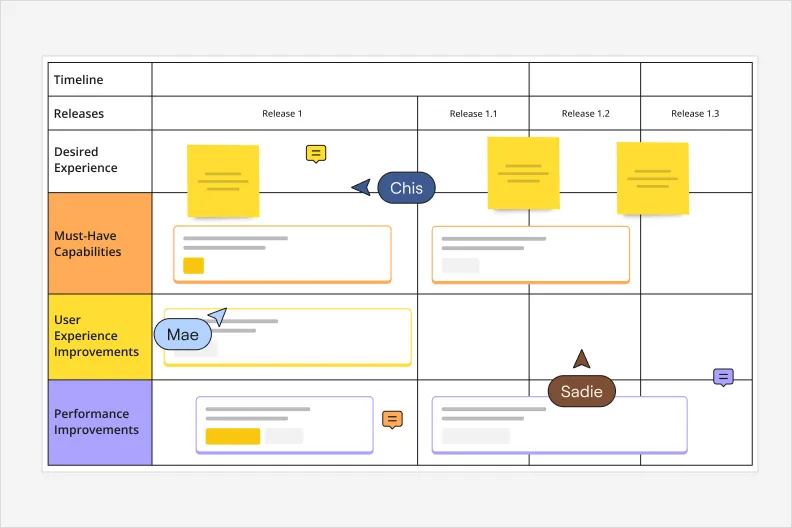
Keep maps current without starting over
Update journey maps as you learn instead of rebuilding each quarter. Add new findings to existing touchpoints, mark which pain points you've addressed, and watch synced copies auto-update across Confluence and Notion. Your map stays a living source of truth.
Why people love Miro for customer journey mapping
Work together, whenever works for your team
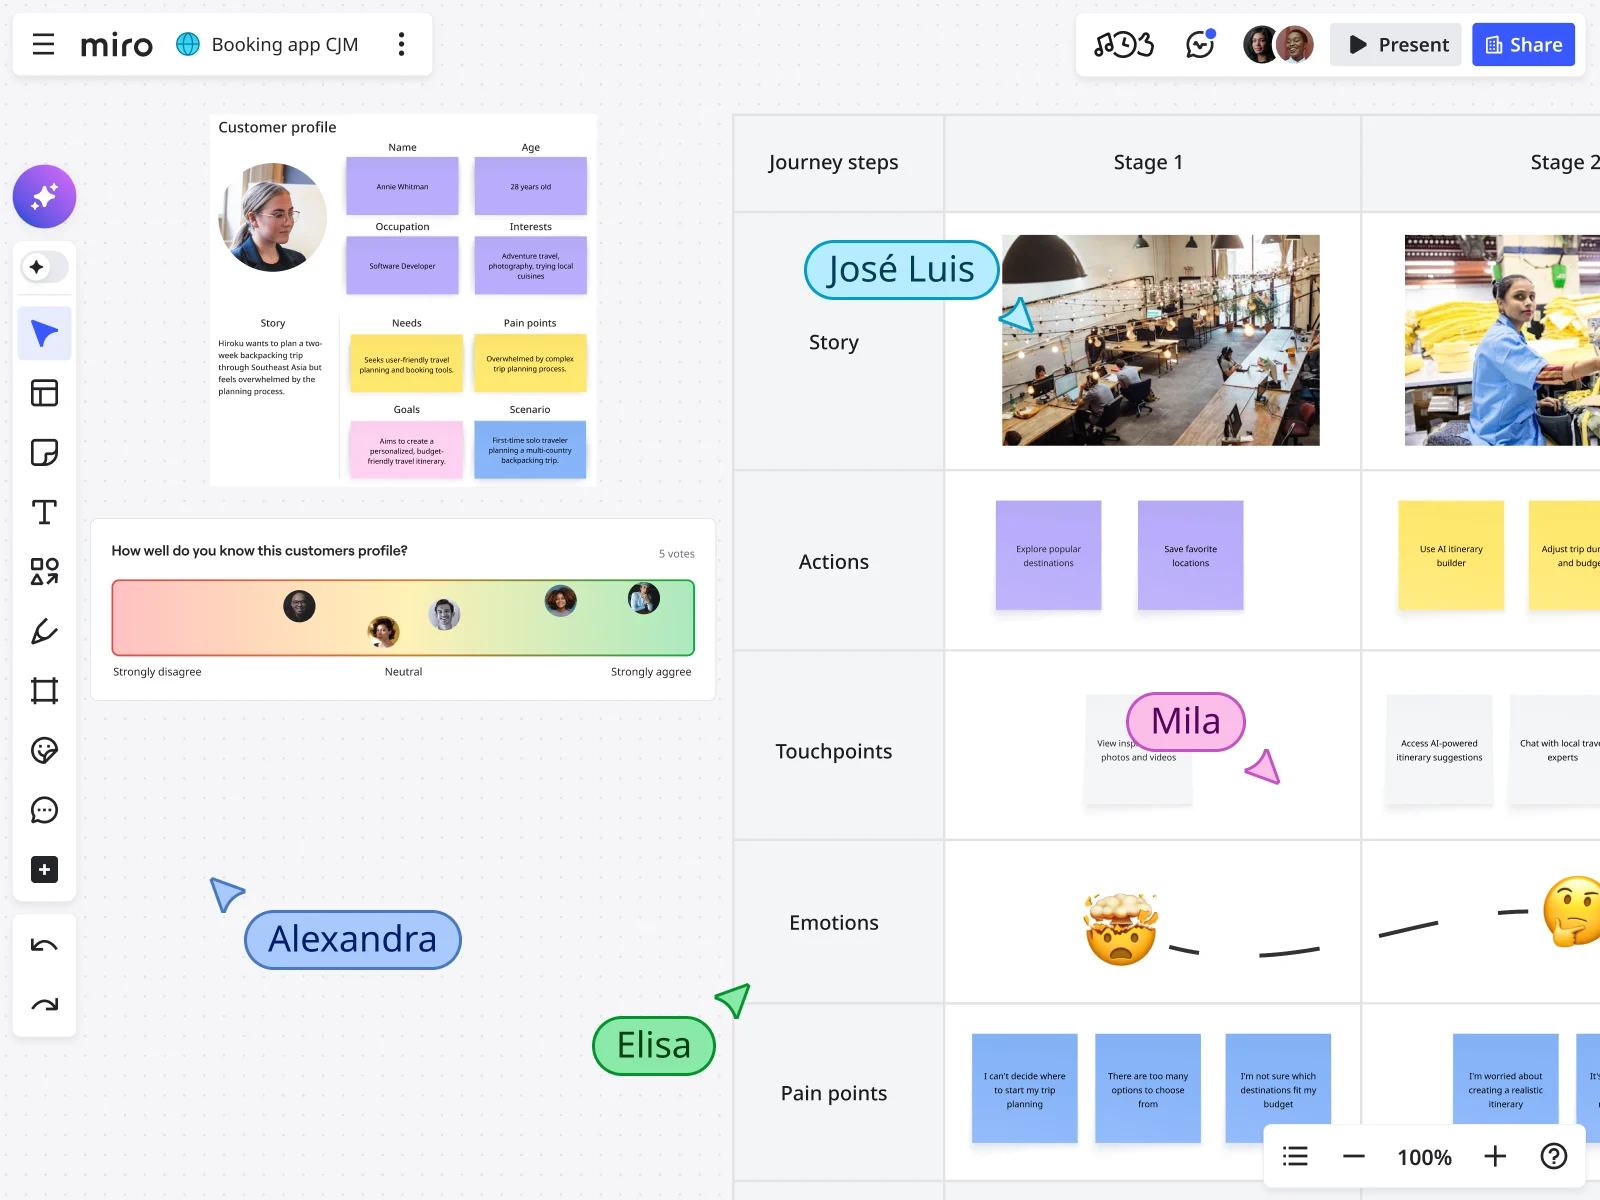
Collaborate during live journey mapping workshops or let distributed teammates contribute on their own schedule. Use comments, sticky notes, polls, and voting to align on priorities without endless meeting cycles. Video recording captures context, so remote team members never miss the thinking behind decisions.
Structure journey projects your way
Set up customer journey work however makes sense for your team with Spaces. Create folders for different personas, product lines, or lifecycle stages. Keep research, journey maps, and improvement plans together so teams find what they need without hunting through scattered files.
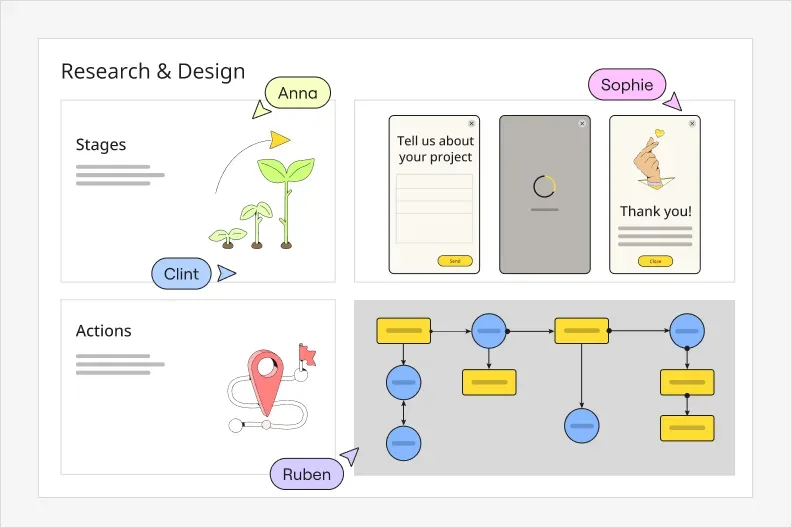
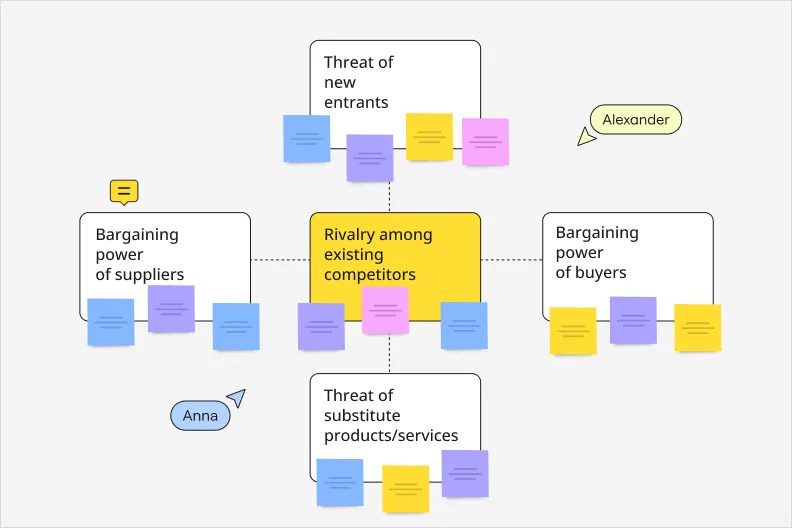
Go beyond static journey maps
Go beyond journey maps to create everything needed for execution. Our customer journey mapping tool supports docs for product briefs, diagrams for user flows, tables for opportunity analysis, prototypes for touchpoint validation, and Kanbans for tracking improvements. All formats work together on one canvas.
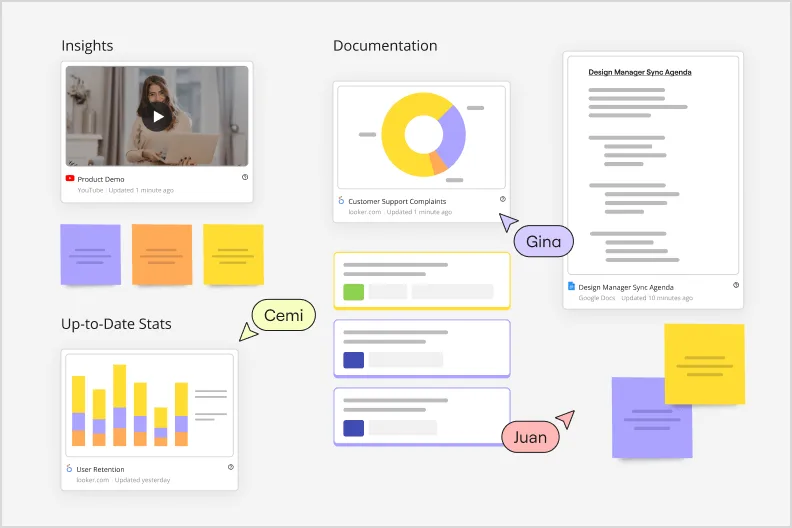
Synthesize insights with AI
Turn interview transcripts and customer feedback into structured insights faster. AI helps identify patterns across touchpoints, suggests journey structures based on your research, and highlights recurring pain points so your team focuses on deciding what to fix rather than manually organizing data.
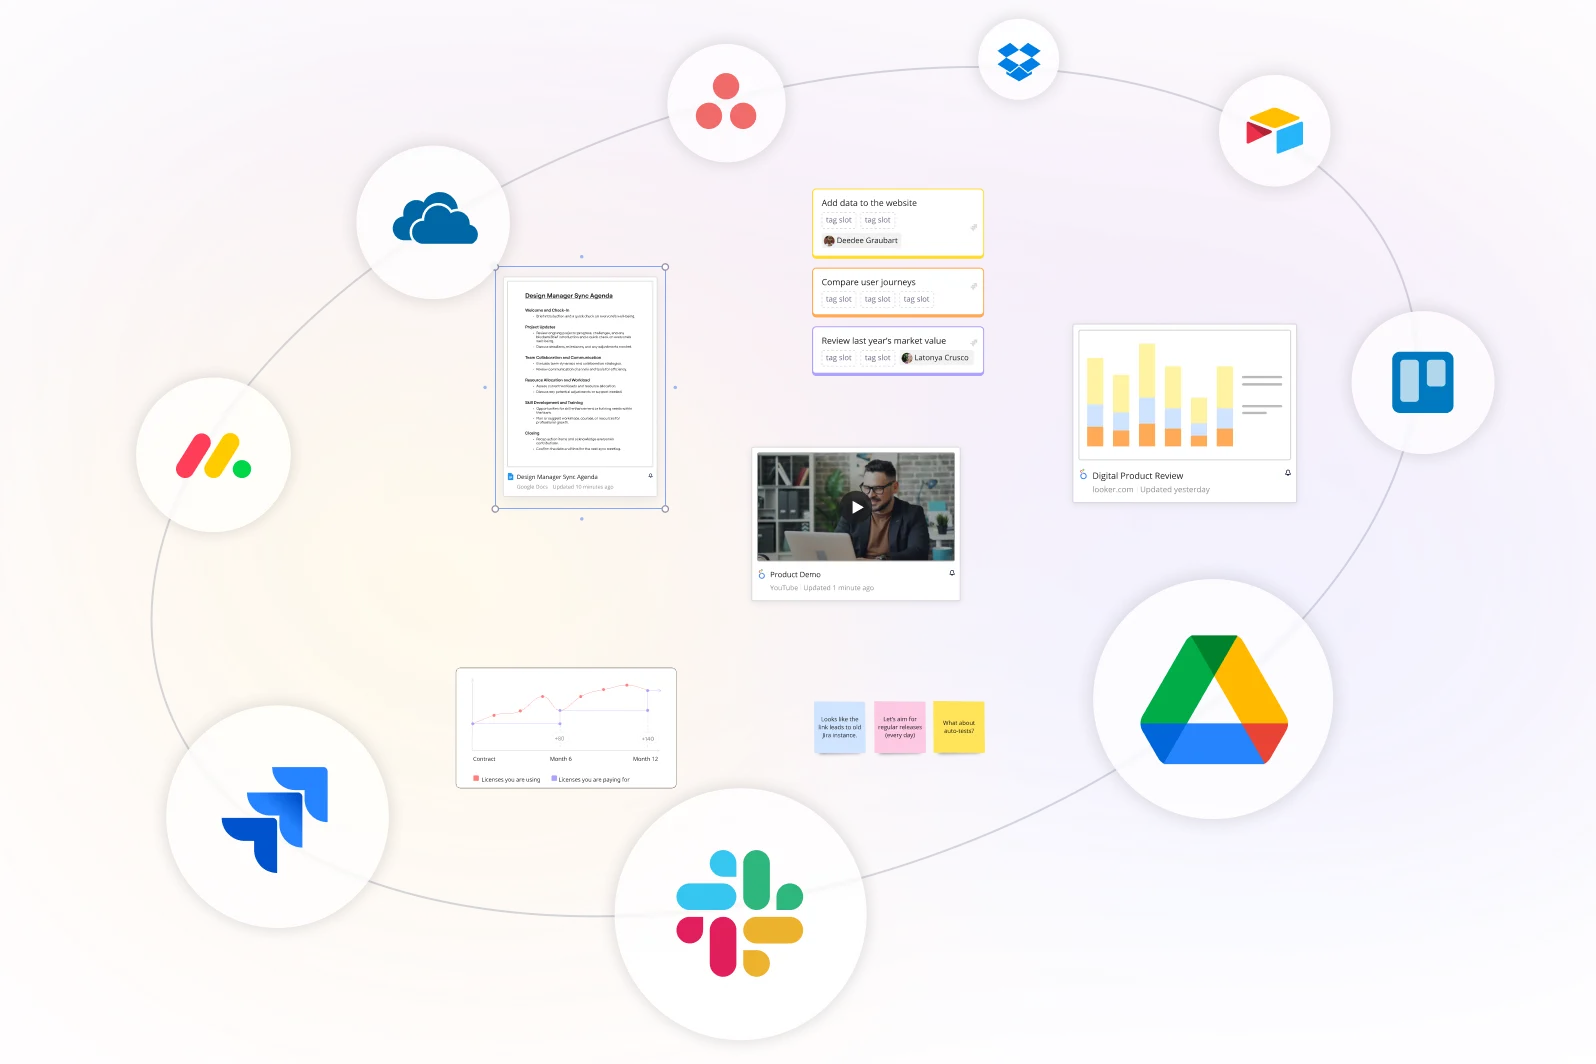
Sync journey maps across all your tools
Synced copies automatically update across your Miro boards and tools like Confluence and Notion. When you refine a journey map, every stakeholder sees the latest version where they already work. No more chasing down outdated PDFs or wondering which version is current.
Connect to your product workflow
Link journey maps directly to the tools where product work happens with our customer journey mapping tool. Connect pain points to Jira tickets, tie opportunities to Confluence roadmaps, and share insights in Slack threads. Customer research stays connected to the features it informs instead of disappearing into a research archive.
Integrated with your favorite tools
Related pages


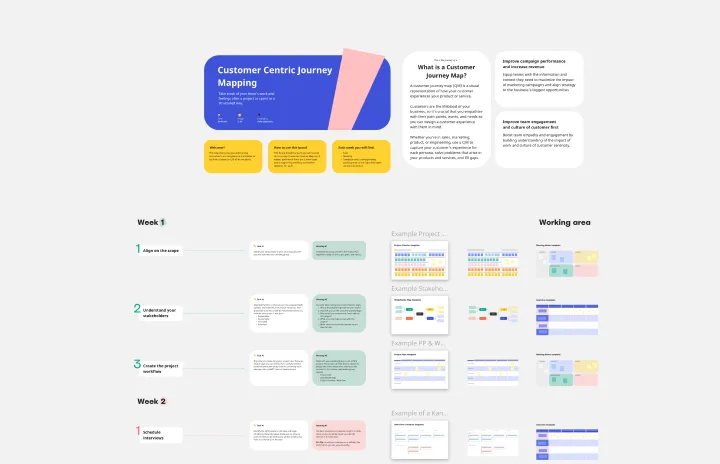
How to create a customer journey map with Miro
Identify opportunities to improve the customer experience. Use AI capabilities to identify recurring themes across large research sets and highlight critical areas. When ready, share with stakeholders for feedback and collaboratively draft an action plan to implement the findings.
Embed the map where teams and stakeholders can easily find it. Regularly review and evolve the customer journey map as you gain more data, insights, and feedback. Link insights to product briefs, user flow diagrams, and improvement Kanbans so research drives actual product decisions
Customer journey mapping tools FAQs
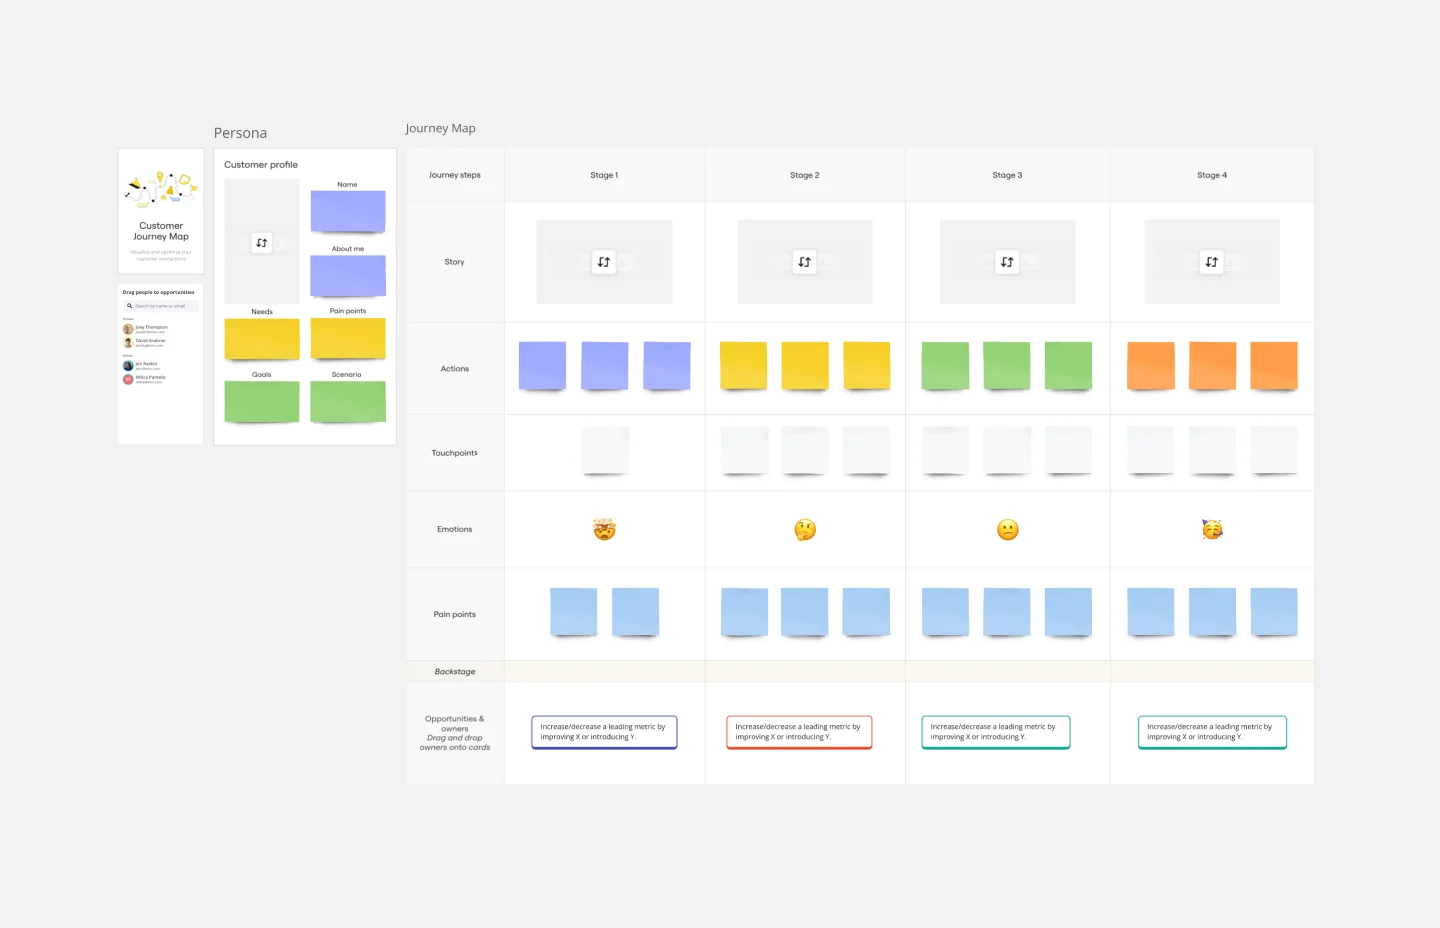
What are the components of a customer journey map?
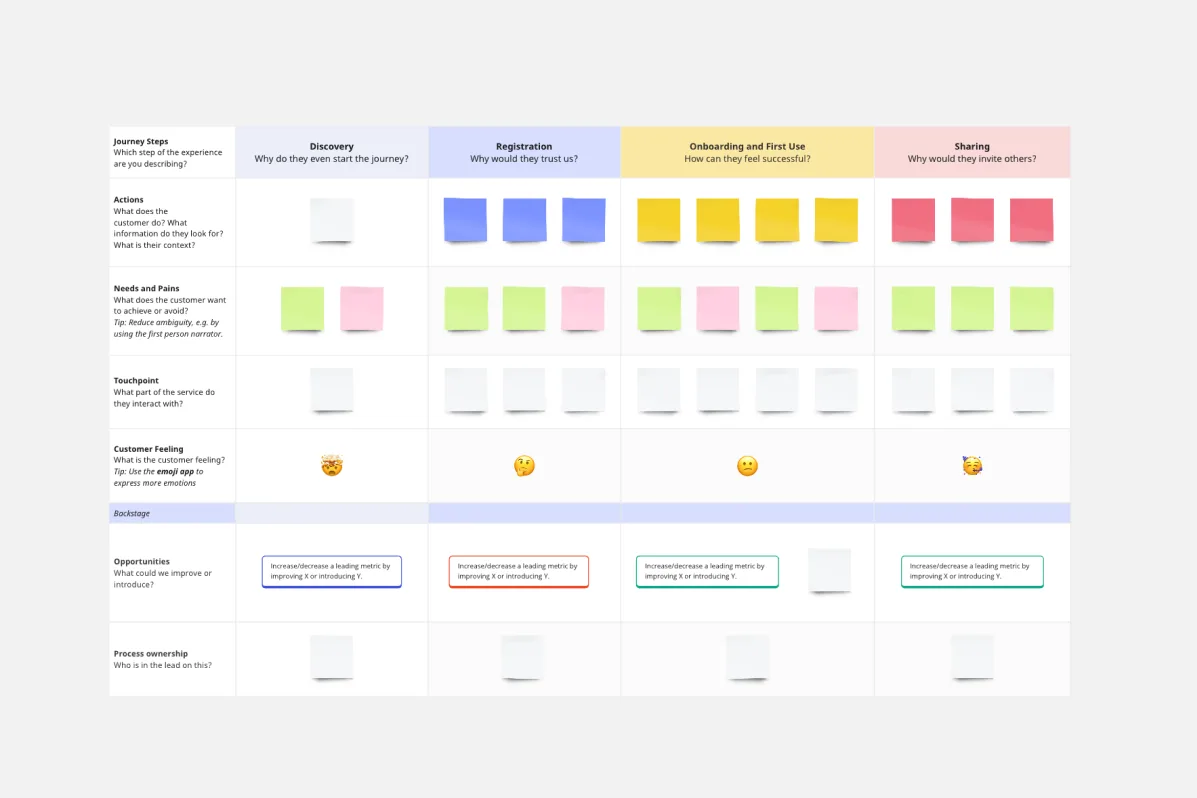
In Miro’s customer journey mapping tool, you have the flexibility to add as many components as you’d like. In our template, we use the following: actions, touchpoints, customer thoughts, customer feelings, process ownership, and opportunities. Each component belongs to a customer journey stage and is added to the board. Some folks also add user research data and other tools, such as empathy maps or timelines.
Can I download or share my customer journey map?
Yes, you can download your customer journey map as an image or PDF file or share your board link with others. Embed the map everywhere your teams work, like Confluence or Notion and it'll always be synced to the latest version. The customer journey map can be treated as a living document, evolving according to your product evolution and need.
What makes Miro's customer journey mapping tool different?
Miro connects research, mapping, and execution in one workspace. Unlike static journey mapping tools, your maps live alongside the artifacts needed for action — product briefs, user flows, opportunity tables, and improvement roadmaps. Teams collaborate where insights exist rather than recreating context elsewhere.
How does AI help with customer journey mapping?
AI capabilities help synthesize research patterns across touchpoints, suggest journey structures based on your insights, and identify recurring pain points. Turn interview transcripts and feedback into structured journey maps faster, letting your team focus on deciding what to fix rather than manually organizing data.
Is there additional cost for AI features?
AI capabilities use credits available across Miro plans. Please check our pricing page for more information.
How do I organize multiple customer journeys?
Use Spaces to structure journey work however makes sense for your team. Create folders for different customer segments, product lines, or journey phases. Keep related work together — from research synthesis to final journey maps to improvement tracking — so teams find what they need without digging through scattered boards.