Wireframe vs mockup: A clear guide to knowing when and why to use each
Summary
In this guide, you will learn:
- What a wireframe is and when to use one
- What a mockup is and when to use one
- Key differences between wireframes and mockups
- Best practices for each
- How to wireframe and build mockups in Miro
- The verdict: which one do you need right now?
Collaborative AI Workflows
Join thousands of teams using Miro to build the right thing, faster.
If you’re stepping into product design, the terms “wireframe” and “mockup” come up fast, and so does the confusion between them. They look similar on the surface, but they serve very different purposes at very different stages of the design process. Picking the wrong one at the wrong time doesn’t just slow you down; it pulls your team’s attention in the wrong direction entirely.
And here’s a take that might seem far-fetched at first: wireframes and mockups aren’t just for product designers.
As a content manager who has worked with online content for a long time, I’ve found that understanding these structures is genuinely useful across the whole organization, marketers included. When you know how a wireframe works, you can show up to stakeholder conversations with a clearer picture of what you’re trying to build, shape your ideas before they get lost in back-and-forth, and give feedback that actually moves things forward. The earlier you can visualize something, the better the decisions around it tend to be.
In this guide, I'll break down what each one is, when to reach for it, and how to move between them without losing momentum.
Wireframes explained
Think of a wireframe as the blueprint of your product. It focuses purely on structure and functionality, setting aside colors, typography, and visual polish for later. At this stage, the question is “where should everything go, and why?”
What’s a wireframe?
A wireframe is a low-fidelity, stripped-down sketch of a digital interface. It uses simple shapes and grayscale elements to map out the skeleton of a screen before any visual design work begins.
A typical wireframe includes:
- Basic layout: Boxes, rectangles, and placeholders that show where text, images, and buttons will sit
- Structural focus: The hierarchy of information and how elements relate to each other
- Interactive zones: “Dummy” buttons and clickable areas representing actions, without actual interactivity yet
Wireframes give your team and stakeholders a shared starting point, a way to agree on layout and flow before anyone has invested time in visual design.
When do you need a wireframe?
When do you need a wireframe?
Situation | Why a wireframe helps |
Starting a new product from scratch | Gives you a solid outline to build from before visual decisions complicate things |
Validating functionality | Keeps focus on the user journey and core features, not aesthetics |
Early stakeholder alignment | Gets everyone on the same page before visual work begins |
Organizing complex multi-screen flows | Maps each screen logically so nothing gets missed |
Running design sprints | Speeds up ideation and iteration in a low-cost, easy-to-change format |
Wireframing best practices
Keep it simple. Use gray boxes and basic placeholders when creating wireframes. No colors, no specific fonts. Simplicity keeps everyone focused on structure rather than style, and avoids the common trap of debating visual choices when you haven’t solved the layout yet.
Label everything clearly. Every button, form field, and content placeholder should have a label. Clear labels reduce back-and-forth and make collaboration much smoother, especially across disciplines.
Seek feedback early. Wireframes are built to be flexible. The earlier you share them, the cheaper it is to change them. Get input on structure and functionality before anyone’s invested in the visual layer.
Use templates as a starting point. Wireframing templates give you a solid foundation to customize, so you can spend your energy on the layout decisions that actually matter for your product.
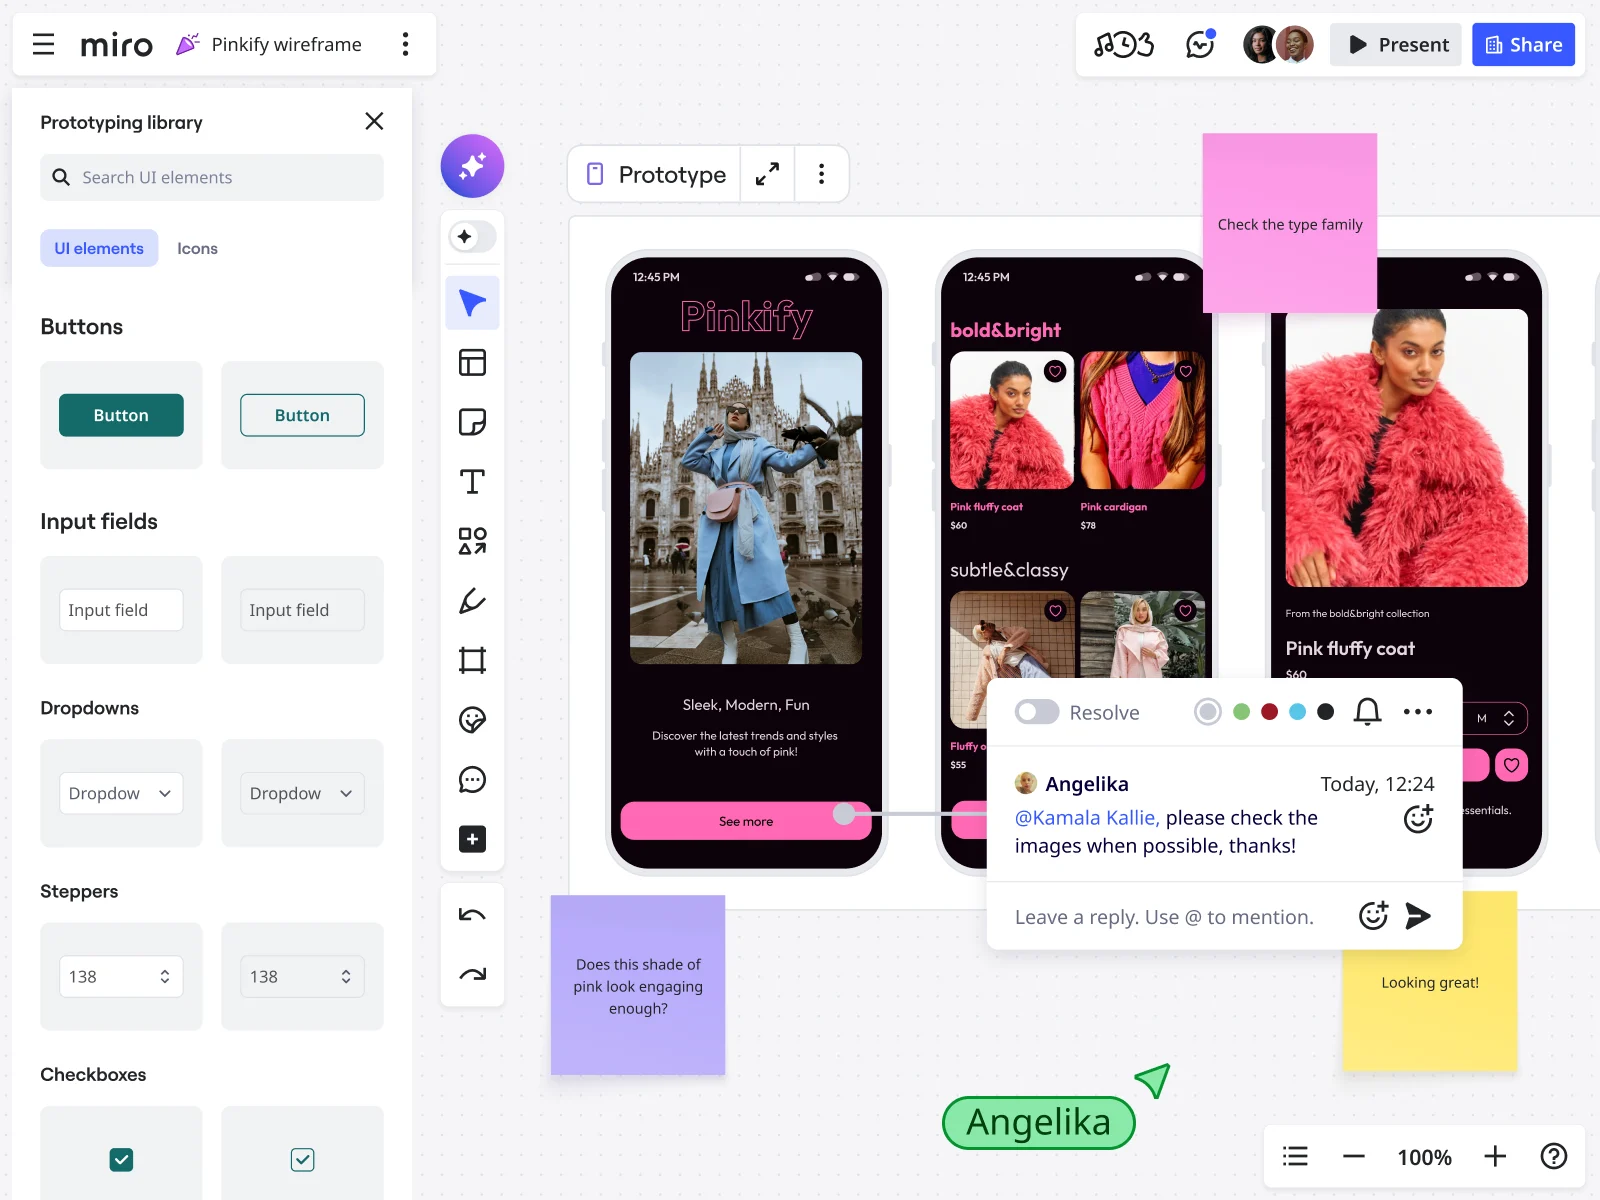
How to wireframe in Miro
Whether you’re starting from a blank board, a template, or an AI-generated foundation, Miro gives you a fast, flexible environment for wireframing. Here’s how it works in practice.
To start from scratch, open a new Miro board and add the prototyping library to your toolbar. Pick your target device (phone, tablet, or desktop), drop it onto the board, then drag in the components that fit your layout: text fields, buttons, icons, and other UI elements. Customize everything to fit your project, then share the board with stakeholders to collect feedback and iterate.
If you’d rather start with proven structure, search the Miro template gallery for “wireframe” and pick the one that fits your project. In seconds, you have a solid foundation to build on and customize.
Want to move even faster? Miro AI can generate a wireframe for you from a simple prompt. Select Create prototype, type in what you need, for example, “create a wireframe for a website homepage with a hero banner and call to action button,” and Miro AI produces a complete wireframe you can edit and expand right away. It’s especially useful when you’re stuck at the starting point or just need a structure to react to.
No matter how you start, whether from scratch, a template, or AI, Miro’s drag-and-drop UI elements make it easy to iterate, invite your team to co-create and comment in real time, and keep the whole wireframing process moving at the speed your project actually needs.
Mockups explained
Once the structure is settled, it’s time to add visual design. Mockups build on the wireframe by layering in the colors, typography, imagery, and branding that make the product feel real. This is where you stop asking “where does everything go?” and start asking “how will this actually look?”
What’s a mockup?
A mockup is a high-fidelity, static representation of your final design. It’s not interactive, but it shows stakeholders and developers exactly what the finished product will look like. Key elements include:
- Full color and branding: Exact colors, fonts, and style elements aligned with your brand
- Visual polish: Aesthetics take center stage, making it easy for stakeholders to picture the finished product
- Realistic content: Placeholders give way to real (or near-real) text and imagery for a more accurate user experience preview
Mockups are the bridge between concept and completion, the point where form and function finally meet.
When do you need a mockup?
When do you need a mockup?
Situation | Why a mockup helps |
Ensuring brand alignment | Confirms the product matches your brand guidelines before development starts |
Stakeholder presentations | Gives decision-makers a near-final design to react to on colors, layout, and aesthetics |
Testing visual hierarchy | Shows how the design directs the user's eye to key elements |
Design handoff | Gives developers a clear, detailed reference to build from |
Validating responsive layouts | Checks how designs translate across device sizes before a single line of code is written |
Mockup best practices
Use brand colors and fonts. Consistency is the whole point of a mockup. Stick to your brand’s visual system so the design feels cohesive, and so you catch any mismatches before they reach development.
Add real content. Wherever possible, replace placeholders with actual text, images, and icons. Realistic content gives stakeholders a much clearer sense of the real user experience than lorem ipsum ever will.
Get feedback on aesthetics. This is the moment to invite input on visual decisions: colors, imagery, typography, spacing. Getting that feedback on a mockup, rather than in development, saves significant rework down the line.
Test across screen sizes. A design that looks great on desktop can fall apart on mobile. Checking responsiveness at the mockup stage, before development, is always easier and cheaper than fixing it after the fact.
Build responsive mockups faster with Miro AI
One of the most time-consuming parts of mockup work is adapting a desktop design for different screen sizes. Most teams do this manually, rebuilding layouts element by element for each breakpoint. It’s painstaking, repetitive, and a surprisingly common source of inconsistency between desktop and mobile experiences.
Miro’s Responsive Mockups from Desktop to Mobile template removes that friction entirely. Instead of rebuilding from scratch, Miro AI analyzes your desktop design and generates a mobile version directly on the same board, preserving the layout logic, content, and components you’ve already built.
Here’s how to use it:
- Add your desktop prototype to the Miro board. This is your source design, the desktop mockup you’ve already created and refined.
- Select your desktop screen and activate the AI tool. With your screen selected, run the template’s AI prompt. Miro AI analyzes the layout, content, and components of your design.
- Review your mobile layout. Miro AI generates a new mobile-sized prototype based on your desktop version. The more detail you include in your prompt, the more tailored the result.
- Refine and iterate. Adjust the generated mobile layout as needed, share it with your team for feedback, and use it directly for stakeholder reviews or user testing.
The result is a consistent cross-platform design, desktop and mobile, without the back-and-forth of manual rebuilding. Your team stays on the same board, in the same context, moving forward rather than repeating work.
Wireframe vs mockup – what's the difference?
Wireframe vs. mockup: what's the difference?
Wireframe | Mockup | |
Fidelity | Low | High |
Color | Grayscale | Full brand colors |
Typography | Placeholder | Final fonts |
Content | Dummy text and boxes | Real or near-real content |
Interactivity | None | None (static) |
Primary focus | Structure and functionality | Visual design and aesthetics |
Best used for | Early ideation, alignment, flow mapping | Brand validation, stakeholder presentations, design handoff |
Stage in process | Discovery and definition | After layout is confirmed |
Time investment | Low | Medium to high |
Wireframes lay the foundation. Mockups build on that foundation by adding the visual layer. Both are essential, and they work best when used in sequence, not interchangeably.
A common mistake is jumping straight to mockups before the structure is solid. Polishing something that still needs rethinking wastes time and creates confusion.
The verdict: which one do you need right now?
Here’s the honest answer: it depends on where you are in the process.
Reach for a wireframe if:
- You’re still figuring out what the product needs to do
- Your team hasn’t aligned on layout or user flow yet
- You’re early in a sprint and need something low-cost to react to and iterate on
- You want to validate a concept with stakeholders before investing in visual design
Reach for a mockup if:
- The structure is settled and you’re ready to focus on how the product looks
- You need stakeholder sign-off on visual design before moving to development
- You’re preparing for a developer handoff and need a clear, detailed visual reference
- You want to test how the design holds up across screen sizes
The most effective design processes use both, in order. Wireframes give you permission to think messily and iterate quickly without the cost of getting visual details wrong. Mockups give you the confidence to hand off a design that’s actually ready.
What matters most is not having to switch tools between the two. When your wireframes and mockups live on the same canvas, with the same team and the same context, moving from one stage to the next is a natural progression rather than a disruptive handoff. That’s where most design processes lose time: not in the work itself, but in the gaps between tools.
Build wireframes and mockups in one place
Creating great products means getting both structure and aesthetics right, in the right order. Wireframes give you the layout and logic. Mockups bring in the visual polish. Each step matters, and the distance between them doesn’t have to be large.
Miro’s innovation workspace gives you everything for both stages on a single canvas: a prototyping library with ready-made UI components, wireframing templates you can customize in minutes, and Miro AI that generates wireframes and adapts designs across screen sizes from a simple prompt.
Your team can comment, co-create, and iterate in real time, whether you’re in the messy early stages of wireframing or presenting a polished mockup to stakeholders.
Ready to get started? Sign up for Miro free and take your design process from first sketch to final handoff, all in one place.
Frequently asked questions
What is the main difference between a wireframe and a mockup? A wireframe is a low-fidelity, grayscale sketch that focuses on structure and layout. A mockup is a high-fidelity, static design that adds color, typography, imagery, and branding. Wireframes answer “where does everything go?” Mockups answer “how will this look?”
Which comes first, a wireframe or a mockup? Wireframes come first. They let you settle the structure and user flow before investing time in visual design. Once the layout is confirmed, mockups build on that foundation by adding the visual layer.
Can you skip wireframes and go straight to mockups? Technically yes, but it usually creates more work down the line. Jumping straight to mockups means making visual decisions before the structure is solid, which often leads to rework when the layout needs to change. Wireframes are a low-cost way to catch those issues early.
Are wireframes and mockups only useful for product designers? Not at all. Anyone who needs to communicate ideas visually, present concepts to stakeholders, or give structured feedback on a design can benefit from understanding both. Marketers, content managers, and strategists all work with digital products, and knowing how wireframes and mockups work makes those conversations sharper and faster.
What is the difference between a mockup and a prototype? A mockup is static: it shows what the product will look like but doesn’t respond to clicks or interactions. A prototype is interactive: it simulates the user experience so you can test flows and gather usability feedback before development begins. Mockups come before prototypes in most design processes.
What is the difference between a wireframe and UI design?
A wireframe is a low-fidelity structural blueprint that defines layout, content hierarchy, and user flow without any visual styling. UI design is the stage where visual decisions are made: colour palettes, typography, iconography, spacing, and component styling. Wireframes answer 'where does everything go?' UI design answers 'how will it look and feel?' A mockup sits between the two. It takes the wireframe's structure and applies visual design to it, giving stakeholders a realistic preview before development begins.
How long does it take to create a wireframe? It depends on the complexity of the product, but wireframes are intentionally quick to produce. A single screen can take anywhere from a few minutes with a template to an hour or two for a more complex layout. The point is speed: wireframes are meant to be cheap to make and easy to change.
What tools can I use to create wireframes and mockups? There are many options, but the most effective setups keep wireframes and mockups in the same place so context doesn’t get lost between stages. Miro’s innovation workspace supports both, with a prototyping library, ready-made wireframing templates, and Miro AI that can generate wireframes from a prompt or adapt desktop mockups into mobile layouts automatically.
Author: Sarah Luisa Santos, Content & Growth @Miro
Last update: June 15, 2026