Customer Journey Map Template
Map your customer journey and help your customers successfully get from A to B. Understand the reasoning behind their choices and design the best product experience and meet your customer's needs.
Trusted by 65M+ users and leading companies


About the Customer Journey Map Template
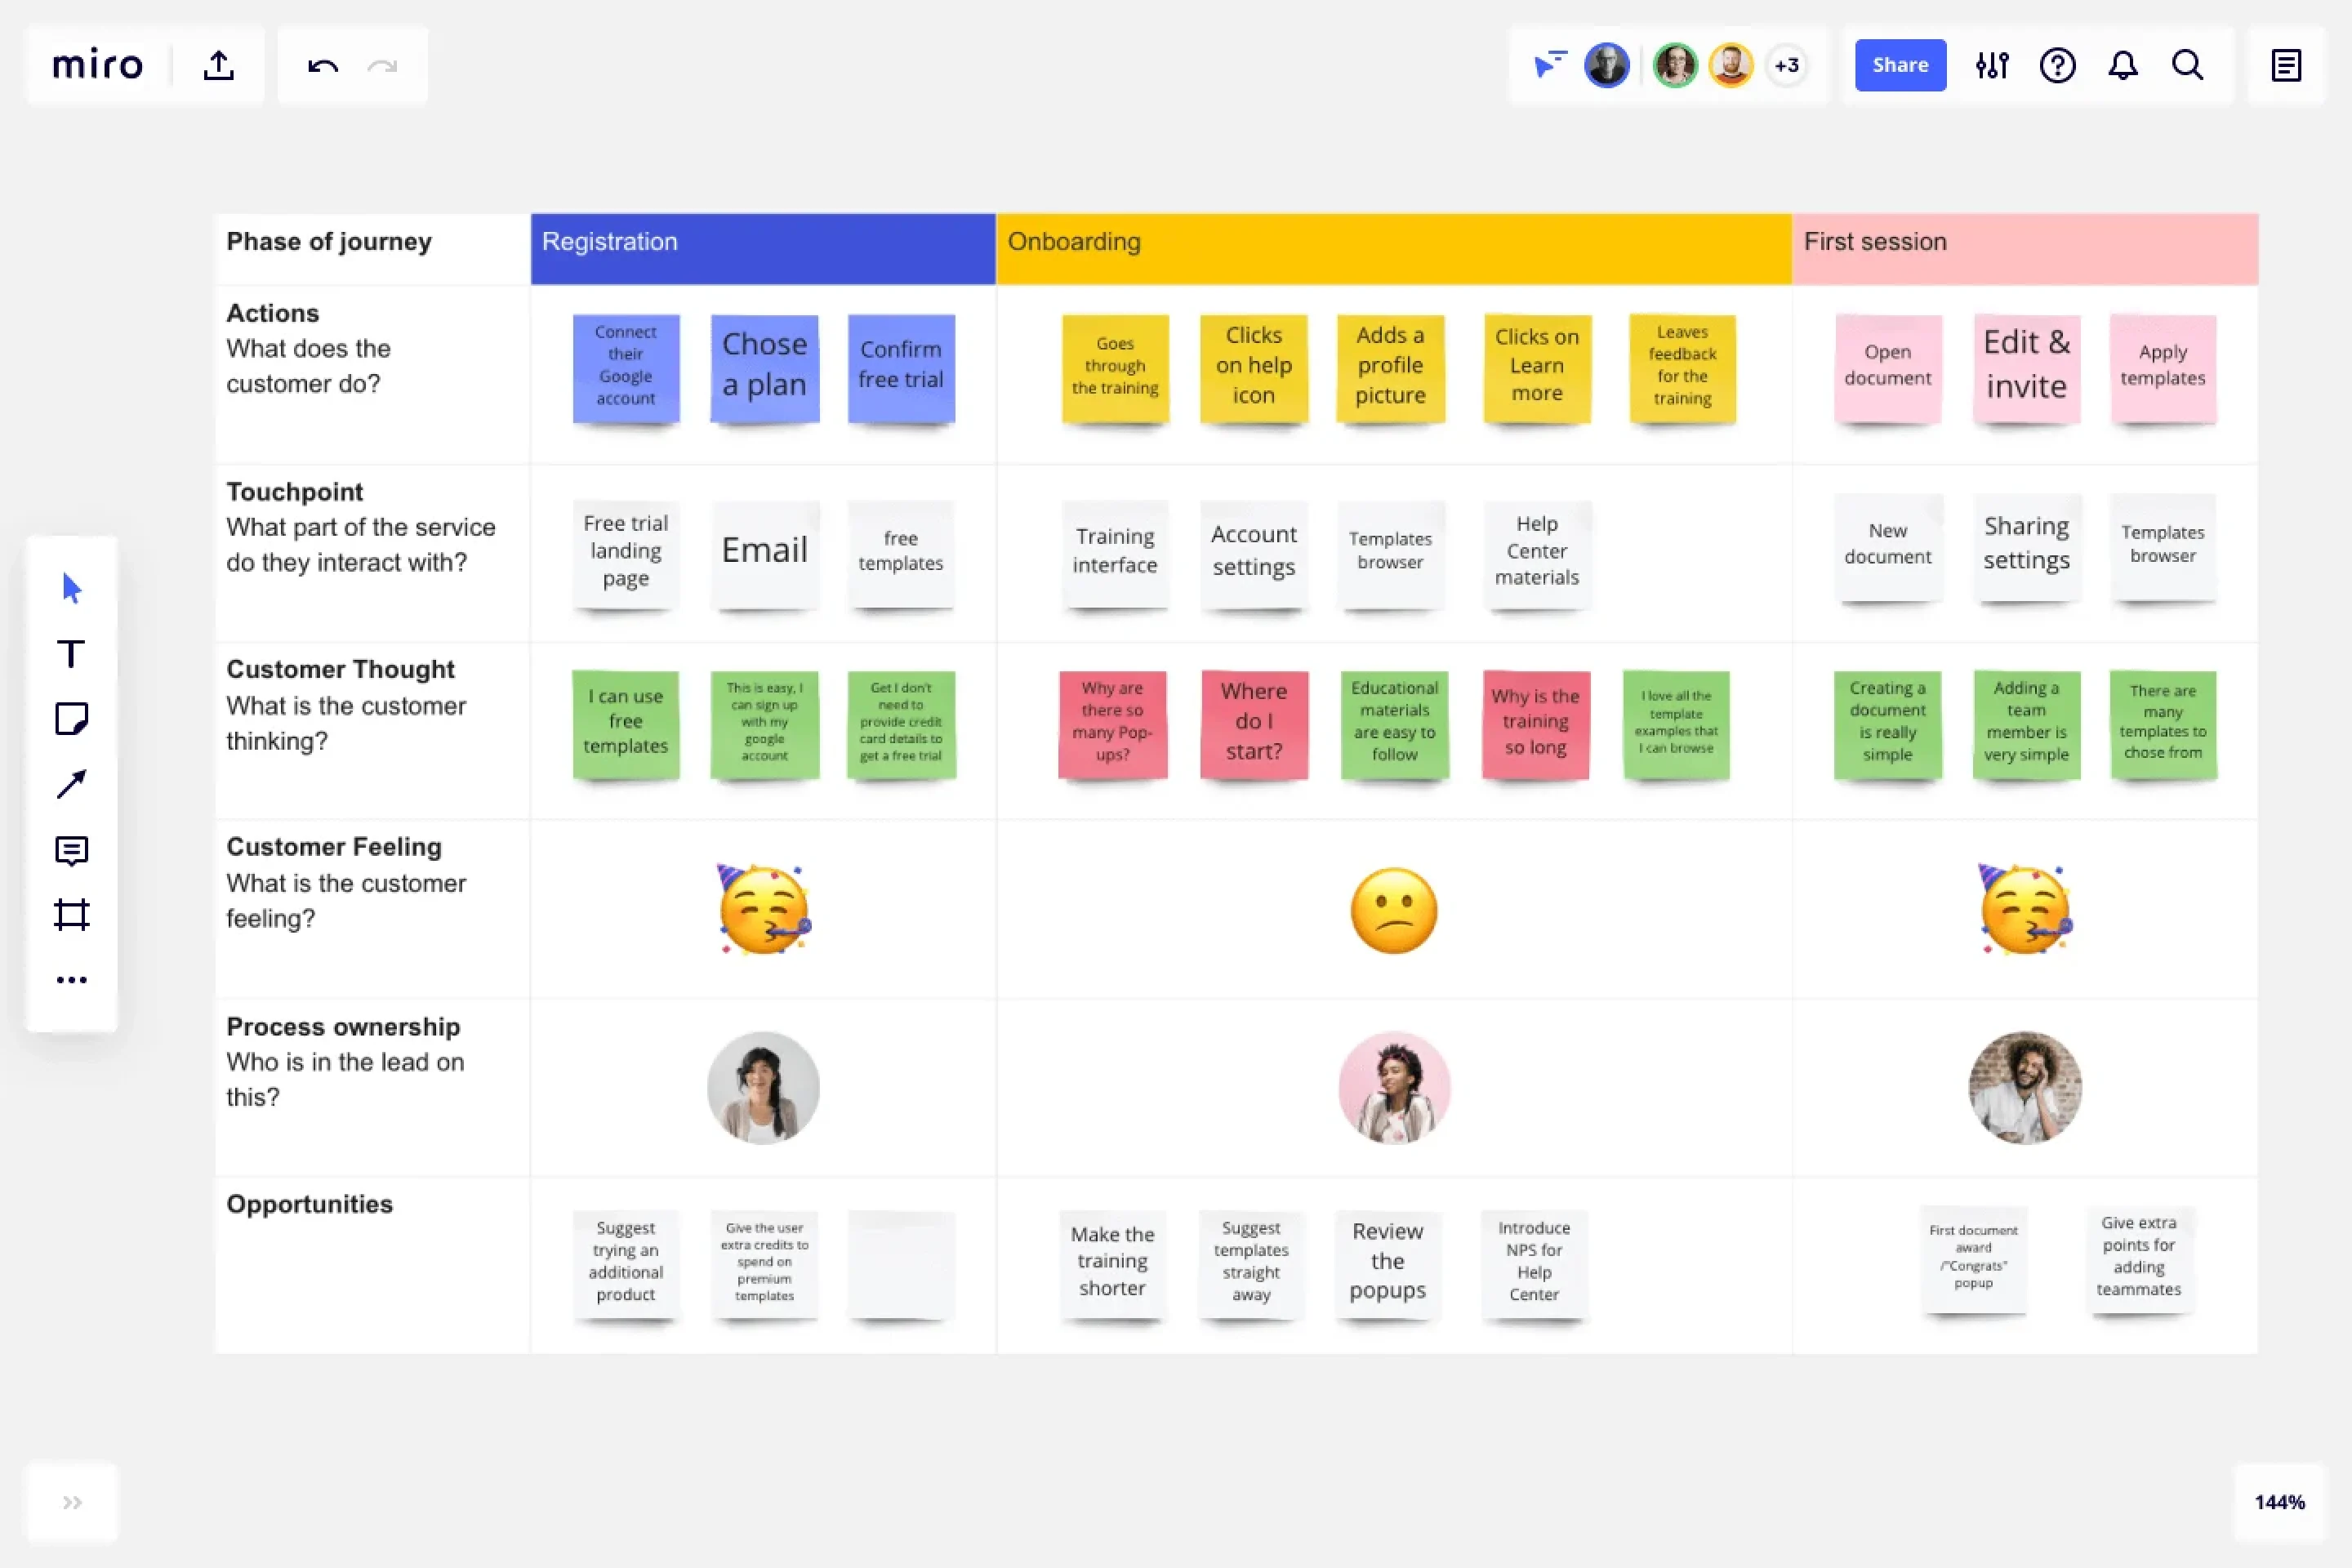
A customer journey map, also known as a user journey map, is a visual representation of how customers experience your brand and company across all its touchpoints. In a customer journey map template, interactions are placed in a pre-made timeline to map out the user flow.
Since customers are the backbone of your business, it is important to understand their pain points, desires and needs so that you can create a customer-centric experience for them.
Many teams use customer journey mapping tools to visually represent customers' thought processes and emotions from their initial interaction until the end goal. This practice enables businesses to assess whether they are meeting their objectives. Doing so can improve their conversion rates and enhance the overall customer experience.
How to use Miro’s customer journey map template
Here are 6 steps to create a successful CJM using the customer journey mapping template. In each section, we will dive a little deeper, but remember, every customer journey map is different, so you may spend more time on one step compared to another.
1. Set clear objectives for the map
Identify your goal for the map. Identifying your ideal outcome will help set the foundations for a successful project.
Ask yourself some of these questions:
Why are you making a customer journey map?
Who is it specifically about?
What experience is it based upon?
Based on this, you may want to create a buyer persona. This is a fictitious customer with all their demographics and psychographics representing your average customer. Having a clear persona is helpful in reminding you to direct every aspect of your customer journey map toward them.
2. Identify your user personas and define their goals
Use the Game-Changer container on the template to identify your persona.
Answer these three questions:
What are their key goals and needs?
What do they struggle with most?
What tasks do they have?
Conduct user research to help you in this process. Survey customers to understand their buying journey, or ask the sales team or customer service representatives for feedback or the most frequently asked questions. You would want to hear the experience of people who are interested in your product and who have interacted with it to understand their pain points and what can be done to improve.
3. Highlight target customer personas
Once you’ve discovered all the different buyer personas that interact with your business, you will need to narrow the list down and select one or two to focus on.
A customer journey map is a specific journey one customer takes, so having too many personas on one map will not be a precise indication of their journey and not a reflection of their true experience.
4. Identify all possible customer touchpoints
Based on your research, you can now use this information to map out all the possible customer touchpoints your customer will face. Use the User Journey Map Template to add the outcomes you want your customer to achieve, and then map all the steps they need to take in order to achieve these outcomes.
List out all of the touchpoints your customer currently has, and then make another list of where you would like your customers to have additional touchpoints. Then check if there are any overlaps.
This step is vital as it can show you whether you have too few or too many touchpoints and gives you a rough idea of your current customer journey experience.
Touch points are not limited to just your website. Look at other areas such as:
Social media channels
Paid Ads
Email marketing
3rd party reviews or mentions
Pro Tip: Run a quick Google search of your business and identify all the pages that mention your brand. Verify this using Google Analytics to see what brings in the most traffic.
This step is very important as it can help you understand things like, are the lack of touchpoints the reason why my customers are turning away? If there are more than expected, are they getting too overwhelmed?
5. Build the customer journey map and try it yourself!
Once you have gathered all the necessary information and identified all the touchpoints your customer will experience, it will finally be time to start building your own customer journey map.
Ensure that you note down every point your customer will touch your business. Remember to add their actions, needs, pains, and feelings to your customer journey map.
Creating the map alone isn’t the end of the process. You will need to go through the journey yourself and analyze the results. By going through the journey first-hand, you will see the areas where expectations might not have been met.
For each persona, go through every journey from beginning to end and take notes.
6. Adjust as needed
Once you have gone through each persona map, you will get a clearer understanding of what your customers are experiencing.
Ensure that all the needs are met and pain points are addressed. No matter how big or small the changes are, every single change has an impact. And this small impact could be the deciding factor for purchase, signup, or download.
Add all the opportunities and improvements you could introduce to your User Journey Map Template. Brainstorm with your team ideas to implement changes, and make sure you assign the right team members to each process.
Share your expertise on Miroverse 🚀
Publish your own template and help over 60M+ Miro users jump-start their work.
What should be included in a customer journey map template?
Every customer journey map will be different. No map is linear, so it is okay not to have a direct A to B Journey. Below we have compiled a number of points that may be included in a customer journey map template:
1. Significant milestones
In order to begin with a successful customer journey map, it is important to draft a path your customer will be journeying through to reach your business’s goal. This step is also useful as you can preemptively identify potential hiccups that might ensue here.
2. User engagement
This element is where you map out the details of how your customer will interact with your site or product. Think of how you would like this to be in order for you to achieve your goal.
3. Emotions
As we seek positive experiences, it is also important to ensure our customers feel relief, excitement, and happiness. Therefore, to mitigate any negative emotions, ensure you have a clear and concise process with appropriate branding to avoid creating negative opinions.
4. Pain Points
When your customers are experiencing a negative emotion, there is a reason why. Adding pain points to your customer journey map will help you identify the reasons behind them and come up with a solution to fix them.
5. Solutions
And finally, add solutions. Once you and your team have identified the pain points, brainstorm and implement solutions to improve your user experience.
How do I use a customer journey map template?
You can create your CJM with Miro’s free Customer Journey Map Template and customize it according to your brand or product needs. When using your own CJM template, remember to define the scope, what touchpoints you want to analyze, and who inside your organization has ownership of which step.
What are the benefits of customer journey mapping?
Using a user journey map template can be key to better understanding your customers. Customer journey mapping puts you and your team in the mind of the customer and helps you to visualize what they are experiencing at each stage and touchpoint with your business or product. Outlining the stages of interaction, while keeping the customer front and center, allows you to identify any pain points that could be improved. This will better not only the customer experience but will help with customer retention in the long run.
What is a touchpoint in a customer journey map?
A touchpoint in a customer journey map is an instance where your customer can form an opinion of your business. Touchpoints can be found in places where your business comes in direct contact with potential or existing customers. A display ad, an interaction with an employee, a 404 error, and even a Google review can be considered a customer touchpoint. Your brand exists beyond your website and marketing materials, so it’s important that the different types of touch points are considered in your customer journey map because they can help uncover opportunities for improvement in the buying journey.
How often should you update your customer journey map?
Your map should be a constant work-in-progress. Reviewing it on a monthly or quarterly basis will help you to identify gaps and opportunities for streamlining your customer journey further. Use your data analytics along with customer feedback to check for any roadblocks. It would also be helpful to schedule regular meetings to analyze any changes that might affect the customer journey.
Do all businesses need a customer journey map?
Customer journey mapping is important for businesses of all sizes. From SMBs to Enterprise. It is also important for all functions. From sales and marketing to customer service. There is no one size fits all for customer journey maps. Therefore, it is important to take time to personalise your own customer journey map to fully understand your own process and identify your own pain points.
Get started with this template right now.
SDLC Template
Works best for:
Diagramming
The Software Development Life Cycle (SDLC) template is a well-designed visual tool that helps software development teams follow a structured approach from the initial concept to the final deployment of the software. One of the most significant benefits of using this template is that it promotes clear, streamlined communication among team members. By breaking the development cycle into distinct phases, all stakeholders can stay informed about the progress of the project and understand their responsibilities within the larger context. This enhanced communication reduces the chances of misunderstandings and ensures that everyone works together towards the common goal of delivering high-quality software. The template acts not only as a roadmap but also as a shared language for the team, improving collaboration and the efficient progression of the project through each critical stage.
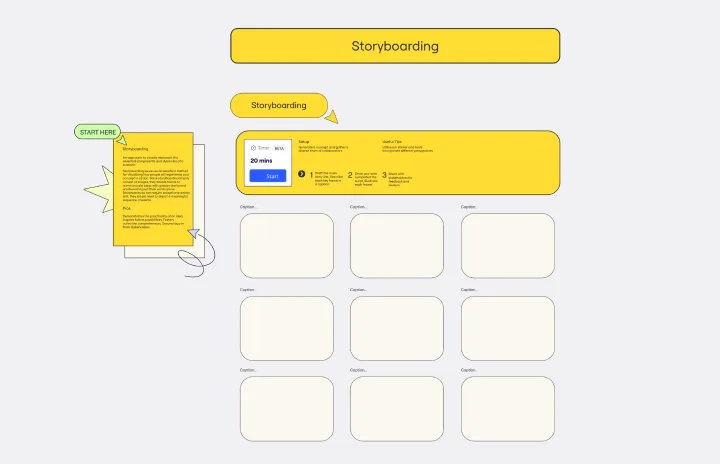
Storyboarding Template
The Storyboarding Template is an excellent way to visualize how people will experience your concept in action. It primarily consists of images, which enable teams to communicate ideas with greater clarity and emotional impact than words alone. You don't need exceptional artistic skill to create storyboards; you simply need to depict a meaningful sequence of events.

Service Blueprint Template
Works best for:
Desk Research, Operations, Market Research
First introduced by G. Lynn Shostack in 1984, service blueprints allow you to visualize the steps that go into a service process from the customer’s perspective. Service blueprints are useful tools for understanding and designing a service experience – and finding ways to improve it. Service blueprint diagrams make it simpler for teams to design new processes or improve existing ones. To create a service blueprint, map out each process and actor that contributes to the customer experience, from in-house contributors to third-party vendors.
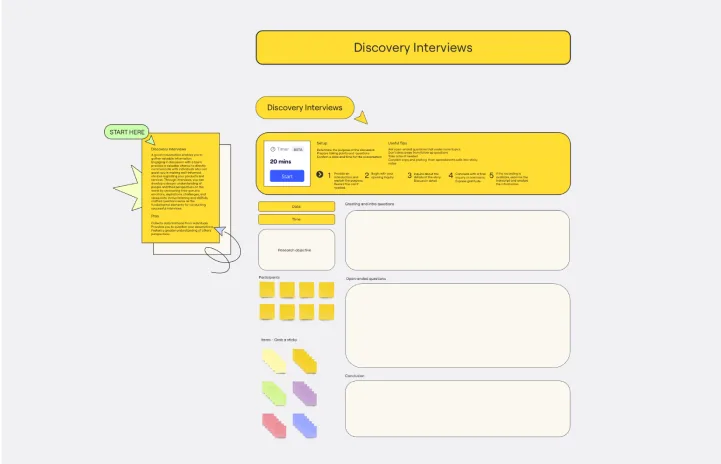
Discovery Interviews Template
Works best for:
Design, UX
The Discovery Interviews Template is a powerful tool that allows you to delve into a topic from different angles and gain a deeper understanding of different perspectives. By conducting interviews using this template, you can uncover valuable insights and uncover new information that can help you make informed decisions. Whether you are a researcher, product manager, or simply curious about a specific topic, the Discovery Interviews Template is an essential resource for anyone looking to explore a subject in depth.
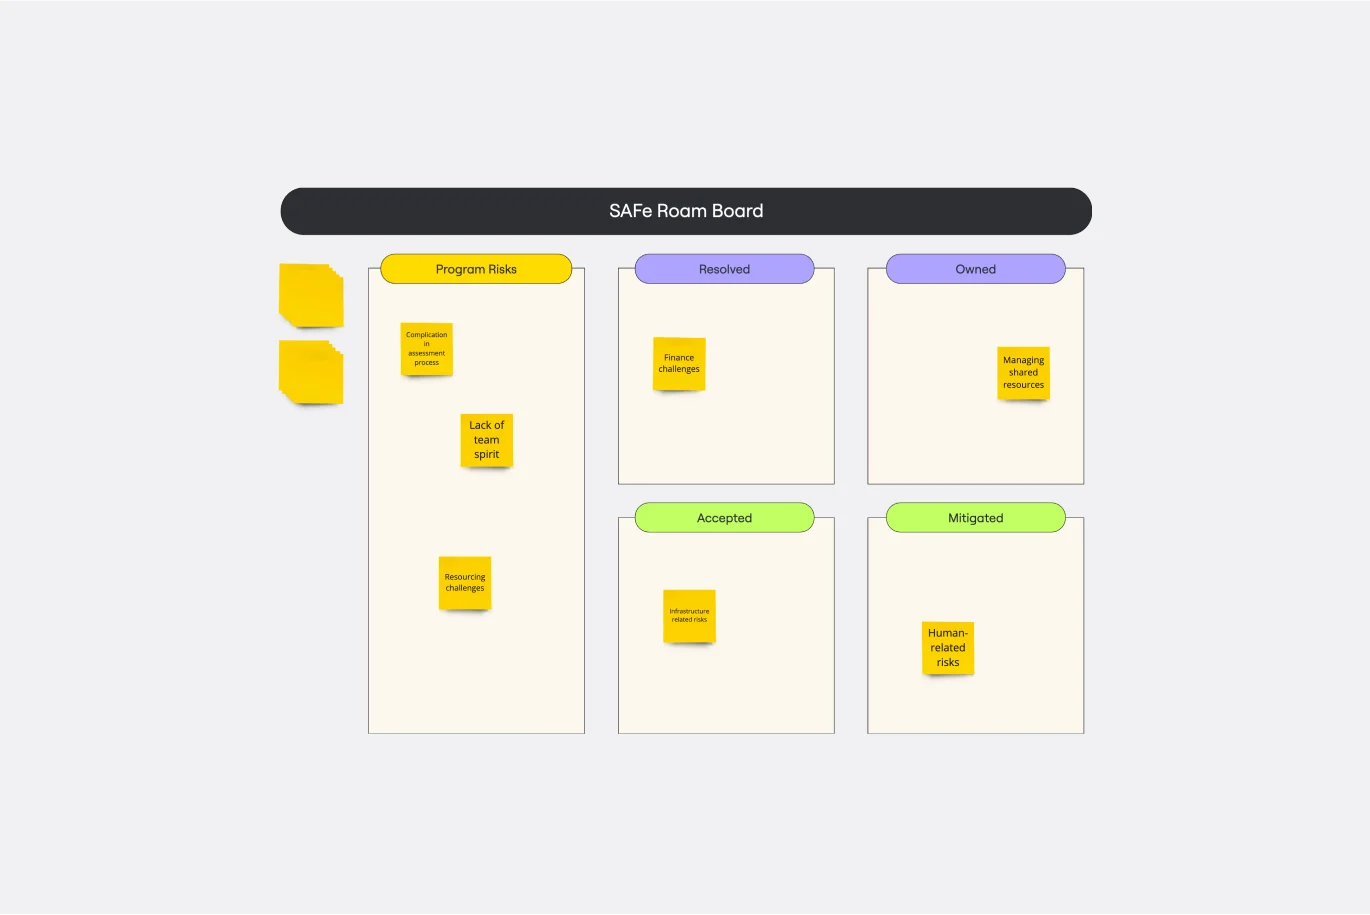
SAFe Roam Board
Works best for:
Agile Methodology, Operations, Agile Workflows
A SAFe ROAM Board is a framework for making risks visible. It gives you and your team a shared space to notice and highlight risks, so they don’t get ignored. The ROAM Board helps everyone consider the likelihood and impact of risks, and decide which risks are low priority versus high priority. The underlying principles of SAFe (Scaled Agile Framework) are: drive cost-effective solutions, apply systems thinking, assume that things will change, build incrementally, base milestones on evaluating working systems, and visualize and limit works in progress.
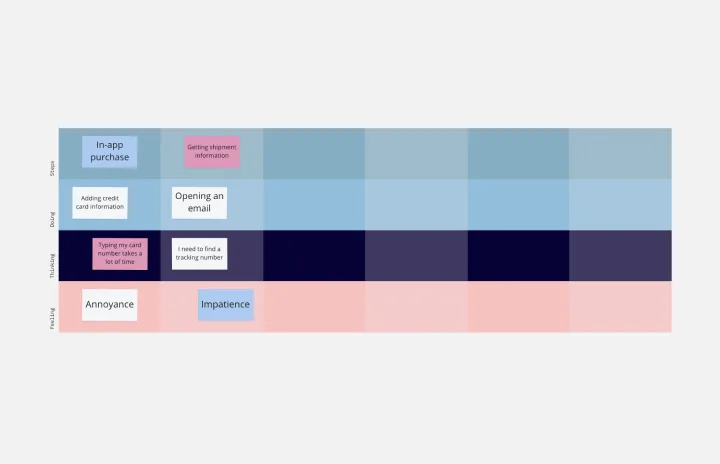
Scenario Mapping Template
Works best for:
Desk Research, Mapping, Product Management
Scenario mapping is the process of outlining all the steps a user will take to complete a task. The scenario mapping template helps you create a visual guide to what different personas are doing, thinking, and feeling in different situations. Use scenario mapping to outline an intended or ideal scenario (what should happen) as well as what currently happens. If you’re trying to outline the ideal scenario, user mapping should take place very early on in a project and can help inform user stories and the product backlog. If you’re just trying to get a better sense of what currently happens, you can do user mapping when conducting user interviews or observation.