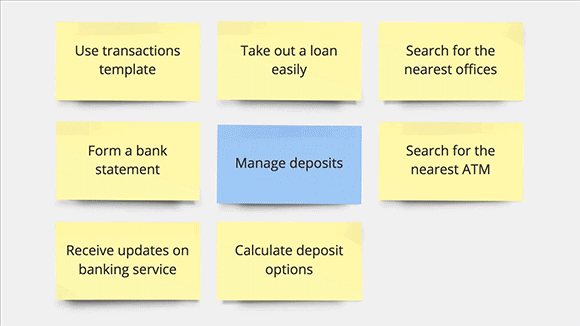
Designing initial product backlog refinement meetings, when your team doesn’t have a backlog yet.
This guide illustrates the process of setting up and using the popular Agile Scrum approach. In this guide, we review the basics of each event and provide examples of how running them in a visual workspace helped our clients enhance their Agile process or helped overcome the challenges of remote teamwork. You’ll also find instructions on how to set up a similar process for your Scrum Team using Miro.
Backlog refinement
The Agile process begins before the first Sprint is initiated. The official Scrum Guide™ calls this stage “Product Backlog refinement.” Your team needs to know how to design the three types of this meeting.
- Initial Product Backlog refinement meeting, when your team doesn’t have a Backlog yet
- Story generation workshop, when a team needs to understand how to implement a new feature
- Ongoing Backlog refinement to ensure the Backlog is healthy
We asked one of our clients, Lieuwe van Brug, co-founder of Frontall.io and an experienced Agile coach, to share the framework he uses to lead clients through the most complicated meeting – the initial Backlog refinement.
Product backlog refinement
What is product backlog refinement? *
Product Backlog refinement is the act of adding detail, estimates and order to items in the Product Backlog. This is an ongoing process in which the Product Owner and the Development Team collaborate on the details of Product Backlog items
Why run a product backlog refinement meeting?
To ensure the Product Backlog is healthy. In a healthy Product Backlog, the items that will occupy the Development Team for the upcoming Sprint should be refined so that any one item can reasonably be “Done” within the Sprint time-box.
How to run this meeting*
You can plan a Backlog refinement meeting whenever you realize that a Backlog needs revision. This activity occurs on a regular basis and may be an officially scheduled meeting or an ongoing activity. Backlog refinement includes the following tasks.
- Remove completed stories.
- Redefine and confirm the remaining stories.
- Prioritize each story.
- Review the estimated time required for each story.
* Source: The Scrum Guide™, November 2017
Challenges
- Creating a Product Backlog, when you don’t have a Backlog
- Difficulty visualizing Backlog changes for remote team members
Useful Miro features
- Different Backlog import types: physical sticky notes, cells from spreadsheets or Jira issues
- Digital sticky notes
- Pre-made templates
- Tags
- Jira integration
Customers’ examples
This case study is written by Lieuwe van Brug, co-founder of Frontall.io and an Agile coach.
“The refinement process is always the biggest challenge for companies where I worked as a coach or Scrum Master and so often underestimated. I think it’s the biggest flaw in Agile Scrum.” Lieuwe van Brug, co-founder of Frontall.io and Agile coach
Profile: Frontall
Website: frontall.io
Industry: Information technology and services
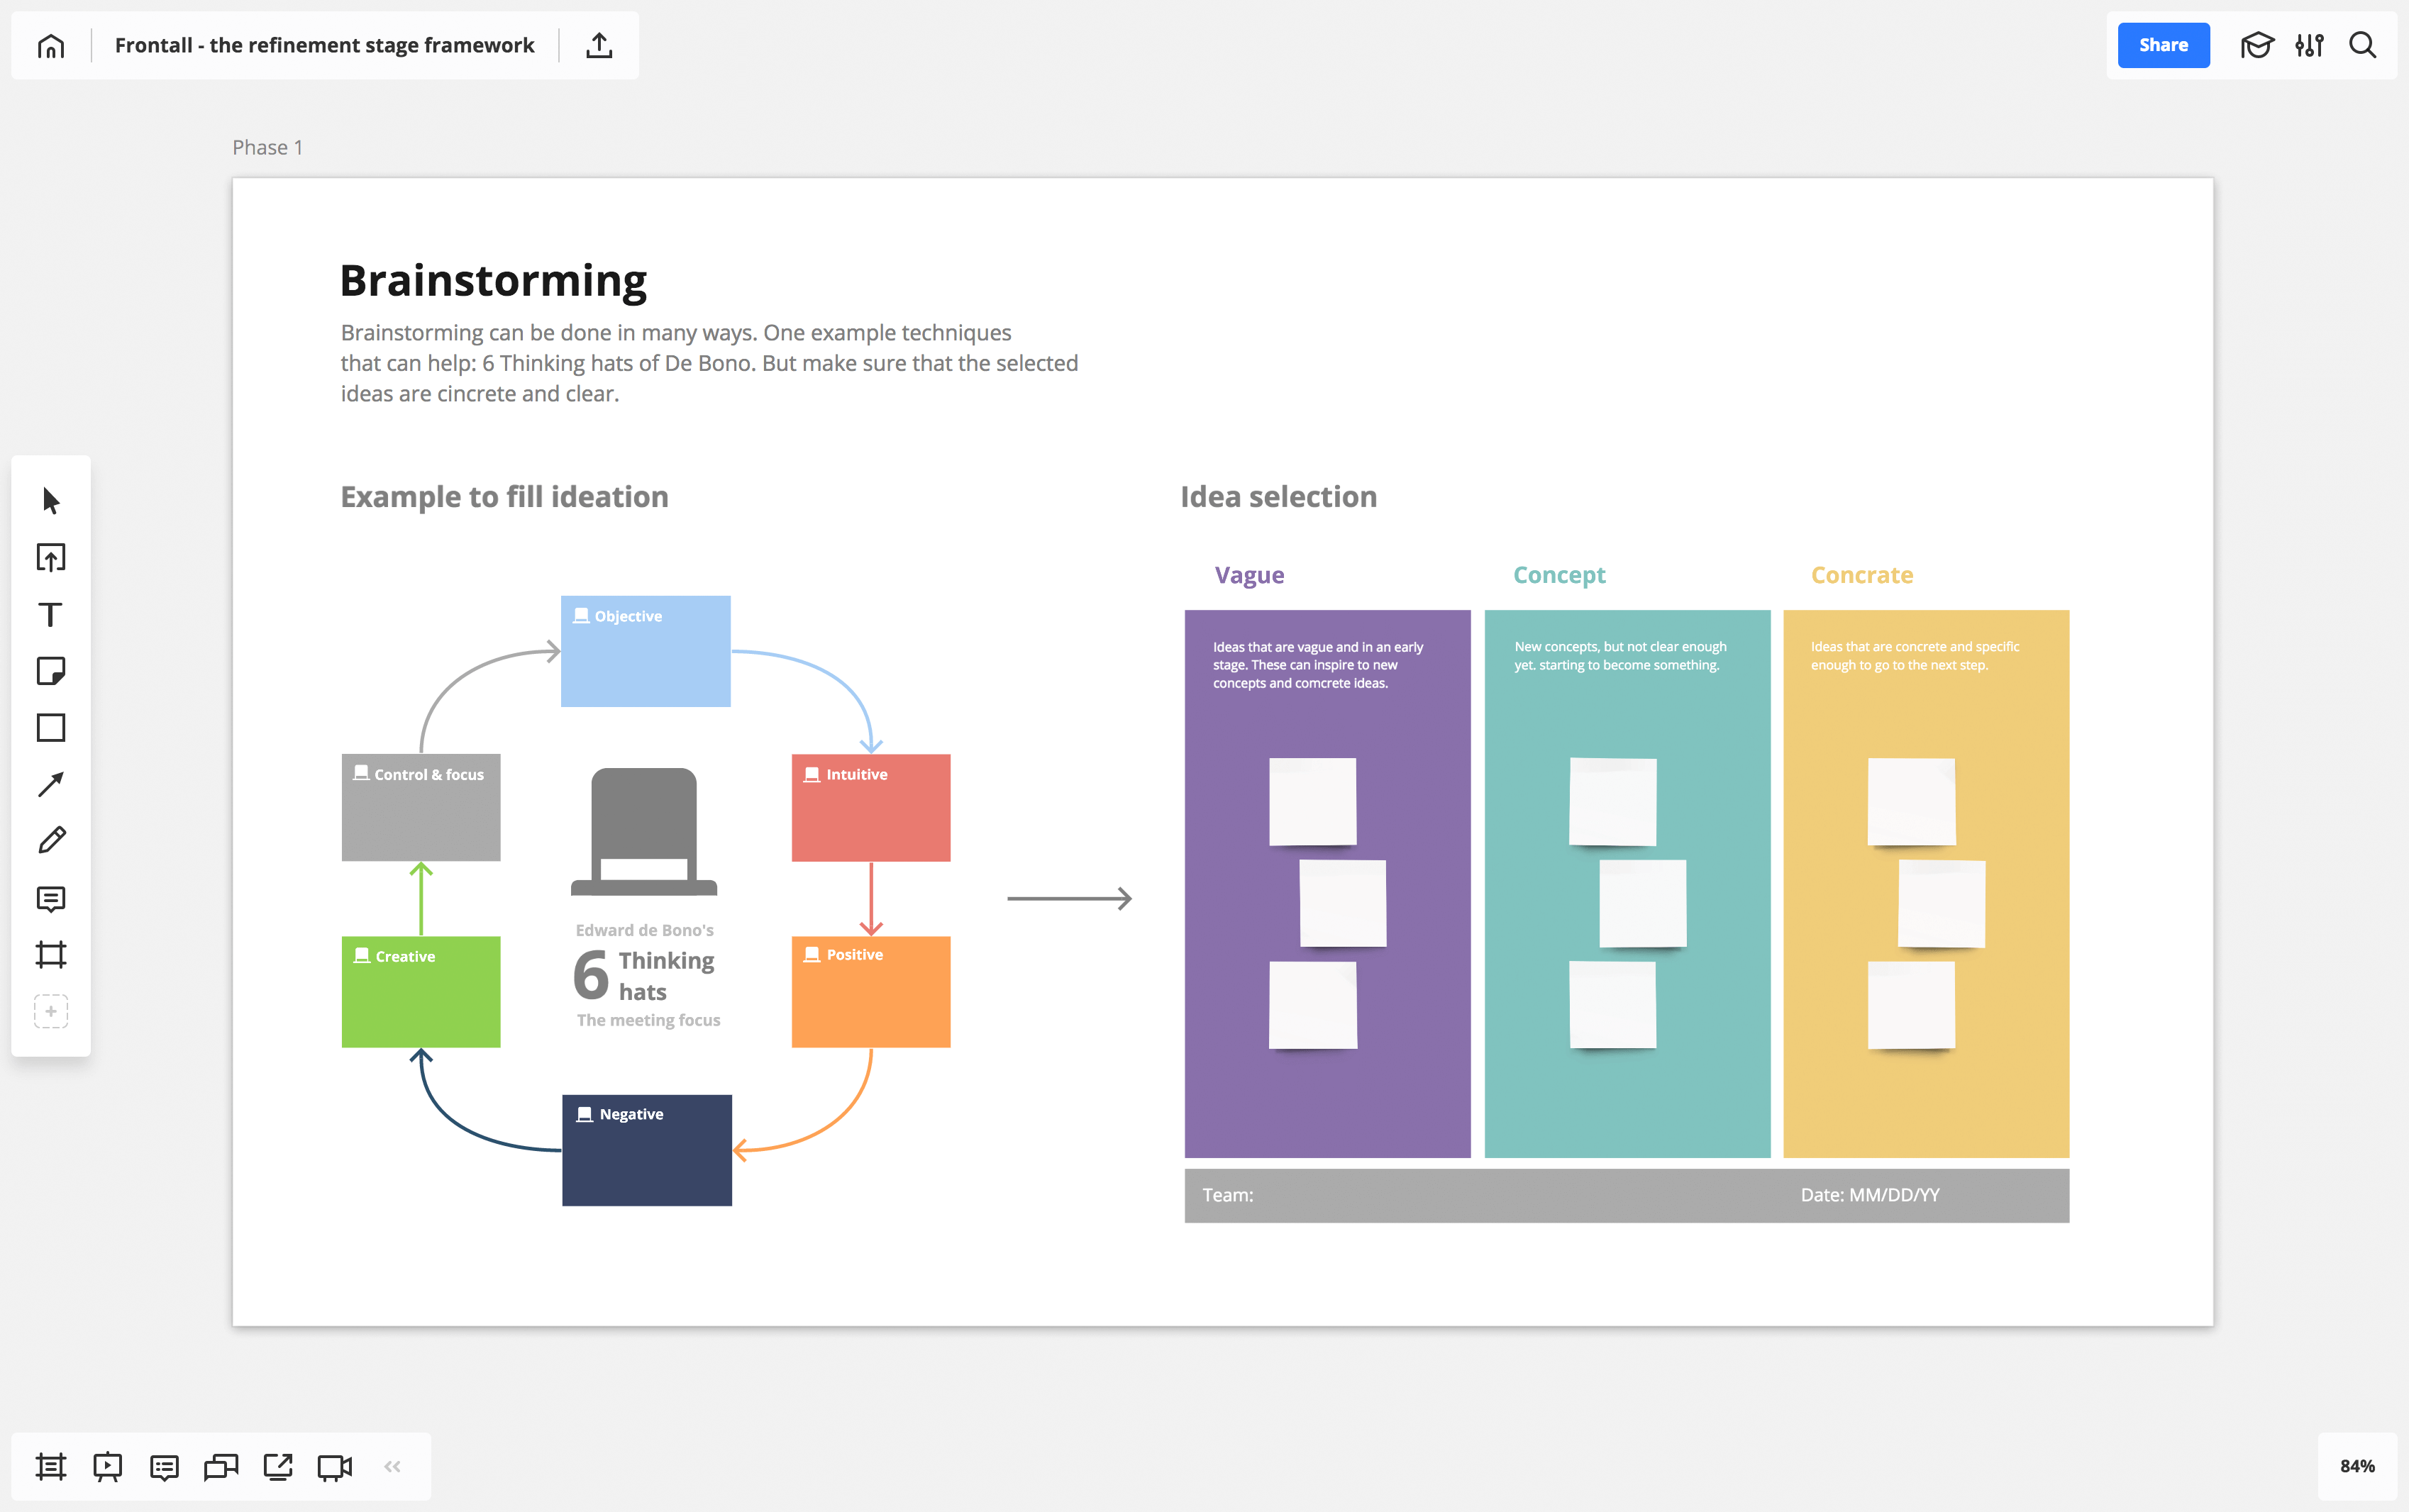
Phase 1. Ideation
The first phase of the refinement process is ideation. It is usually discussed among the business, Product Owners, architects, tech leads and, ideally, clients. Based on my experience, all the items a team generates during this phase are mostly ideas, wishes or hunches. They always need refinement and customer validation.
This phase of the process is flexible and can be chaotic. For idea generation, you can use different brainstorming methods and categorize the ideas in a convenient way. For example, you can use the “six thinking hats” of de Bono as a brainstorming method or a vague, concept and concrete idea template for clustering ideas.
I usually start the ideation phase by creating a board in Miro and adding pre-made templates or creating my own. With a visual workspace, even remote team members can actively participate by adding ideas, leaving comments and taking part in discussions.
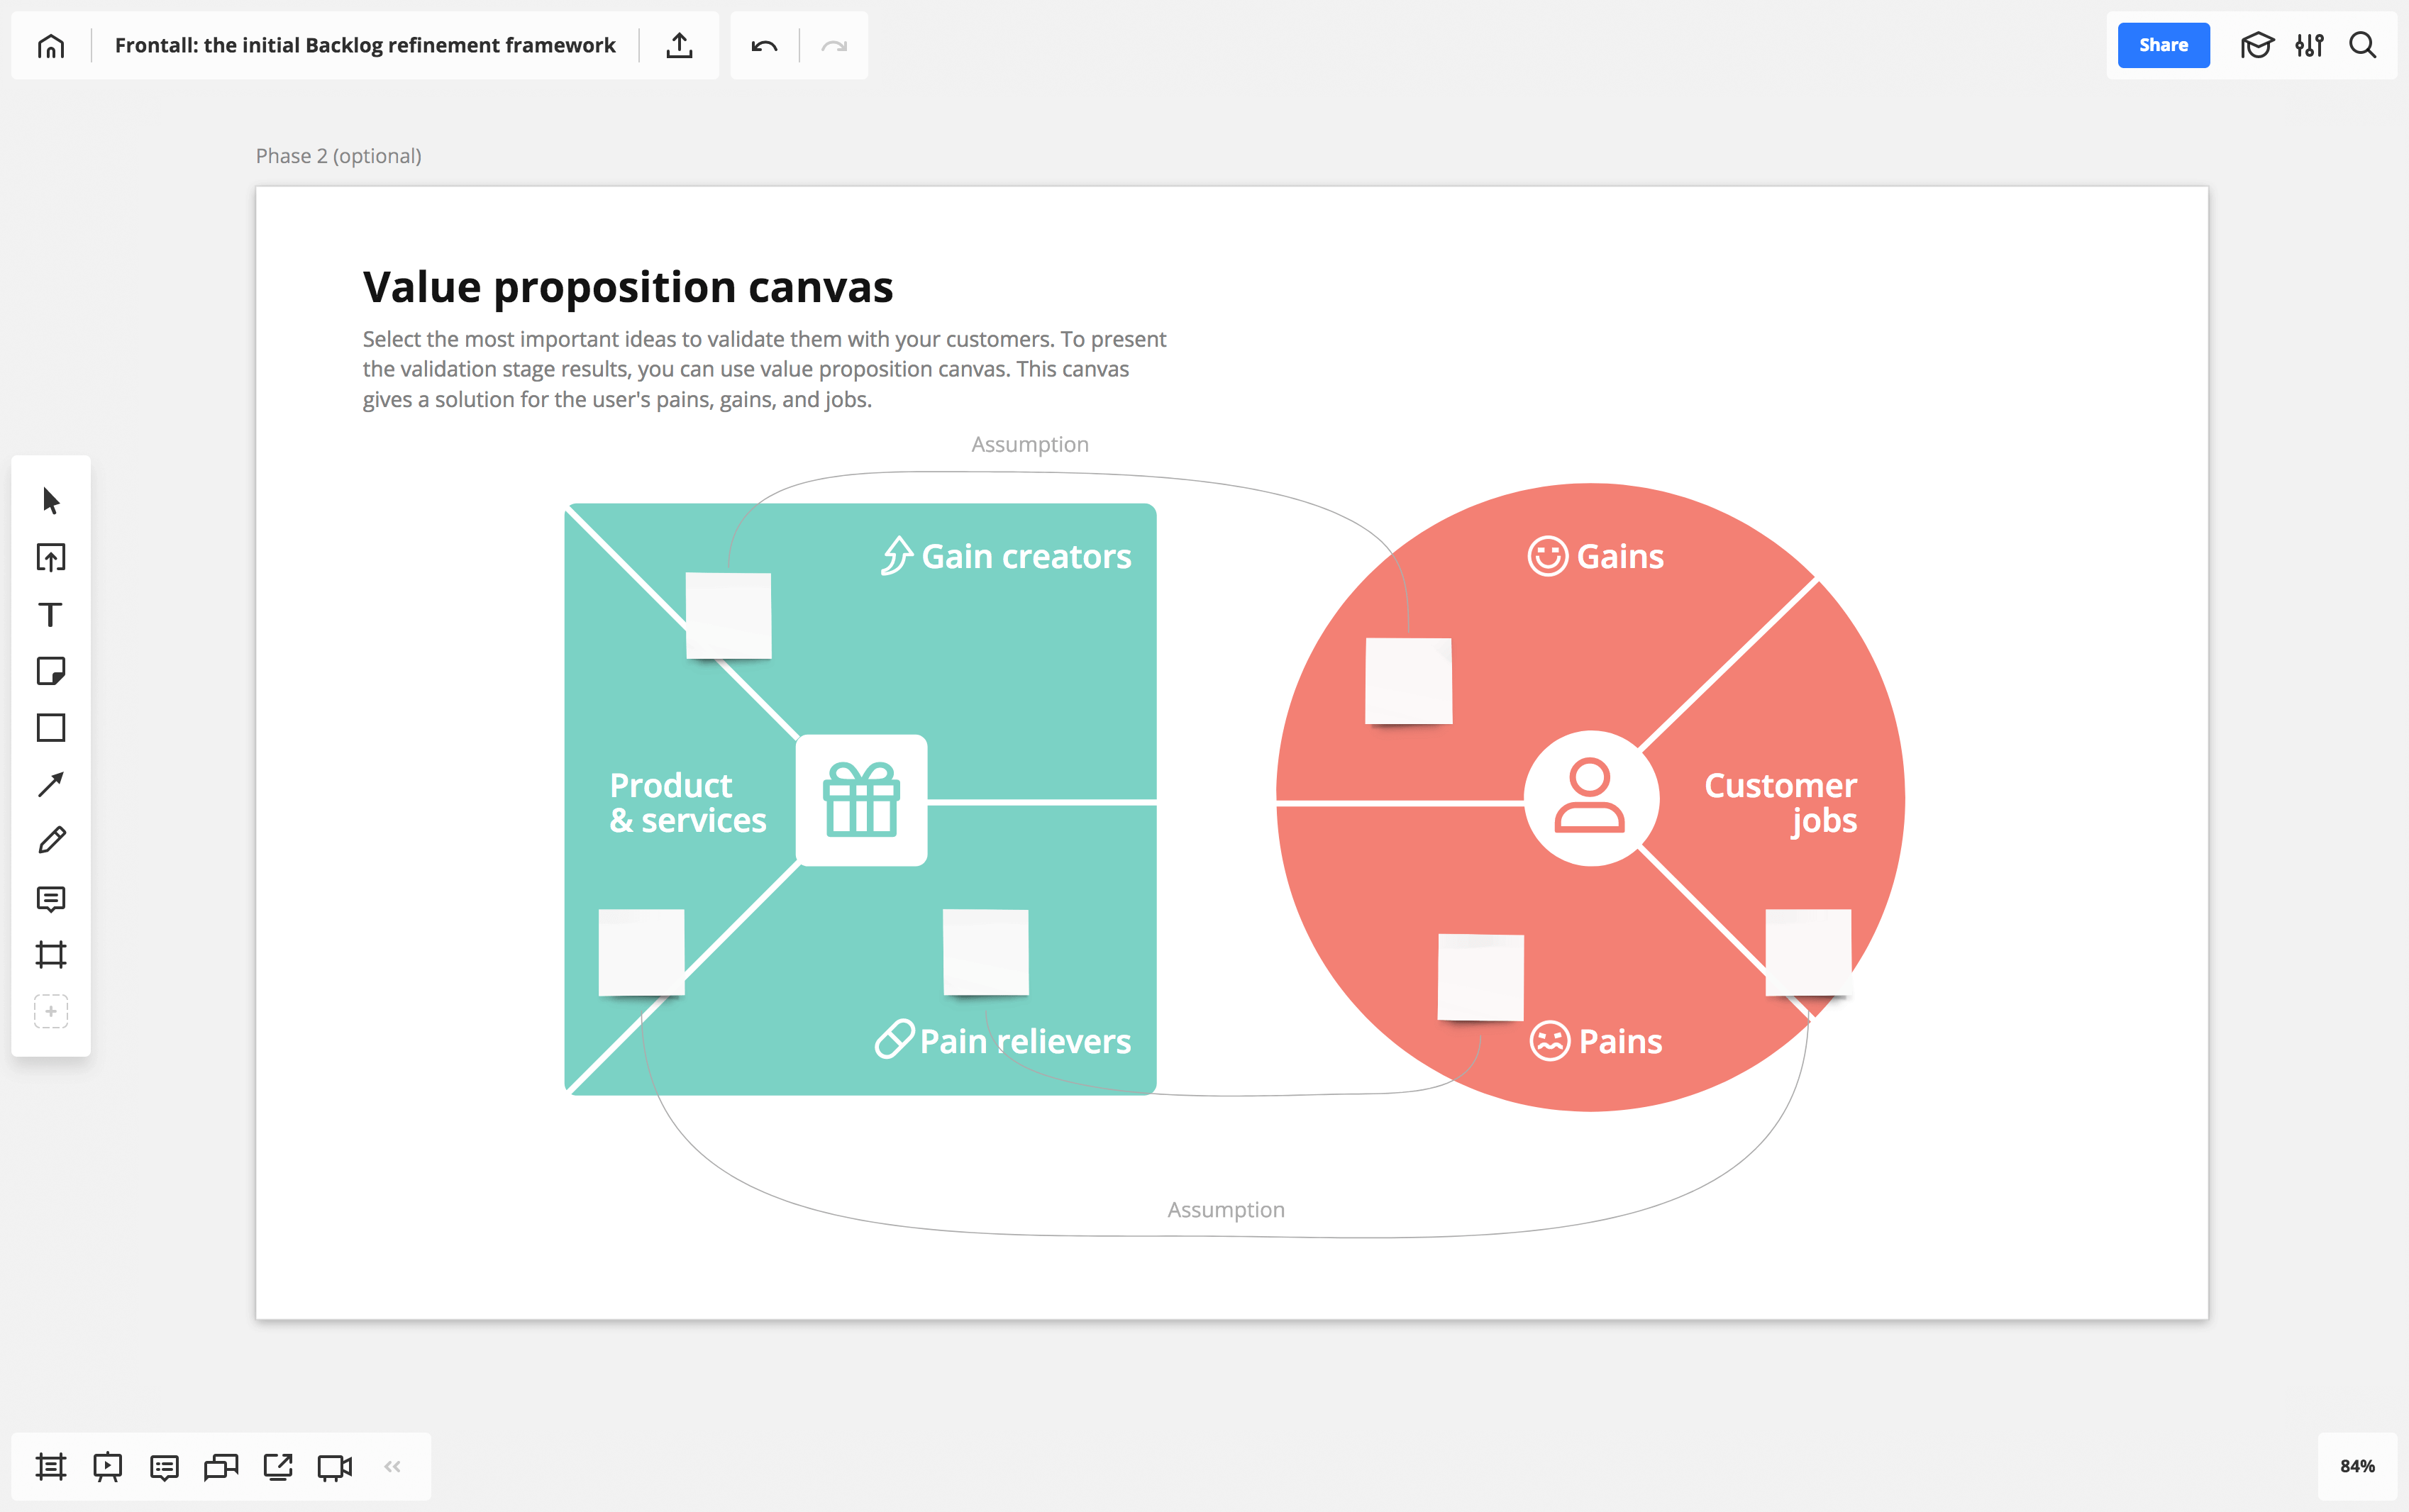
Phase 2. Validation (optional)
The next (optional) phase is validation. After the brainstorming is done, the implementation of the idea is still full of assumptions. A discussion or workshop with real customers is a good idea to validate those assumptions. I also prefer to use Miro for this phase, as you can connect with users or customers remotely, share screens and discuss the scenarios freely. To present the results of the validation phase, you can use a value proposition canvas. This sets your solution against a visualization of the users’ pains, gains and jobs.
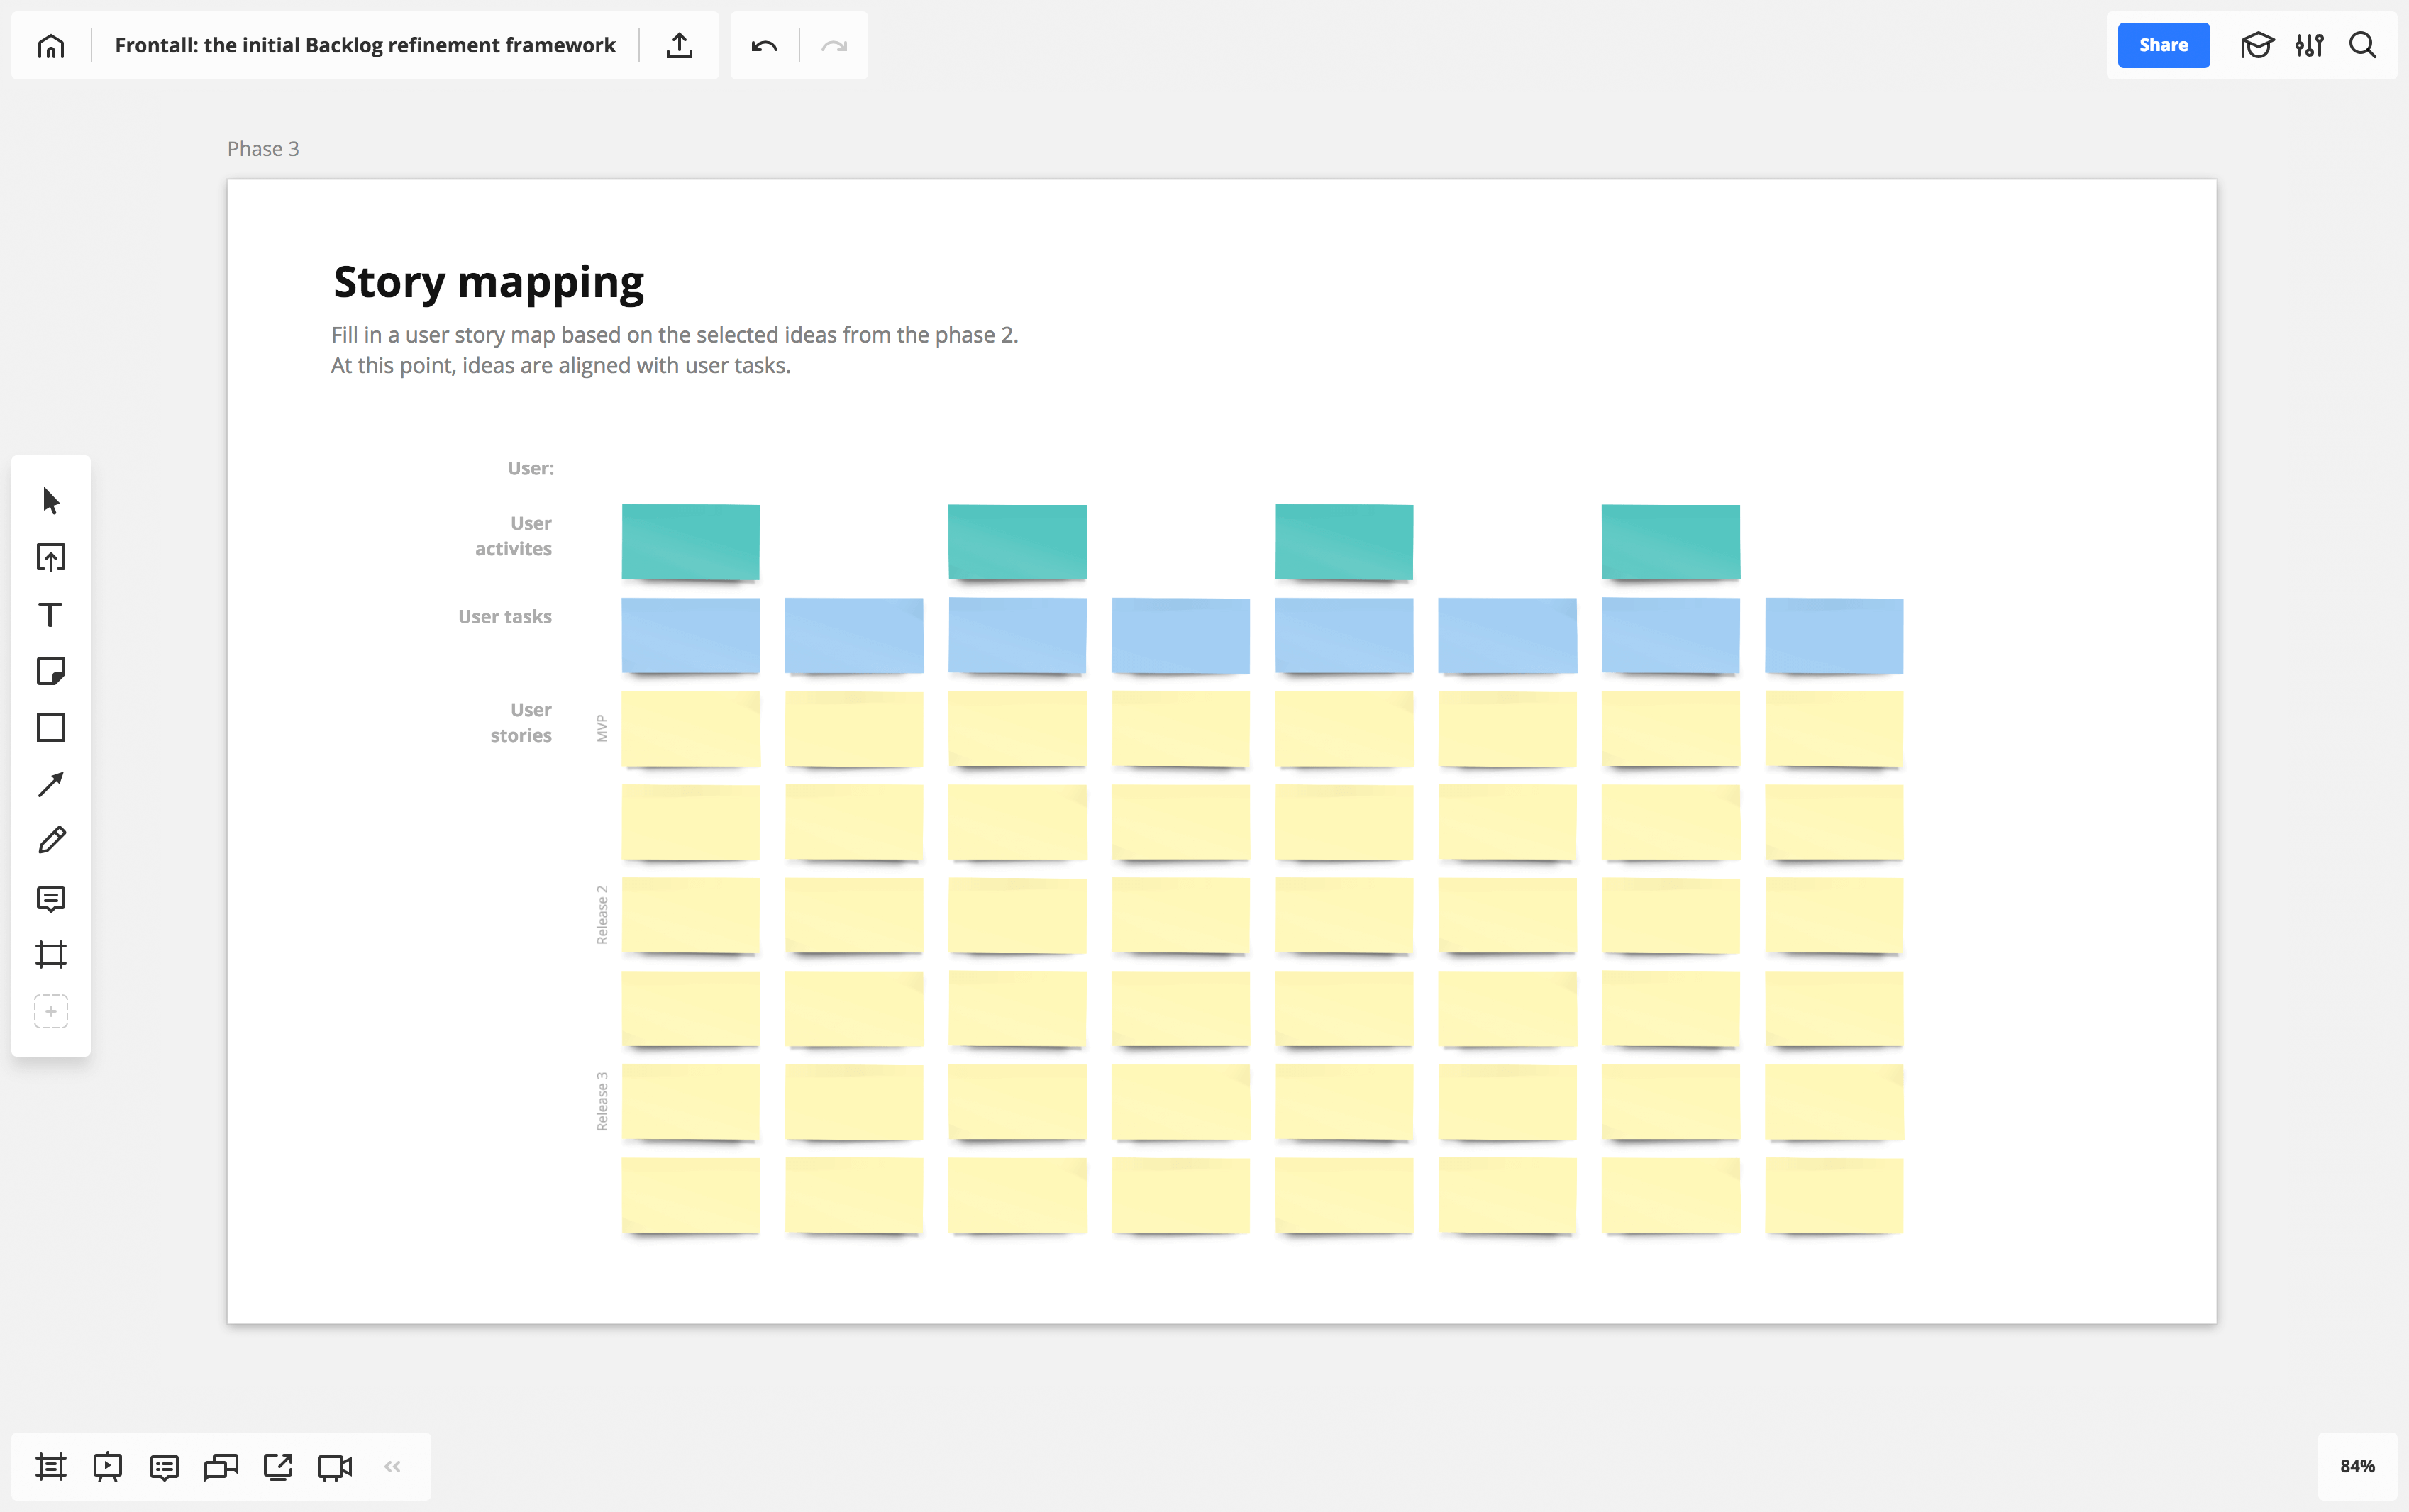
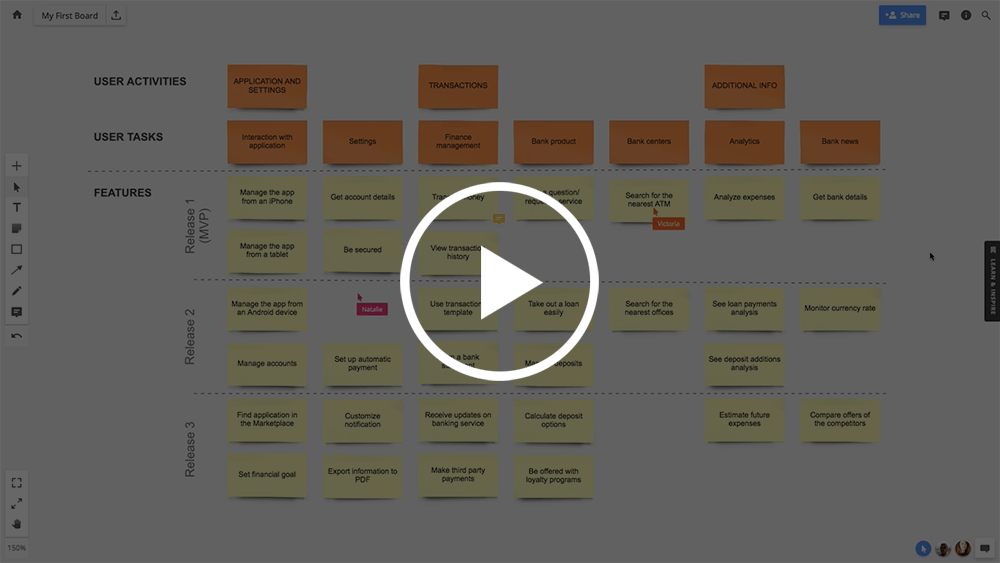
Phase 3. User story mapping
The third step is to create a user story map based on the selected ideas from phase 2. I used our pre-made user story map template, but you can create your own. User story mapping is usually done by the Product Owner and Scrum Team, when a rough idea is refined to user tasks. The idea moves toward real implementation at this point.
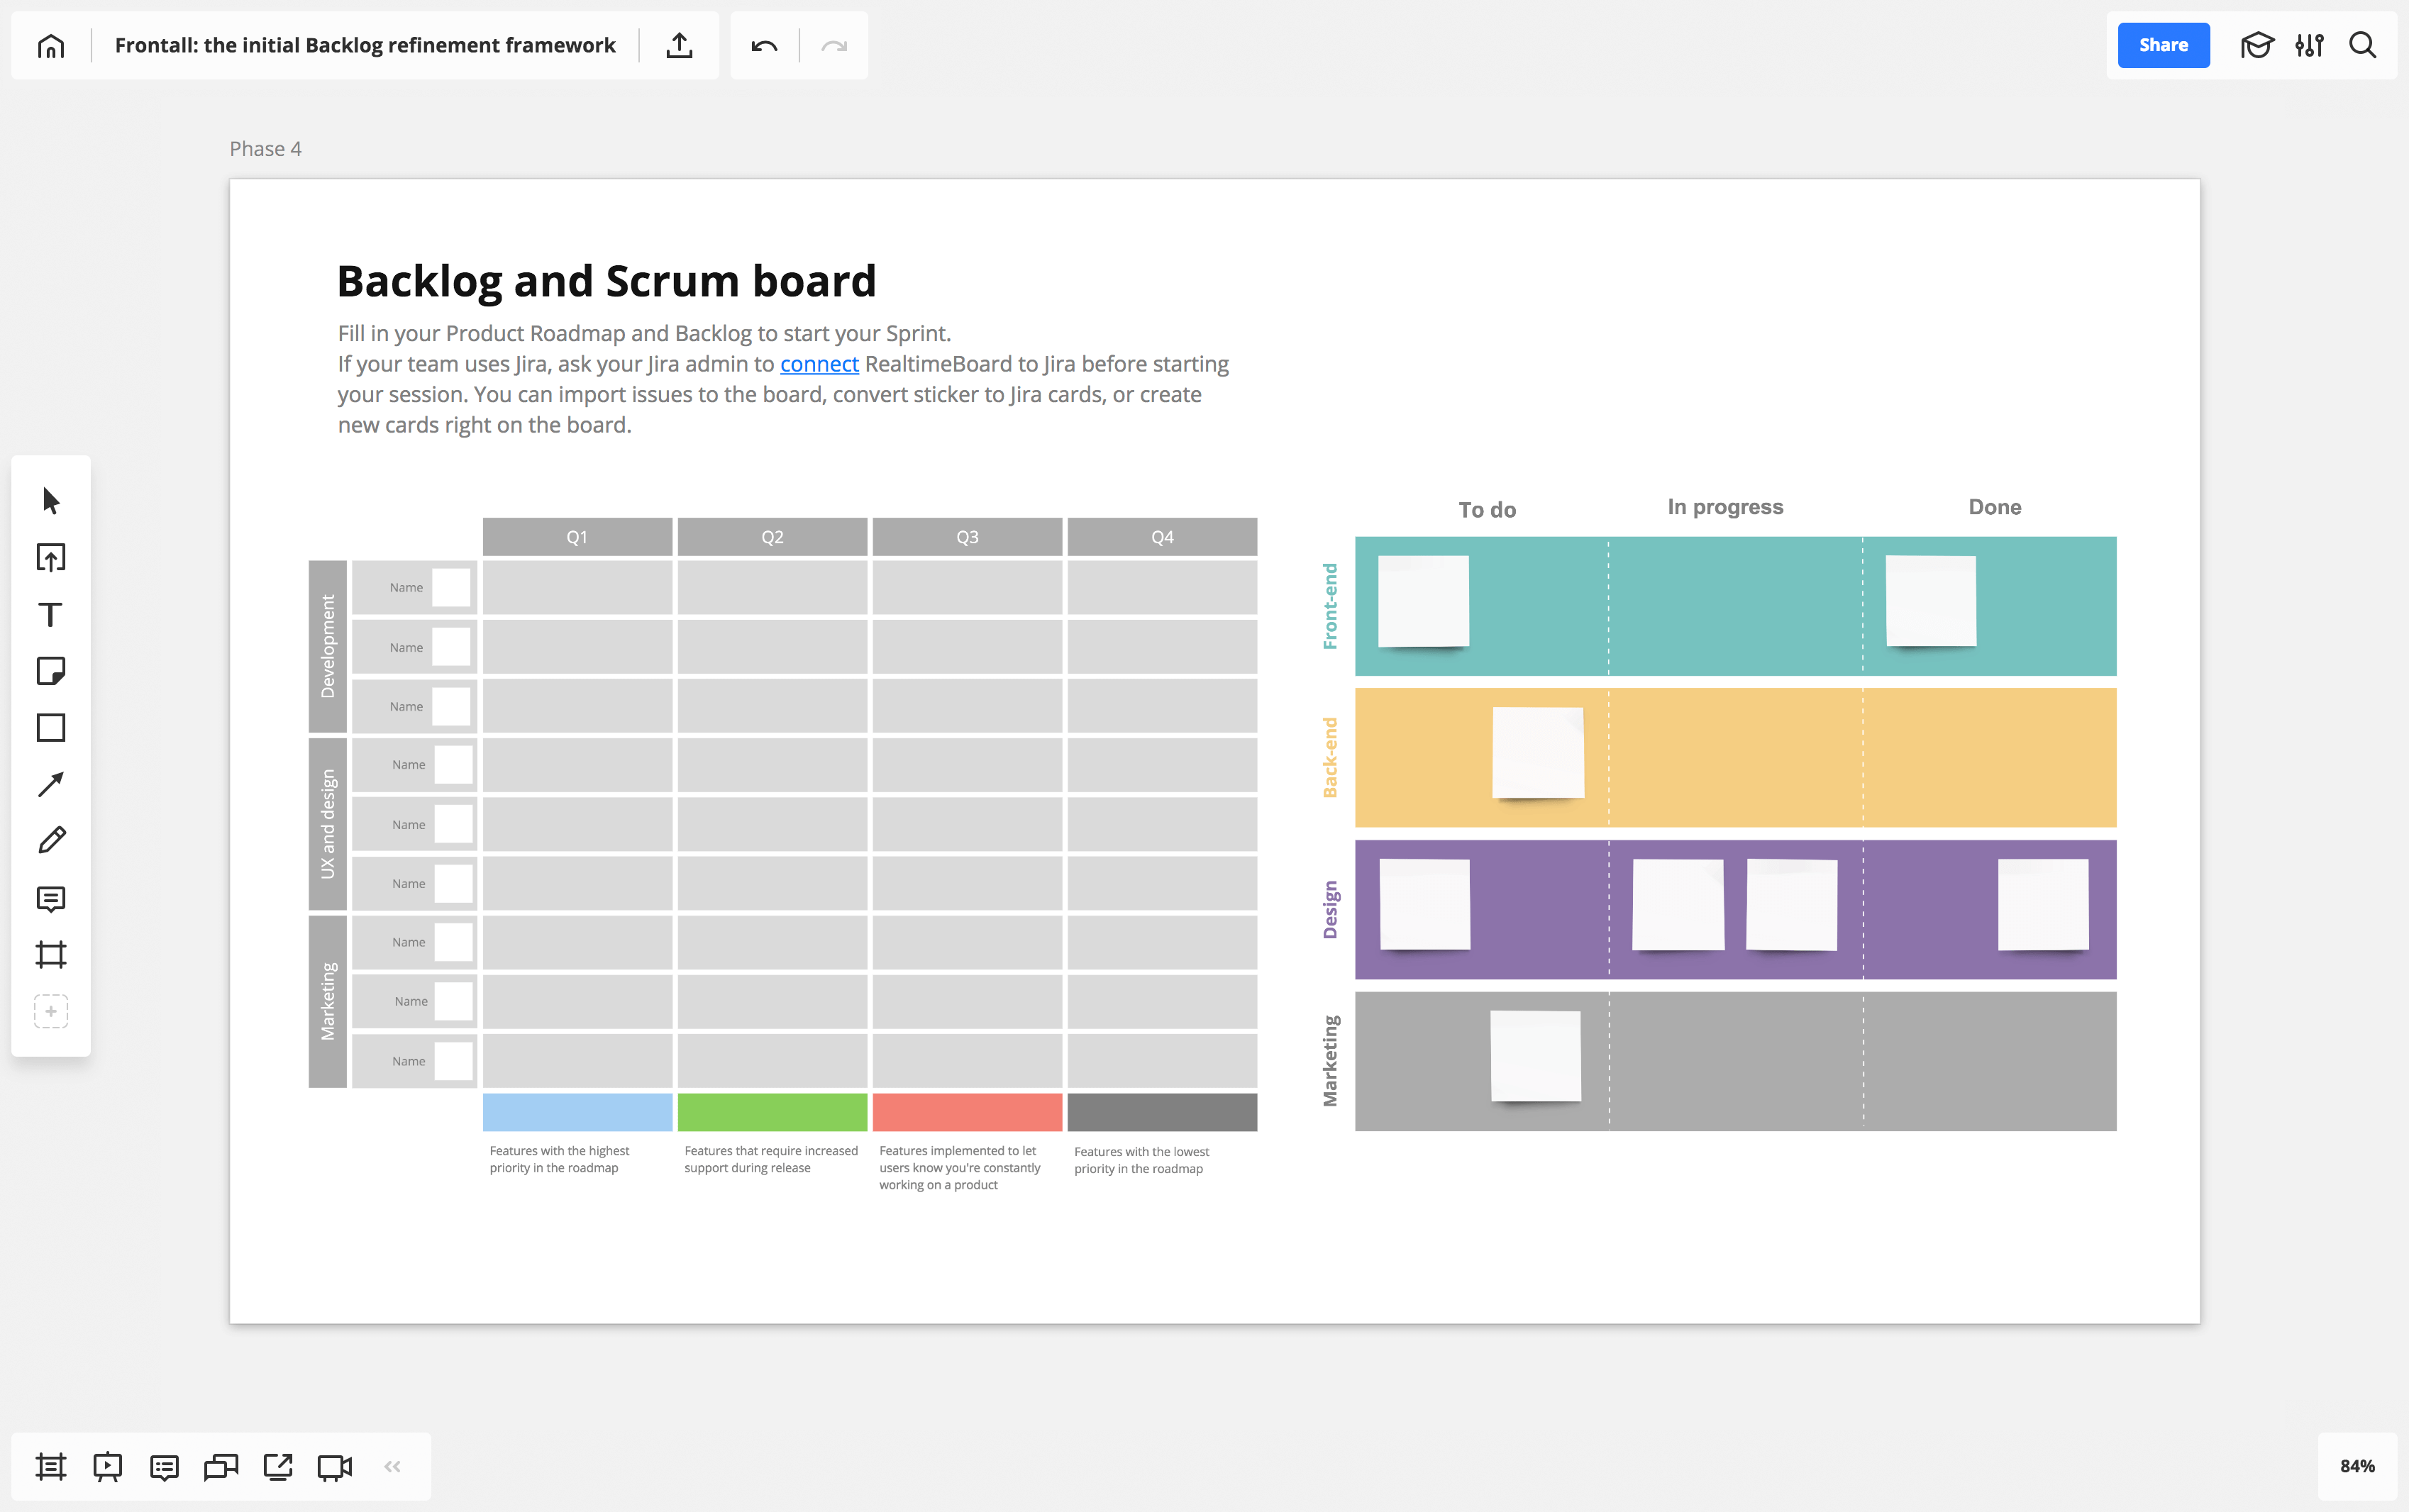
Phase 4. Backlog
After the previous steps are complete, the user story is ready to put in the Backlog. If your team uses Jira, you can activate Jira integration in Miro and convert stickers with user stories to Jira cards within the board. Depending on the project, we either keep a Backlog visible on the board or move it to Jira (or any other tool the client’s team uses). The refinement stage is now complete, and you can start your Sprint. Parallel with the Sprint, you should start a new refinement process.
User stories are frequently documented in text format because of the user story mantra. Running every phase on the board helps the team and me use visual aids throughout the process. My advice is to “draw” to your teammates more often, even if they are remote.
How to set up an initial Backlog refinement meeting in Miro
You can simply copy the Product Backlog refinement framework described above by clicking the button at the beginning of this chapter. If you want to design your own custom framework, follow the steps below.

Create a new board and invite your team members by opening the “Share” settings. When they accept the invitation, every individual edit is viewable and saved.

Add a brainstorming template from our template library. Simply press the “plus” icon on the left toolbar > Templates > e.g. “Six thinking hats.” Or create a custom template using shapes, sticky notes and text.
Add a user story map template from our template library. Simply press the “plus” icon on the left toolbar > Templates > User story map. Or create a custom template using sticky notes.
Keep your Backlog visible on the board or move it to Jira (or any other tool your team uses). To keep the Backlog on the board, organize content using frames, shapes and links.
Useful tips
TIP 1
Choose a pre-made brainstorming template
If you would rather not use the six thinking hats of de Bono, choose one of the pre-made templates from the template library: “Brainwriting,” “5 whys,” “Mind map,” etc.
TIP 2
Use the “bulk add” mode to add a bunch of stickers with ideas
Click on the “sticker” icon on the left toolbar > choose the “bulk add” mode and start typing away. Click “Done” when you are finished, and your ideas will be added to the board as stickers.
TIP 3
Estimate user stories via digital stickers, tags and emoji
Use tags or emoji to cluster and estimate the stories.
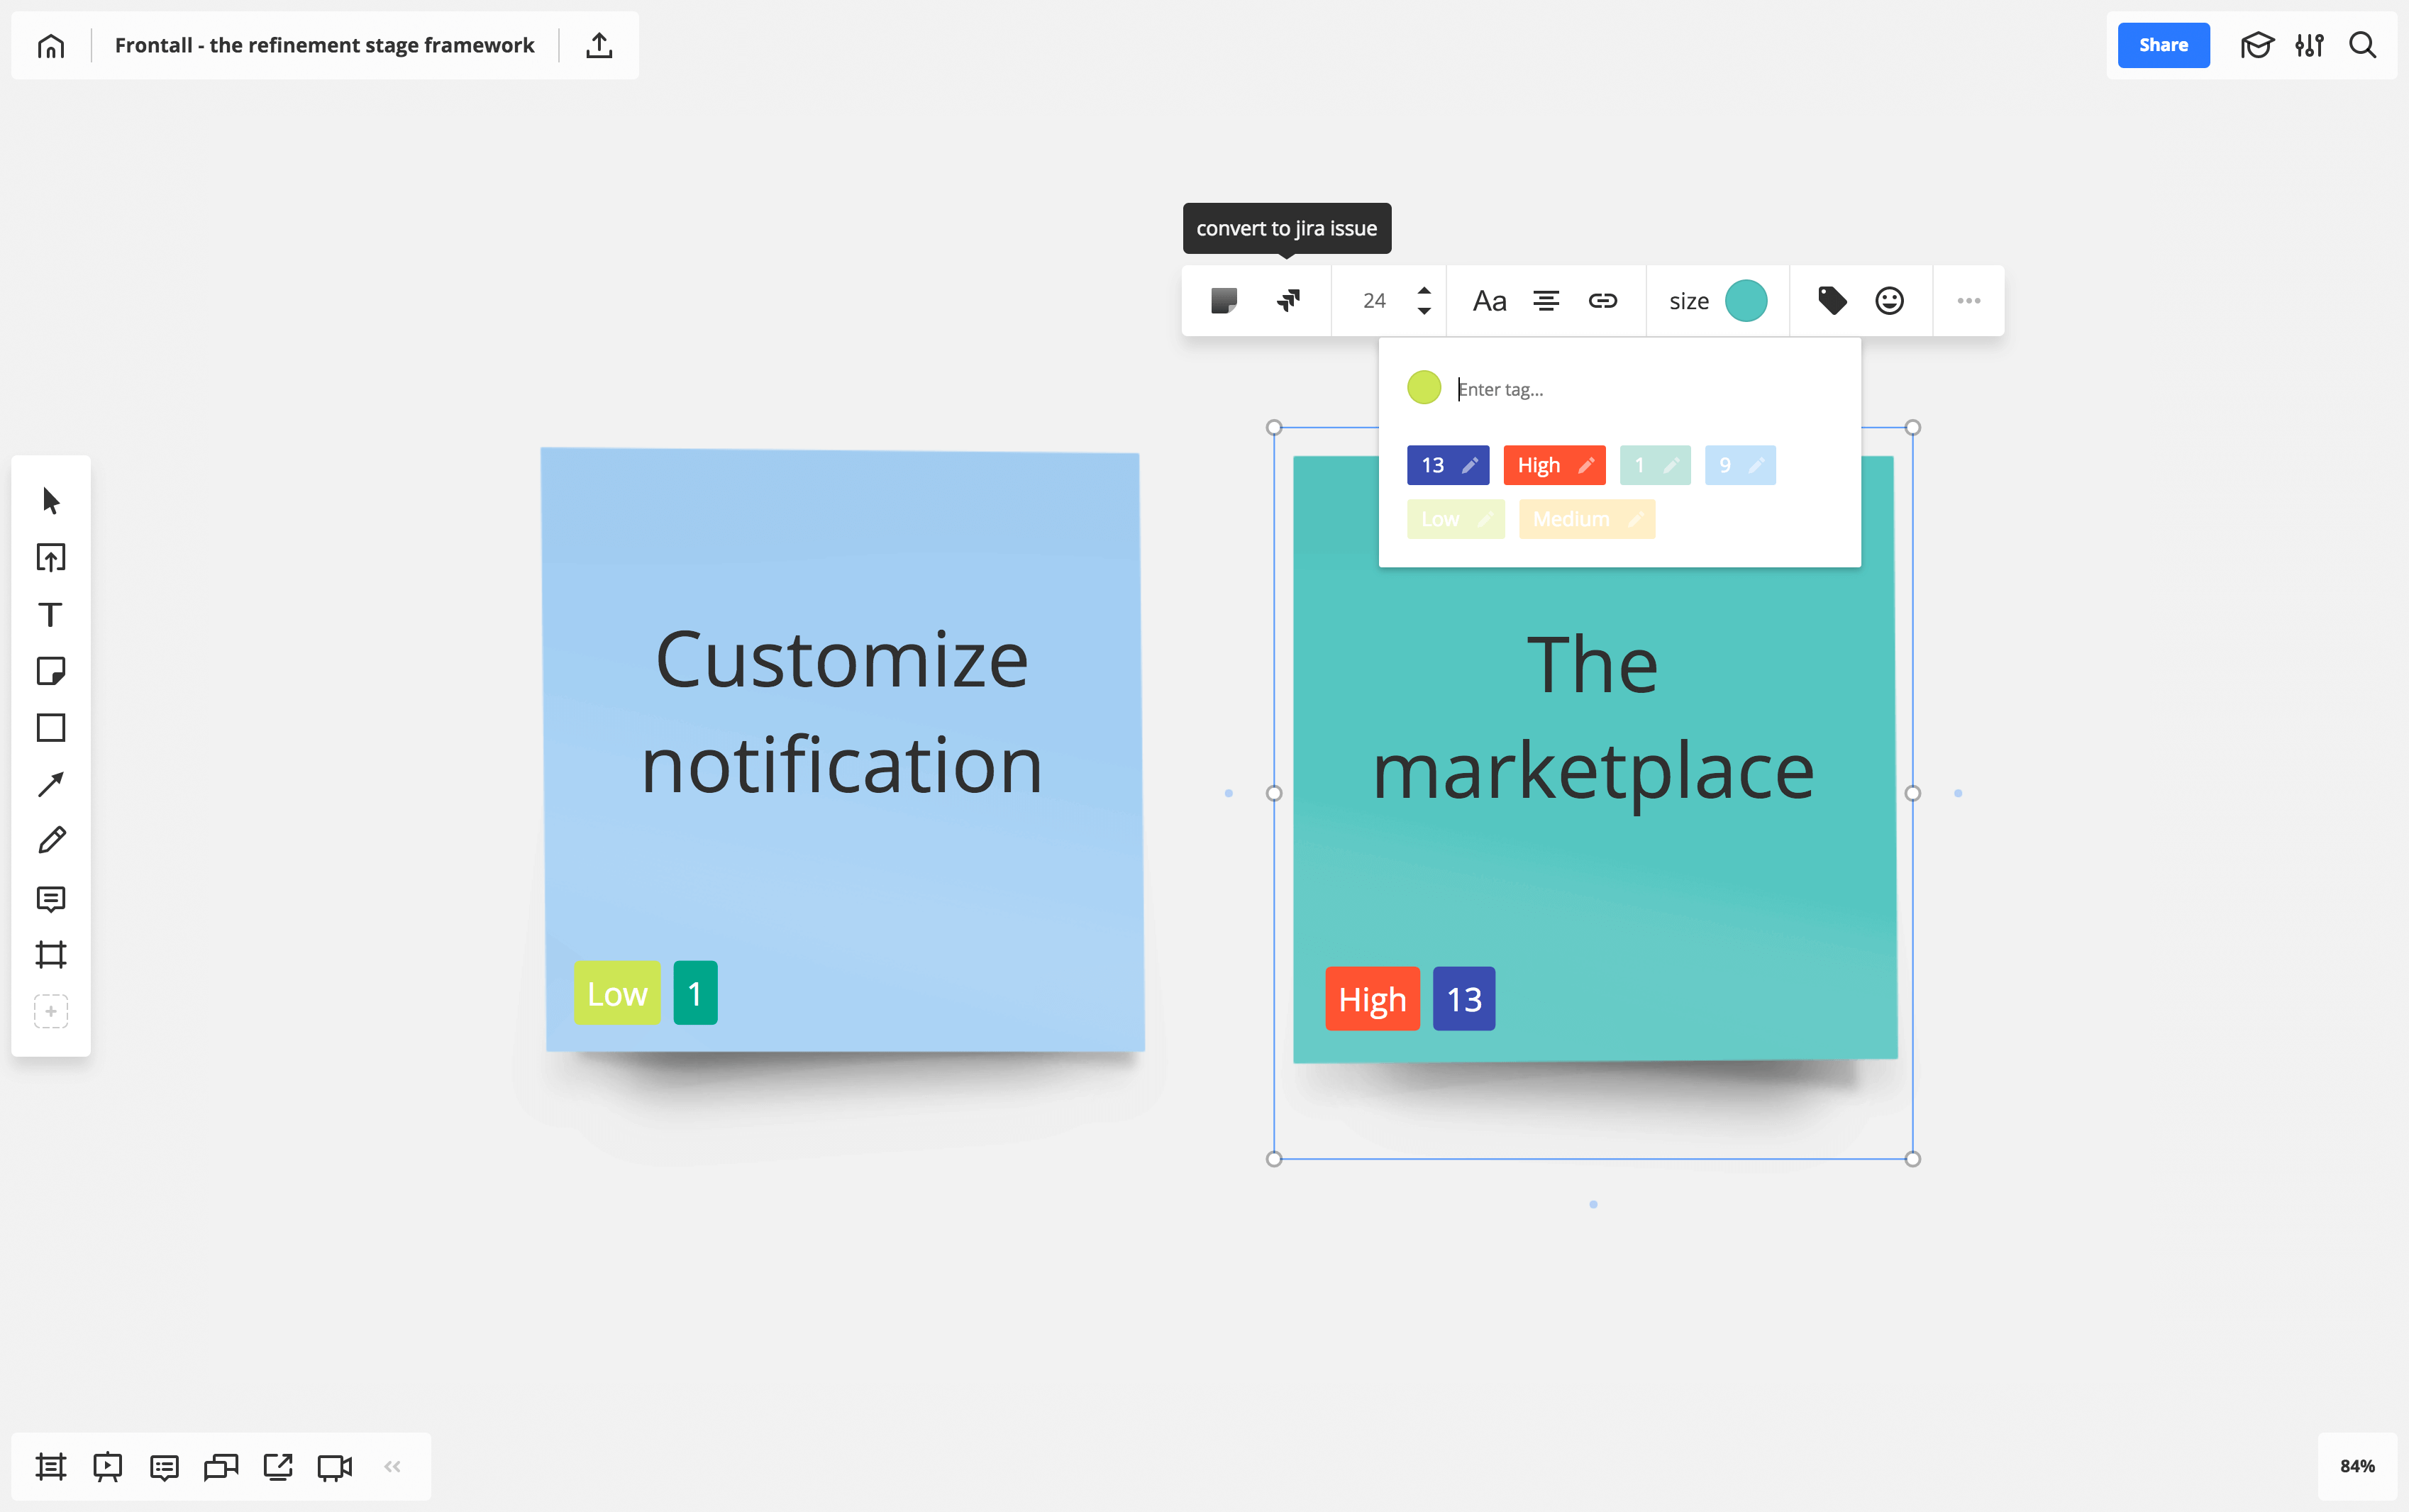
Read how Ron Lichty, an Agile expert, estimates user stories in Miro via digital stickers and tags.
TIP 4
Connect an offline whiteboard with Miro
If you did a previous Backlog refinement session on a physical whiteboard using sticky notes, simply transfer the results to Miro. Open the Miro mobile app for iOS or Android and choose the “capture notes” feature to take a picture of the paper sticky notes, which will then be recognized as digital stickers in the visual workspace.
Does your team use Jira? Before to start your session ask your Jira admin to connect Miro to Jira. You can import issues to the board, convert sticker to Jira cards or create new cards right on the board.
TIP 5
Import Jira issues to the board to collaborate on the Backlog refinement
To import existing Jira issues to the board as cards, copy each issue’s URL and paste it to the board, or open the list of issues by clicking the Jira icon in the Miro library.
TIP 6
Convert stickers with user stories to Jira issues.
With the click of a button, Miro stickers are converted into Jira cards and automatically synced. This is especially useful if you groom your Backlog via stickers.
TIP 7
Divide tasks into sub-tasks and reflect these in Jira.
As you groom stories in Miro, you may need to split tasks into sub-tasks and reflect these in Jira. To do so, simply create a new card using the card picker. Click “Jira” in a library to open the picker and choose the “Create” button. Once you create a card in Miro, the corresponding issue will be created in Jira, with all the changes synced automatically.

TIP 8
Validate your ideas with customers on the board.
You can connect with users or customers remotely via the visual workspace, share screens and discuss the ideas that need to be validated freely.
Useful resources
Getting started with Miro
Miro tools and features guide
Introducing smart layout in Miro
Miro Marketplace: Jira Cards
Before reading further, remember the advice of Lieuwe van Brug about the importance of “drawing” to your teammates more often, even if they are remote. Indeed, running the Product Backlog refinement meeting using visual aids throughout the process can help a Scrum Team achieve shared understanding more quickly, even if someone on a team is remote.